Mummy Oreo Balls Recipe

Imagine impressing your guests with a Halloween treat that's both charming and easy to make. Mummy Oreo Balls are not only visually appealing, but their creamy, delicious filling also promises to satisfy everyone. You'll find that crafting these bite-sized delights is straightforward, with just a few simple steps from crushing cookies to the final decorative touch. However, there's an essential, often overlooked tip that guarantees your mummy creations look and taste their best. Are you ready to discover the secret that will elevate your Oreo Balls from good to unforgettable?
Recipe
Mummy Oreo Balls are an enchanting Halloween treat that combines the irresistible flavor of Oreo cookies with a creamy center, all enveloped in a smooth white chocolate shell. These delightful snacks aren't only scrumptious but also incredibly easy to make, making them a great addition to any festive gathering.
With their charming mummy appearance, they're sure to be a hit with both kids and adults who enjoy a little creativity in the kitchen. Prepare them ahead of time, and they'll be ready to wow your guests at any Halloween party or event.
The process is simple and requires only a handful of ingredients. Begin by crushing Oreo cookies into fine crumbs and mixing them with softened cream cheese to form a dough-like consistency. Shape the mixture into bite-sized balls and chill them briefly before dipping them into melted white chocolate. The final touch involves adding candy eyes to complete the mummy look.
These Oreo balls can be stored in the fridge until you're ready to serve, keeping them fresh and delicious.
Ingredients:
- 1 package of Oreo cookies
- 8 oz cream cheese, softened
- 12 oz white chocolate chips or candy melts
- Edible candy eyes
- Wax paper
To make Mummy Oreo Balls, first crush the Oreo cookies into fine crumbs using a food processor. Mix the crumbs thoroughly with softened cream cheese until a smooth, dough-like mixture is achieved.
Roll this mixture into small balls, about 1 inch in diameter, and place them on a wax paper-lined baking sheet. Chill the balls in the refrigerator for approximately 20 minutes to set.
While chilling, melt the white chocolate chips or candy melts as per package instructions. Dip each chilled Oreo ball into the melted chocolate, ensuring it's fully coated, and place it back on the wax paper. Quickly press two candy eyes onto each ball while the coating is still soft. Allow the chocolate to fully set before serving.
For the best results, make sure the cream cheese is well-softened to blend smoothly with the Oreo crumbs. Chilling the balls before dipping helps maintain their shape and eases the coating process.
If the white chocolate begins to harden as you work, gently reheat it in the microwave in short bursts. For an added mummy effect, use a piping bag to drizzle extra white chocolate over the coated balls, creating a bandage look. Enjoy making and sharing these festive treats!
Cooking Steps
Ready to whip up some spooky Mummy Oreo Balls? Start by crushing those Oreos into fine crumbs—it's a smashing good time!
Mix the crumbs with softened cream cheese until you have a dough-like consistency, then roll the mixture into small balls; think of it as giving each Oreo a little makeover before chilling them for 20 minutes.
Step 1. Crush Oreos Into Fine Crumbs
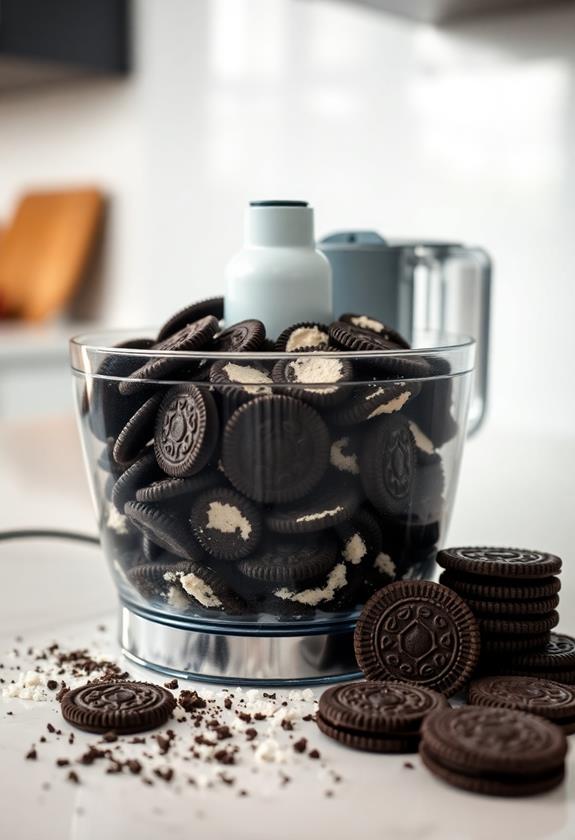
To start, you'll need to crush the Oreo cookies into fine crumbs. Grab a package of your favorite Oreos, and use a food processor to make quick work of them.
If you don't have a food processor, don't worry—just place the cookies in a zip-top bag and crush them with a rolling pin. It's a great stress reliever!
Aim for a consistent, sand-like texture without large chunks. This will guarantee your Mummy Oreo Balls have a smooth and creamy filling.
Be sure to crush all the cookies, cream filling included, to get that rich, chocolatey flavor throughout.
Once your crumbs are ready, you'll have the perfect base for the next steps in creating your delicious, spooky treats.
Step 2. Mix Crumbs With Cream Cheese
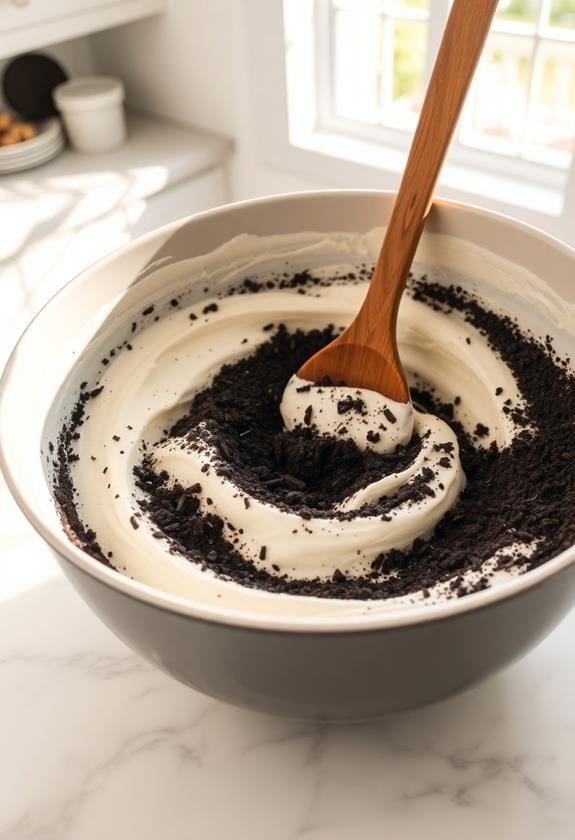
With your Oreo crumbs prepped and ready, it's time to blend them with the softened cream cheese.
Grab a mixing bowl, and dump those crumbs in. Add the cream cheese, and start mixing with a spoon. If you're feeling adventurous, use your hands—it's messy but effective!
The goal is to create a dough-like consistency. If it feels too crumbly, add a tiny bit more cream cheese, but don't go overboard. You want a mixture that sticks together easily without being too sticky.
Imagine you're crafting the perfect dough for a spooky project. As you mix, the aroma of Oreo goodness will fill the air, enticing you to sneak a taste. Resist! You've got mummies to make!
Step 3. Roll Mixture Into Small Balls

Once you've mixed the Oreo crumbs and cream cheese into a cohesive dough, it's time to shape them into bite-sized balls.
Grab a small scoop or use your hands, and pinch off a portion of dough about the size of a large marble or walnut. Roll it between your palms until it's nice and round—don't worry if they're not perfect; they're mummies, after all!
Place each ball onto a baking sheet lined with wax paper. This helps prevent sticking and makes clean-up a breeze. If the dough's a bit sticky, you can lightly dust your hands with powdered sugar or cocoa powder.
Enjoy this step—it's like playing with edible Play-Doh, but way tastier!
Step 4. Chill Balls for 20 Minutes

After shaping the dough into delightful little balls, it's important to let them chill in the fridge. This step is like giving your Oreo creations a mini spa retreat—they need some downtime to firm up.
Pop them into the fridge for about 20 minutes; this will make them less squishy and easier to handle later. Imagine them basking in the coolness, getting ready for their chocolate bath. It helps them hold their shape and prevents any melty mishaps.
Don't skip this step, or you might end up with gooey blobs instead of perfect spheres. So, take a break, sip some tea, or start tidying up your kitchen while the fridge works its magic on your little Oreo masterpieces.
Step 5. Dip Balls in Melted Chocolate

Now that your Oreo balls are nicely chilled, it's time to coat them in melted chocolate. Grab a fork or toothpick, and gently dip each ball into the smooth, melted white chocolate. Confirm they're fully covered—no Oreo bits peeking through!
As you lift them out, let any excess chocolate drip back into the bowl. This helps avoid a messy mummy situation. Place the coated balls back on the wax paper, and while the chocolate is still soft, press two candy eyes onto each one. It's like giving them a personality!
If your chocolate starts to harden, just give it a quick zap in the microwave. Keep it fun, imagining each ball as a tiny mummy waiting for its bandages!
Final Thoughts
Crafting these Mummy Oreo Balls is a delightful way to embrace the Halloween spirit while offering a treat that's as pleasing to the eye as it's to the palate.
You'll find that these little mummies not only taste incredible but also add a whimsical touch to any spooky gathering. They're deceptively simple to make, yet they never fail to impress your guests.
Remember, the key to their visual charm lies in the details, so don't skimp on those cute candy eyes! If you're feeling extra creative, try experimenting with different drizzle patterns for the bandages.
Whether you're hosting a party or simply making them for fun, these Mummy Oreo Balls are sure to become a Halloween favorite. Enjoy every bite!
Frequently Asked Questions
Can I Use Flavored Oreos for a Different Taste?
You can definitely use flavored Oreos for a unique twist. Choose varieties like mint, peanut butter, or birthday cake to customize the taste of your mummy balls. Experimenting with flavors adds a fun and personal touch!
How Long Can Mummy Oreo Balls Be Stored in the Refrigerator?
You can store Mummy Oreo Balls in the refrigerator for up to a week. Just place them in an airtight container to keep them fresh, ensuring they maintain their delightful taste and texture for your enjoyment.
Can I Freeze the Mummy Oreo Balls for Later Use?
Yes, you can freeze them for later use. Just place them in an airtight container or freezer bag. They'll last up to three months. Thaw them in the fridge before serving to maintain their delicious texture.
Are There Alternatives to White Chocolate for Coating?
You can use dark or milk chocolate as an alternative for coating. If you're feeling adventurous, try using colored candy melts to match your party theme. Just guarantee the coating is smooth for easy dipping and decorating.
How Do I Prevent the Chocolate From Cracking When It Sets?
To prevent chocolate from cracking, make certain you let the balls come to room temperature before dipping. Avoid drastic temperature changes, and guarantee the white chocolate is tempered correctly. This helps maintain a smooth, crack-free coating.
Conclusion
You've just whipped up a batch of Mummy Oreo Balls, and they're ready to impress! After chilling and dipping them in chocolate, you'll find they're not only delicious but also adorably spooky. Remember, the key is patience when dipping and decorating, so don't rush it. These treats are perfect for a Halloween bash or just a cozy night in. So go ahead, indulge in these little bites of happiness, and watch them disappear like magic!

