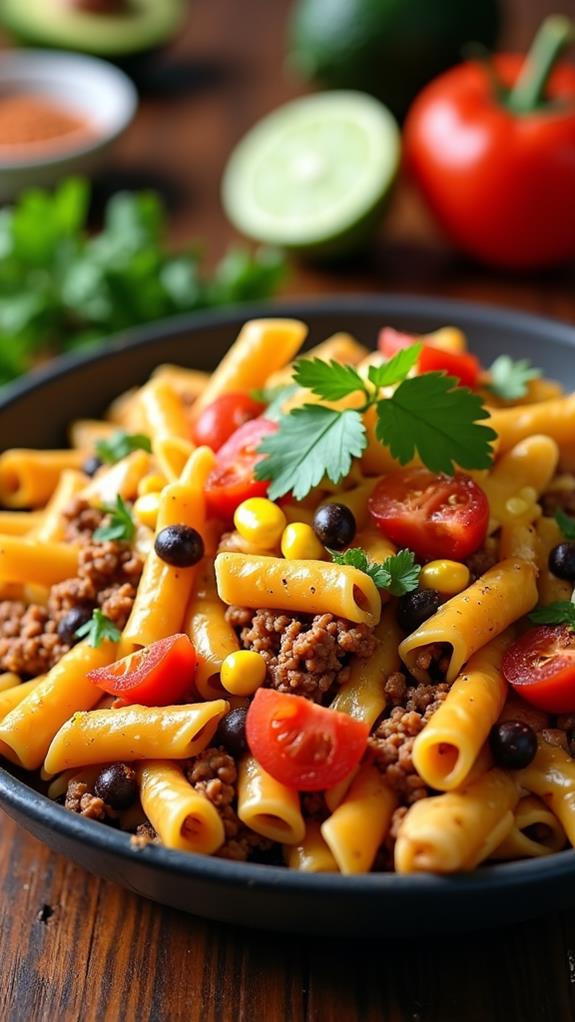
Quick & Easy Chili Recipe On Stove Top

Nothing beats the comfort of a warm, hearty bowl of chili on a chilly evening. This quick and easy stovetop chili recipe delivers all the rich flavors you crave without spending hours in the kitchen. With simple pantry ingredients and straightforward steps, you can have a delicious, satisfying meal ready in under 45 minutes.
Whether you’re feeding a hungry family or meal prepping for the week ahead, this foolproof chili recipe is your answer to quick, comforting meals. Let’s dive into creating the perfect bowl of homestyle chili that will become your go-to recipe.
What is “Quick Easy Chili”?
Quick Easy Chili is a simplified version of traditional chili that maintains all the essential flavors while cutting down on cooking time. This stovetop method uses readily available ingredients like ground beef, beans, tomatoes, and spices to create a thick, hearty stew that’s perfect for busy weeknights.
Unlike slow-cooked versions that take hours, this recipe delivers the same satisfying taste and texture in a fraction of the time. The secret lies in using the right combination of spices and allowing the flavors to meld together quickly over medium heat.
Ingredients List for Quick Easy Chili
- 1 pound ground beef (80/20 lean-to-fat ratio)
- 1 medium yellow onion, diced
- 3 cloves garlic, minced
- 2 tablespoons olive oil
- 2 tablespoons chili powder
- 1 teaspoon ground cumin
- 1 teaspoon smoked paprika
- ½ teaspoon dried oregano
- ½ teaspoon salt (or to taste)
- ¼ teaspoon black pepper
- ¼ teaspoon cayenne pepper (optional, for heat)
- 1 can (14.5 oz) diced tomatoes, undrained
- 1 can (15 oz) kidney beans, drained and rinsed
- 1 can (15 oz) black beans, drained and rinsed
- 1 can (6 oz) tomato paste
- 2 cups beef broth (or chicken broth)
- 1 tablespoon brown sugar
- Optional toppings: shredded cheese, sour cream, green onions, cilantro
How to Cook Quick Easy Chili: A Step-by-Step Guide
Creating the perfect stovetop chili requires layering flavors and building depth through proper cooking techniques. Here’s my detailed guide to ensure your chili turns out perfectly every time:
1. Prepare Your Ingredients:
- Dice the onion into small, uniform pieces for even cooking.
- Mince the garlic cloves finely to distribute the flavor throughout the chili.
- Open and drain the beans, giving them a quick rinse to remove excess sodium.
- Measure out all your spices in advance for easy addition during cooking.
2. Brown the Ground Beef:
- Heat 1 tablespoon of olive oil in a large, heavy-bottomed pot or Dutch oven over medium-high heat.
- Add the ground beef, breaking it up with a wooden spoon as it cooks.
- Cook for 5-7 minutes until the beef is completely browned and no pink remains.
- Drain excess grease, leaving about 1 tablespoon in the pot for flavor.
3. Sauté the Aromatics:
- Add the remaining tablespoon of olive oil to the same pot.
- Add diced onions and cook for 3-4 minutes until they become translucent and fragrant.
- Add minced garlic and cook for another 30 seconds, being careful not to burn it.
4. Build the Spice Base:
- Add chili powder, cumin, smoked paprika, oregano, salt, pepper, and cayenne (if using).
- Stir the spices with the onion and garlic mixture for 30-60 seconds until fragrant.
- This step, called “blooming” the spices, intensifies their flavors significantly.
5. Add the Tomato Components:
- Stir in the tomato paste and cook for 1-2 minutes to remove the raw taste.
- Add the diced tomatoes with their juice, scraping up any browned bits from the bottom of the pot.
- These browned bits add incredible depth to your chili’s flavor.
6. Combine and Simmer:
- Return the browned beef to the pot and mix well.
- Add the drained beans, beef broth, and brown sugar.
- Bring the mixture to a boil, then reduce heat to low and let it simmer.
- Cover partially and cook for 25-30 minutes, stirring occasionally to prevent sticking.
7. Final Seasoning and Serving:
- Taste and adjust seasonings as needed, adding more salt, pepper, or spices to your preference.
- Let the chili rest for 5 minutes before serving to allow flavors to settle.
- Serve hot with your favorite toppings for the ultimate comfort food experience.
Substitutions and Variations
This versatile chili recipe can be easily adapted to suit different dietary needs and taste preferences:
- Meat Options: Replace ground beef with ground turkey, chicken, or pork for a lighter option. For a heartier texture, try using a combination of ground beef and Italian sausage.
- Bean Varieties: Experiment with pinto beans, navy beans, or cannellini beans instead of kidney and black beans. You can also use just one type of bean if that’s what you have on hand.
- Vegetarian Version: Omit the meat entirely and add extra beans, diced mushrooms, or plant-based ground meat substitute. Increase the vegetables by adding bell peppers and corn.
- Spice Level: Adjust the heat by increasing or decreasing the cayenne pepper, or add diced jalapeños for fresh heat. For a milder version, reduce the chili powder slightly.
- Liquid Base: Substitute beef broth with chicken broth, vegetable broth, or even beer for different flavor profiles.
Common Mistakes to Avoid
When making Quick Easy Chili, avoid these common pitfalls to ensure your dish turns out perfectly:
- Not Browning the Meat Properly: Take time to properly brown the ground beef. This creates fond (browned bits) that add tremendous flavor to the finished chili.
- Skipping the Spice Blooming: Always cook your spices for 30-60 seconds before adding liquids. This step releases essential oils and intensifies flavors.
- Adding Beans Too Early: Beans can break down if cooked too long. Add them in the last 25-30 minutes of cooking to maintain their texture.
- Not Tasting and Adjusting: Chili should be tasted and seasoned throughout the cooking process. What tastes good at the beginning may need adjustment at the end.
- Rushing the Simmer: Allow proper simmering time for flavors to meld together. This is what transforms good chili into great chili.
How to Serve Quick Easy Chili
This hearty chili works wonderfully as a standalone meal or paired with complementary sides. I love serving it with warm cornbread or crusty bread rolls for soaking up every drop of the flavorful sauce.
For a complete meal, consider adding a simple green salad with a light vinaigrette to balance the richness of the chili. Baked sweet potatoes also make an excellent base for serving chili as a topping, creating a nutritious and filling combination.
The beauty of chili lies in its versatility as a base for other dishes. Use it as a topping for baked potatoes, serve it over rice, or use it as a filling for tacos or burritos.
Presentation Ideas for Quick Easy Chili
Make your chili as visually appealing as it is delicious with these presentation tips:
- Toppings Bar: Set up a DIY toppings station with bowls of shredded cheese, sour cream, diced avocado, chopped green onions, and fresh cilantro. This allows everyone to customize their bowl.
- Bread Bowl Service: Hollow out round sourdough bread loaves and serve the chili inside for an impressive presentation that’s also edible.
- Colorful Garnish: A sprinkle of bright green cilantro or chives adds a beautiful color contrast against the rich red chili.
- Layered Presentation: Start with a layer of cheese in the bottom of the bowl, add the hot chili, then top with sour cream and more cheese for a restaurant-style look.
Quick Easy Chili Recipe Tips
Here are my tried-and-true tips for making the best stovetop chili every time:
- Use Quality Ground Beef: Choose 80/20 ground beef for the best balance of flavor and texture. Leaner beef can result in dry chili.
- Let It Rest: Allow the finished chili to sit for 5-10 minutes before serving. This resting time helps the flavors settle and the consistency thicken slightly.
- Make It Ahead: Chili actually tastes better the next day as flavors continue to develop. Make it a day ahead for even better results.
- Freeze for Later: This recipe freezes beautifully for up to 3 months. Portion it into meal-sized containers for easy future meals.
- Double the Recipe: Since you’re already cooking, consider making a double batch. Chili freezes well and you’ll thank yourself later for the convenience.
How to Store Quick Easy Chili
Proper storage ensures your chili maintains its quality and safety for future enjoyment. Allow the chili to cool completely at room temperature for no more than 2 hours before refrigerating.
Transfer the cooled chili to airtight containers and store in the refrigerator for up to 4-5 days. For longer storage, portion the chili into freezer-safe containers or bags, leaving some space for expansion, and freeze for up to 3 months.
When reheating, thaw frozen chili overnight in the refrigerator, then reheat gently on the stovetop over medium-low heat, stirring occasionally. Add a splash of broth if needed to restore the desired consistency.
Frequently Asked Questions (FAQs)
Q: Can I make this chili in a slow cooker instead?
A: Absolutely! Brown the meat and sauté the aromatics on the stovetop first, then transfer everything to a slow cooker. Cook on low for 6-8 hours or high for 3-4 hours.
Q: How can I make my chili thicker?
A: For thicker chili, simmer uncovered for the last 10-15 minutes to allow excess liquid to evaporate. You can also mash some of the beans or add a tablespoon of cornmeal.
Q: Can I use fresh tomatoes instead of canned?
A: Yes, but you’ll need about 2 pounds of fresh tomatoes, peeled and diced. Canned tomatoes provide more consistent results and concentrated flavor.
Q: Is this chili spicy?
A: This recipe has a mild to medium heat level. The cayenne pepper is optional, and you can adjust the spice level by increasing or decreasing the amount of chili powder and cayenne.
Q: Can I add vegetables to this chili?
A: Definitely! Bell peppers, corn, and diced jalapeños are popular additions. Add them when you sauté the onions for best results.
Q: How do I know when the chili is done?
A: The chili is ready when it has thickened to your desired consistency and the flavors have melded together, usually after 25-30 minutes of simmering.
Conclusion
This Quick Easy Chili recipe proves that you don’t need to spend all day cooking to enjoy a deeply flavorful, satisfying meal. With simple ingredients and straightforward techniques, you can create a bowl of chili that rivals any restaurant version in just about 45 minutes.
The beauty of this recipe lies in its flexibility and forgiving nature. Whether you’re a beginner cook or an experienced chef looking for a reliable weeknight meal, this chili delivers every time. The combination of properly browned meat, aromatic vegetables, and well-balanced spices creates a foundation that’s both comforting and exciting.
I encourage you to make this recipe your own by experimenting with different toppings and sides. Remember that great chili improves with time, so don’t hesitate to make extra for even better leftovers. Happy cooking, and enjoy every warming, satisfying spoonful of your homemade chili!