Air Fryer Chicken Tenders Recipe
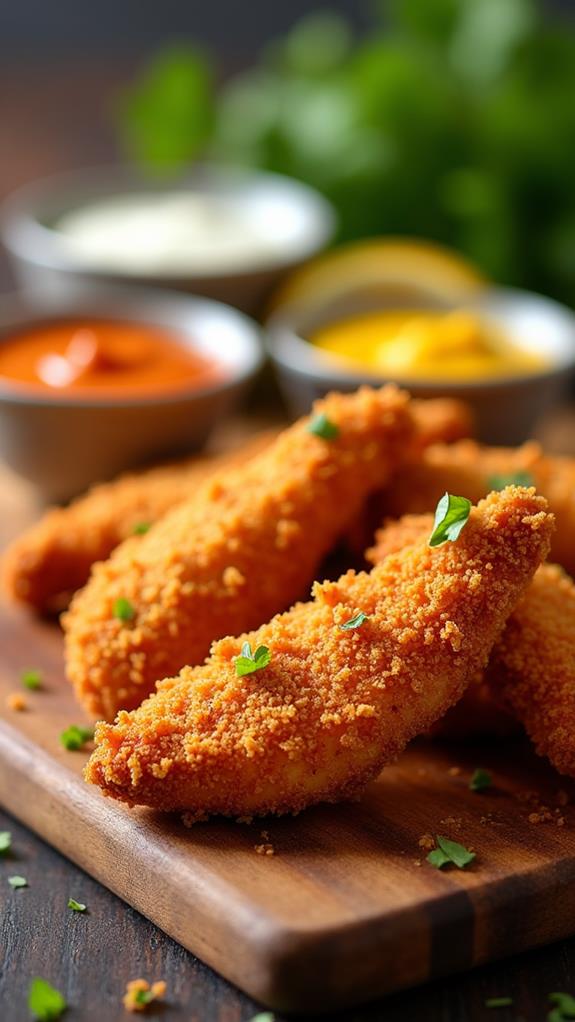
Craving perfectly crispy chicken tenders without the guilt of deep frying? I’ve got the solution that will revolutionize your dinner routine. This Air Fryer Chicken Tenders recipe delivers restaurant-quality results with minimal oil and maximum flavor.
These golden, juicy tenders cook in just 12 minutes and are so delicious, your family will be asking for them weekly. Get ready to discover the secret to achieving that perfect crispy exterior while keeping the chicken incredibly tender inside.
What Are Air Fryer Chicken Tenders?
Air fryer chicken tenders are bite-sized strips of chicken breast that are seasoned, coated, and cooked using hot air circulation technology. Unlike traditional deep-fried tenders, these require minimal oil while still achieving that coveted crispy texture we all love.
The air fryer creates a perfectly golden crust through rapid air circulation, while keeping the inside moist and flavorful. This cooking method reduces calories significantly compared to deep frying, making it a healthier alternative that doesn’t compromise on taste.
Ingredients List for Air Fryer Chicken Tenders
- 1 pound chicken breast, cut into 1-inch thick strips
- 1 cup all-purpose flour
- 2 large eggs, beaten
- 1½ cups panko breadcrumbs
- 1 teaspoon garlic powder
- 1 teaspoon onion powder
- 1 teaspoon paprika
- ½ teaspoon dried oregano
- ½ teaspoon salt
- ¼ teaspoon black pepper
- ¼ teaspoon cayenne pepper (optional)
- 2 tablespoons olive oil spray
- Lemon wedges for serving
How to Cook Air Fryer Chicken Tenders: A Step-by-Step Guide
Creating perfect air fryer chicken tenders is easier than you might think. Follow these detailed steps to ensure crispy, juicy results every time:
1. Prepare the Chicken:
- Pat the chicken breasts completely dry with paper towels to remove excess moisture.
- Cut the chicken into strips about 1 inch thick and 3-4 inches long for even cooking.
- Let the chicken come to room temperature for about 15 minutes before cooking.
2. Set Up Your Breading Station:
- Place the flour in a shallow dish or plate.
- Beat the eggs in a second shallow bowl until smooth.
- In a third dish, combine panko breadcrumbs with all the seasonings: garlic powder, onion powder, paprika, oregano, salt, pepper, and cayenne if using.
- Mix the seasoned breadcrumbs thoroughly to distribute the spices evenly.
3. Bread the Chicken Tenders:
- Dredge each chicken strip first in flour, shaking off excess.
- Dip the floured chicken into the beaten eggs, ensuring complete coverage.
- Finally, coat thoroughly in the seasoned breadcrumb mixture, pressing gently to help the coating stick.
- Place the breaded tenders on a clean plate.
4. Preheat and Prepare the Air Fryer:
- Preheat your air fryer to 400°F (200°C) for 3-5 minutes.
- Lightly spray the air fryer basket with olive oil to prevent sticking.
- This step ensures even cooking and prevents the tenders from sticking to the basket.
5. Cook the Chicken Tenders:
- Arrange the breaded tenders in a single layer in the air fryer basket, making sure they don’t overlap.
- Cook in batches if necessary to avoid overcrowding.
- Spray the tops of the tenders lightly with olive oil for extra crispiness.
- Cook for 6 minutes, then flip carefully and cook for another 5-6 minutes.
- Check that the internal temperature reaches 165°F (74°C) using a meat thermometer.
6. Final Touches:
- Let the tenders rest for 2-3 minutes after cooking to allow the juices to redistribute.
- Serve immediately with lemon wedges and your favorite dipping sauces.
- The coating should be golden brown and crispy, while the inside remains juicy and tender.
Substitutions and Variations
Want to customize this Air Fryer Chicken Tenders recipe to suit your preferences or dietary needs? Here are some great options:
- Gluten-Free Option: Replace all-purpose flour with almond flour or gluten-free flour blend, and use gluten-free breadcrumbs.
- Protein Alternatives: Turkey breast, pork tenderloin, or even firm white fish can be substituted for chicken.
- Breadcrumb Variations: Try crushed cornflakes, crushed crackers, or seasoned stuffing mix for different textures and flavors.
- Spice Blends: Experiment with Italian seasoning, Cajun spice, or ranch seasoning mix instead of the suggested spices.
- Healthier Coating: Use crushed nuts like almonds or pecans mixed with parmesan cheese for a low-carb option.
- Extra Crispy Version: Add a tablespoon of cornstarch to the flour for an even crispier coating.
Common Mistakes to Avoid
Avoid these common pitfalls to ensure your air fryer chicken tenders turn out perfect every time:
- Overcrowding the Basket: This prevents proper air circulation and results in uneven cooking. Cook in batches for best results.
- Skipping the Oil Spray: A light spray of oil helps achieve that golden, crispy exterior.
- Not Preheating: Starting with a hot air fryer ensures immediate crisping of the coating.
- Flipping Too Early: Wait until the 6-minute mark to flip, or the coating may stick to the basket.
- Not Checking Internal Temperature: Always ensure chicken reaches 165°F internal temperature for food safety.
- Using Wet Chicken: Pat the chicken completely dry before breading to help the coating stick properly.
How to Serve Air Fryer Chicken Tenders
These versatile chicken tenders pair beautifully with numerous sides and sauces. For a classic approach, serve them with crispy french fries and coleslaw. For a healthier option, pair with roasted vegetables and a fresh garden salad.
Popular dipping sauces include honey mustard, ranch dressing, barbecue sauce, or buffalo sauce. For a gourmet touch, try serving with homemade garlic aioli or spicy sriracha mayo.
Presentation Ideas for Air Fryer Chicken Tenders
Make your chicken tenders look restaurant-worthy with these simple presentation tips:
- Basket Presentation: Serve in a paper-lined basket with parchment paper for that authentic restaurant feel.
- Colorful Garnish: Add fresh herbs like parsley or chives for a pop of color and fresh flavor.
- Sauce Station: Create a small sauce station with multiple dipping options in small bowls.
- Family Style: Arrange on a large platter with lemon wedges and fresh vegetables for sharing.
Air Fryer Chicken Tenders Recipe Tips
Follow these expert tips to elevate your chicken tender game:
- Marinate for Extra Flavor: Marinate the chicken strips in buttermilk for 2-4 hours before breading for extra tenderness.
- Double Dredge: For extra crispy coating, dip the chicken back in egg and breadcrumbs for a second coating.
- Temperature Matters: Don’t skip checking the internal temperature – overcooked chicken becomes dry and tough.
- Batch Cooking: Cook multiple batches and keep warm in a 200°F oven while finishing the rest.
- Fresh Breadcrumbs: Make your own breadcrumbs from day-old bread for superior texture and flavor.
How to Store Air Fryer Chicken Tenders
Allow the chicken tenders to cool completely before storing (within 2 hours of cooking). Place them in an airtight container lined with paper towels to absorb excess moisture. Store in the refrigerator for up to 3-4 days.
For longer storage, freeze the cooled tenders in a freezer-safe container or bag for up to 3 months. To reheat, place frozen tenders back in the air fryer at 350°F for 3-5 minutes until heated through and crispy again.
Frequently Asked Questions (FAQs)
Q: Can I make these chicken tenders ahead of time?
A: You can bread the tenders up to 24 hours in advance and store them in the refrigerator. Cook them fresh for the best texture and flavor.
Q: What if I don’t have panko breadcrumbs?
A: Regular breadcrumbs work fine, though panko creates a crispier texture. You can also make breadcrumbs from crushed crackers or cornflakes.
Q: How do I know when the chicken tenders are done?
A: The coating should be golden brown and the internal temperature should reach 165°F when checked with a meat thermometer.
Q: Can I cook frozen chicken tenders in the air fryer?
A: It’s best to thaw chicken completely before breading and cooking for even results and food safety.
Q: Why are my chicken tenders not crispy?
A: Make sure to preheat the air fryer, don’t overcrowd the basket, and use a light spray of oil on the coating.
Q: Can I use chicken thighs instead of breasts?
A: Absolutely! Chicken thighs will be even more flavorful and juicy, though cooking time may need slight adjustment.
Conclusion
Air Fryer Chicken Tenders are the perfect solution for anyone craving crispy, flavorful chicken without the hassle and calories of deep frying. This simple recipe delivers restaurant-quality results in just minutes, making it ideal for busy weeknight dinners or weekend family meals.
The beauty of this recipe lies in its simplicity and versatility. With basic pantry ingredients and a few simple techniques, you can create golden, crispy tenders that rival any restaurant version. The air fryer technology ensures even cooking while using minimal oil, making this a healthier option that doesn’t sacrifice flavor.
Whether you’re feeding picky eaters, meal prepping for the week, or just want a quick and satisfying dinner, these air fryer chicken tenders will become a staple in your recipe collection. Give this recipe a try, and I guarantee your family will be requesting these delicious tenders again and again. Happy cooking!

