Bing Cherry Freezer Jam Recipe
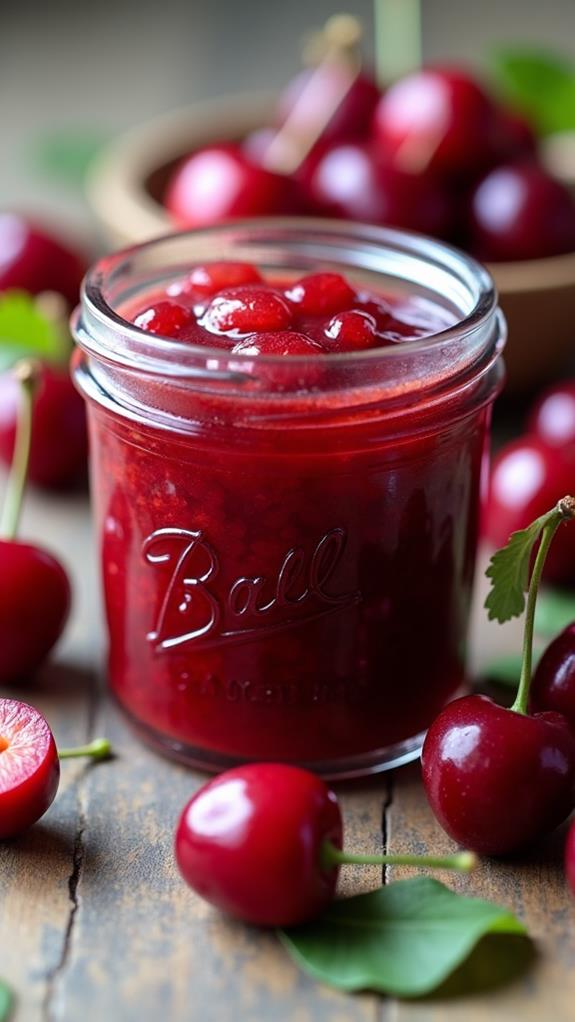
There’s nothing quite like capturing the essence of summer in a jar, and this Bing Cherry Freezer Jam recipe does exactly that. When those gorgeous, deep-red bing cherries are at their peak sweetness, I love transforming them into this simple, no-cook jam that preserves their fresh flavor perfectly.
Unlike traditional canned jams that require lengthy cooking processes, freezer jam maintains the bright, natural taste of fresh cherries while being incredibly easy to make. Get ready to fill your freezer with jars of ruby-red goodness that will brighten your breakfast table all year long!
What is “Bing Cherry Freezer Jam”?
Bing Cherry Freezer Jam is a simple, uncooked preserve made from fresh bing cherries that’s stored in the freezer instead of being processed in a water bath like traditional canned jams. This method preserves the fresh, vibrant flavor of the cherries better than cooked jams, resulting in a spread that tastes like you’re biting into fresh summer fruit.
The magic happens when fresh cherries are combined with sugar and pectin, creating a naturally thick, spreadable consistency without any cooking. The sugar draws out the cherry’s natural juices, while the pectin helps it set to the perfect jam-like texture. Because it’s not heated, the cherries retain their bright color and fresh taste.
This type of jam is perfect for those who want to preserve summer’s bounty without spending hours over a hot stove. It’s also ideal for beginners to jam-making, as there’s no risk of overcooking or worrying about proper canning techniques.
Ingredients List for Bing Cherry Freezer Jam
- 4 cups fresh bing cherries, pitted and chopped
- 3 cups granulated sugar
- 1 package (1.75 oz) powdered fruit pectin
- 2 tablespoons fresh lemon juice
- 1/4 cup water
- 1/2 teaspoon vanilla extract (optional)
- Pinch of salt
How to Make Bing Cherry Freezer Jam: A Step-by-Step Guide
Making Bing Cherry Freezer Jam is remarkably straightforward, but following these detailed steps will ensure perfect results every time. Here’s my foolproof method:
1. Prepare Your Cherries:
- Wash the fresh bing cherries thoroughly under cold running water.
- Remove the stems and pit each cherry using a cherry pitter or small knife.
- Chop the cherries into small, uniform pieces (about 1/4-inch pieces work well).
- You should have exactly 4 cups of prepared cherries for this recipe.
2. Macerate the Fruit:
- In a large mixing bowl, combine the chopped cherries with the granulated sugar.
- Stir well to ensure all cherries are coated with sugar.
- Let the mixture sit for 10-15 minutes, stirring occasionally.
- You’ll notice the cherries begin to release their natural juices, creating a syrupy mixture.
3. Prepare the Pectin Mixture:
- In a small saucepan, combine the powdered pectin with 1/4 cup of water.
- Bring this mixture to a rolling boil over high heat, stirring constantly.
- Boil for exactly 1 minute, then remove from heat immediately.
- This step activates the pectin, which will help your jam set properly.
4. Combine Everything:
- Add the hot pectin mixture to the cherry and sugar combination.
- Stir in the fresh lemon juice, vanilla extract (if using), and pinch of salt.
- Mix thoroughly for 2-3 minutes, ensuring the pectin is completely distributed.
- The mixture should look glossy and well-combined.
5. Fill Your Containers:
- Ladle the jam mixture into clean freezer-safe containers, leaving 1/2 inch of headspace.
- I prefer using plastic freezer containers or mason jars specifically designed for freezing.
- Wipe the rims clean and secure the lids tightly.
6. Set and Store:
- Let the filled containers sit at room temperature for 24 hours to allow the jam to set.
- After 24 hours, transfer the containers to your freezer for long-term storage.
- The jam will keep in the freezer for up to one year.
Substitutions and Variations
While this Bing Cherry Freezer Jam recipe is perfect as written, you can customize it to suit your preferences or dietary needs:
- Sugar Alternatives: Replace granulated sugar with honey, maple syrup, or sugar substitute designed for jam-making. Note that this may affect the setting properties.
- Different Cherries: Sweet cherries like Rainier or Lambert work beautifully, though you may want to add a bit more lemon juice for balance.
- Spice It Up: Add 1/4 teaspoon of cinnamon, a pinch of cardamom, or 1/2 teaspoon of almond extract for different flavor profiles.
- Mixed Berry: Combine cherries with other summer fruits like strawberries or raspberries for a mixed berry jam.
- Reduced Sugar: Use low-sugar pectin and reduce the sugar to 1.5-2 cups, though the jam may be slightly softer.
Common Mistakes to Avoid
When making Bing Cherry Freezer Jam, avoid these common pitfalls to ensure perfect results:
- Not Measuring Accurately: Pectin requires precise measurements to work properly. Always measure your fruit and sugar exactly.
- Skipping the Maceration Step: Letting the cherries and sugar sit together is crucial for proper juice extraction and flavor development.
- Overcooking the Pectin: Boil the pectin mixture for exactly one minute. Longer cooking can break down the pectin’s setting properties.
- Using Damaged Cherries: Only use fresh, ripe cherries without bruises or soft spots for the best flavor and texture.
- Inadequate Mixing: Thorough mixing ensures even distribution of pectin and prevents lumpy or unevenly set jam.
How to Serve Bing Cherry Freezer Jam
This vibrant cherry jam is incredibly versatile and can enhance many different foods. I love spreading it on warm buttermilk biscuits or toasted English muffins for a delightful breakfast treat. It’s also wonderful swirled into plain Greek yogurt or oatmeal for added sweetness and flavor.
For more creative uses, try it as a filling for thumbprint cookies, a topping for cheesecake, or even as a glaze for pork tenderloin. The jam pairs beautifully with soft cheeses like brie or goat cheese on a charcuterie board, and it makes an excellent filling for homemade pastries and hand pies.
Presentation Ideas for Bing Cherry Freezer Jam
To showcase your beautiful homemade jam, consider these presentation ideas:
- Gift Giving: Transfer portions to small decorative jars with fabric covers and ribbon for thoughtful homemade gifts.
- Layered Parfaits: Create beautiful breakfast parfaits by layering the jam with yogurt and granola in clear glasses.
- Elegant Serving: Present the jam in a small glass bowl with a silver spoon alongside fresh biscuits or scones for brunch guests.
Bing Cherry Freezer Jam Recipe Tips
Here are my best tips for ensuring your cherry jam turns out perfectly every time:
- Choose Peak-Season Cherries: The best jam comes from cherries that are perfectly ripe and at their flavor peak, typically in late June through July.
- Taste as You Go: Before adding the pectin, taste your cherry and sugar mixture and adjust sweetness if needed.
- Use Proper Containers: Invest in quality freezer containers that seal well to prevent freezer burn and maintain freshness.
- Label Everything: Always label your containers with the contents and date, so you know what you have and when it was made.
- Thaw Properly: When ready to use, thaw the jam in the refrigerator overnight rather than at room temperature for best texture.
How to Store Bing Cherry Freezer Jam
Proper storage is key to maintaining the quality of your freezer jam. Once set, the jam should be stored in the freezer at 0°F or below, where it will maintain its quality for up to 12 months. Use freezer-safe containers that leave adequate headspace for expansion during freezing.
When you’re ready to use a container, transfer it to the refrigerator and allow it to thaw completely, which typically takes 4-6 hours. Once thawed, the jam should be stored in the refrigerator and used within 3 weeks. Never refreeze jam that has been thawed, as this can affect both texture and food safety.
For daily use, I recommend thawing smaller containers so you’re not repeatedly opening and closing the same jar, which can introduce bacteria and affect freshness.
Frequently Asked Questions (FAQs)
Q: Can I make this jam without pectin?
A: While pectin helps achieve the proper consistency, you can make a looser, more syrup-like version without it. The jam will be thinner but still delicious.
Q: Why didn’t my jam set properly?
A: This usually happens due to incorrect measurements, old pectin, or not boiling the pectin mixture long enough. Always use fresh pectin and measure ingredients precisely.
Q: Can I use frozen cherries instead of fresh?
A: Yes, but thaw them completely first and drain any excess liquid before measuring. The texture may be slightly different, but the flavor will still be excellent.
Q: How long does the jam take to set?
A: Freezer jam typically sets within 24 hours at room temperature. If it’s still too soft after this time, it may not set further.
Q: Can I double this recipe?
A: It’s best to make jam in small batches as written. Large batches may not set properly due to the way pectin works.
Q: What’s the difference between freezer jam and regular jam?
A: Freezer jam isn’t cooked, which preserves more of the fresh fruit flavor and color. Regular jam is cooked and processed for shelf stability but may lose some fresh taste.
Conclusion
Making Bing Cherry Freezer Jam is one of the most rewarding ways to preserve summer’s sweetest bounty. This simple, no-cook method delivers incredible flavor while being accessible to cooks of all skill levels. The vibrant color and fresh taste of this jam will transport you back to sunny summer days, even in the depths of winter.
I love how this recipe allows the natural flavor of bing cherries to shine through without being masked by lengthy cooking processes. Whether you’re spreading it on morning toast, gifting it to friends, or using it in baking projects, this jam brings a touch of homemade goodness to everything it touches.
The beauty of freezer jam lies in its simplicity and the way it captures the essence of fresh fruit. With just a few ingredients and minimal effort, you can fill your freezer with jars of this ruby-red treasure that will remind you of summer’s abundance all year long. Happy jam making!

