Cheesy Garlic Chicken Wraps Recipe
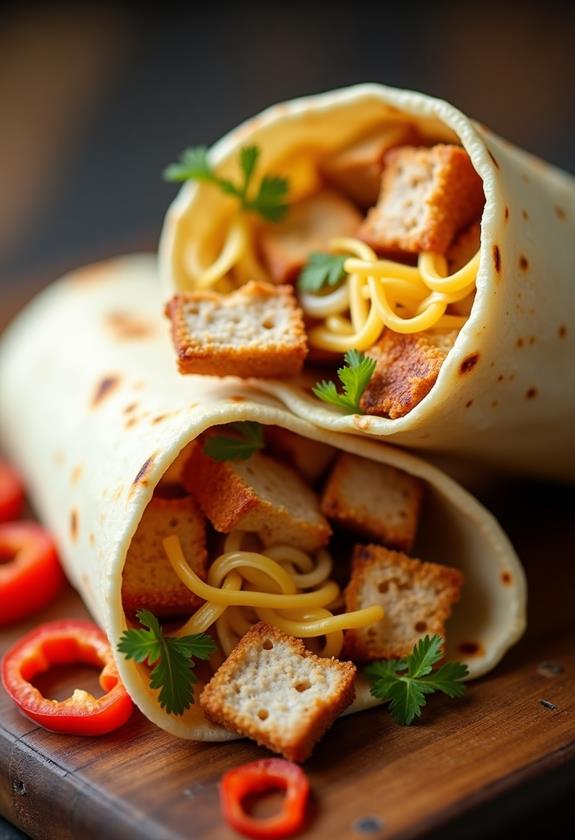
When I’m craving something satisfying but don’t want to spend hours in the kitchen, these Cheesy Garlic Chicken Wraps always come to my rescue. They’re the perfect combination of tender seasoned chicken, melted cheese, and aromatic garlic all wrapped up in a soft tortilla.
What makes these wraps truly special is how they transform simple pantry staples into something restaurant-worthy. The best part? You can have them ready in just 30 minutes, making them ideal for busy weeknights or when unexpected guests drop by.
What are Cheesy Garlic Chicken Wraps?
Cheesy Garlic Chicken Wraps are a delicious handheld meal featuring seasoned chicken breast cooked with garlic, wrapped in a soft tortilla with melted cheese and fresh vegetables. The wraps strike the perfect balance between comfort food and convenience, offering all the flavors of a hearty meal in an easy-to-eat package.
These wraps are incredibly versatile and can be customized with your favorite ingredients. The garlic-infused chicken provides a savory base, while the melted cheese adds richness and helps bind all the ingredients together.
Ingredients List for Cheesy Garlic Chicken Wraps
- 4 large flour tortillas (10-inch)
- 1 pound boneless, skinless chicken breasts, cut into strips
- 2 tablespoons olive oil
- 4 cloves garlic, minced
- 1 teaspoon garlic powder
- 1 teaspoon onion powder
- 1 teaspoon paprika
- ½ teaspoon dried oregano
- ½ teaspoon salt
- ¼ teaspoon black pepper
- 1½ cups shredded cheddar cheese
- ½ cup shredded mozzarella cheese
- 1 medium bell pepper, sliced thin
- 1 small onion, sliced thin
- 2 cups fresh lettuce, shredded
- 2 medium tomatoes, diced
- ¼ cup sour cream
- 2 tablespoons mayonnaise
- 1 tablespoon butter
How to Cook Cheesy Garlic Chicken Wraps: A Step-by-Step Guide
Making these delicious wraps is straightforward and rewarding. Here’s how I prepare them every time for consistent, mouthwatering results:
1. Prepare the Chicken Seasoning:
- In a small bowl, combine garlic powder, onion powder, paprika, oregano, salt, and pepper.
- Pat the chicken strips dry with paper towels to ensure better seasoning adherence.
- Rub the seasoning mixture evenly over all the chicken strips, making sure each piece is well-coated.
2. Cook the Chicken:
- Heat olive oil in a large skillet over medium-high heat until it shimmers.
- Add the seasoned chicken strips to the pan, being careful not to overcrowd them.
- Cook for 5-7 minutes, stirring occasionally, until the chicken is golden brown and cooked through.
- Add minced garlic during the last 2 minutes of cooking to prevent burning.
3. Sauté the Vegetables:
- In the same pan, add butter and let it melt.
- Add sliced onions and bell peppers to the pan.
- Cook for 3-4 minutes until the vegetables are tender but still have a slight crunch.
- Season lightly with salt and pepper.
4. Prepare the Wrap Sauce:
- In a small bowl, mix sour cream and mayonnaise until smooth.
- This creamy mixture will help bind the ingredients and add moisture to the wraps.
5. Warm the Tortillas:
- Heat tortillas in a dry skillet for 30 seconds on each side, or microwave them wrapped in damp paper towels for 30 seconds.
- Warm tortillas are more pliable and less likely to tear when rolling.
6. Assemble the Wraps:
- Spread about 1 tablespoon of the sour cream mixture down the center of each tortilla.
- Layer with lettuce, diced tomatoes, cooked chicken, and sautéed vegetables.
- Sprinkle generously with both cheddar and mozzarella cheeses.
7. Roll and Seal:
- Fold the bottom edge of the tortilla over the filling, then fold in the sides.
- Roll tightly from bottom to top, ensuring the seam is on the bottom.
- For extra security, you can secure with a toothpick.
8. Final Heating (Optional):
- For melted cheese and a crispy exterior, place the wraps seam-side down in a clean, dry skillet.
- Cook for 2-3 minutes on each side until golden brown and the cheese is melted.
Substitutions and Variations
These wraps are incredibly adaptable to different tastes and dietary needs. Here are some variations I love to try:
- Protein Alternatives: Substitute chicken with turkey, beef strips, grilled shrimp, or even seasoned black beans for a vegetarian option.
- Cheese Options: Try pepper jack for heat, Swiss for a milder flavor, or a Mexican cheese blend for authentic flair.
- Tortilla Choices: Use whole wheat tortillas for added fiber, spinach tortillas for color, or corn tortillas for a gluten-free option.
- Vegetable Additions: Include sautéed mushrooms, jalapeños, corn, or avocado slices for extra flavor and nutrition.
- Sauce Variations: Replace the sour cream mixture with ranch dressing, Caesar dressing, or chipotle mayo for different flavor profiles.
Common Mistakes to Avoid
Through trial and error, I’ve learned to avoid these common pitfalls when making chicken wraps:
- Overfilling the Wraps: Too much filling makes the wraps difficult to roll and prone to breaking. Stick to moderate portions.
- Using Cold Tortillas: Cold tortillas are stiff and likely to crack. Always warm them before assembly.
- Skipping the Chicken Rest: Let the cooked chicken rest for 2-3 minutes before slicing to retain juices.
- Not Drying Vegetables: Wet lettuce and tomatoes can make the wraps soggy. Pat them dry before adding.
- Rolling Too Loosely: Loose wraps fall apart when eating. Roll them firmly but not so tight that the tortilla tears.
How to Serve Cheesy Garlic Chicken Wraps
I love serving these wraps with a variety of sides that complement their rich, savory flavors. A simple side salad with vinaigrette provides a fresh contrast, while crispy baked sweet potato fries add a satisfying crunch.
For a complete meal, I often pair them with tortilla chips and fresh salsa or guacamole. A cold beverage like iced tea, lemonade, or sparkling water with lime perfectly balances the richness of the cheese and garlic.
Presentation Ideas for Cheesy Garlic Chicken Wraps
To make these wraps look as appealing as they taste, try these presentation techniques:
- Diagonal Cut: Cut the wraps diagonally in half to show off the colorful filling layers.
- Standing Presentation: Stand the wrap halves cut-side up on the plate for an attractive display.
- Garnish Touch: Sprinkle chopped fresh herbs like cilantro or parsley around the plate for color.
- Side Arrangement: Arrange complementary sides in small bowls around the main wrap for a restaurant-style presentation.
Cheesy Garlic Chicken Wraps Recipe Tips
Here are my proven tips for making the best chicken wraps every time:
- Pound the Chicken: If using thick chicken breasts, pound them to an even thickness for uniform cooking.
- Let Flavors Meld: Allow the seasoned chicken to sit for 15 minutes before cooking for deeper flavor penetration.
- Control the Heat: Medium-high heat prevents burning while ensuring the chicken cooks through completely.
- Cheese Placement: Put cheese directly on the warm chicken so it starts melting immediately.
- Assembly Line: Set up all ingredients before you start assembling for efficient wrap-making.
How to Store Cheesy Garlic Chicken Wraps
Proper storage keeps these wraps fresh and safe to eat. Allow assembled wraps to cool completely before wrapping each one individually in aluminum foil or plastic wrap.
Store in the refrigerator for up to 3 days. For best results, store the components separately and assemble fresh wraps when ready to eat. The cooked chicken can be refrigerated for up to 4 days.
If you must store assembled wraps, place them in airtight containers with paper towels to absorb excess moisture and prevent sogginess.
Frequently Asked Questions (FAQs)
Q: Can I make these wraps ahead of time?
A: Yes, but for best results, prepare the chicken and vegetables ahead of time and assemble the wraps just before serving. Pre-assembled wraps can become soggy.
Q: Can I freeze Cheesy Garlic Chicken Wraps?
A: The cooked chicken filling freezes well for up to 3 months, but assembled wraps with fresh vegetables don’t freeze well due to texture changes.
Q: What’s the best way to reheat leftover wraps?
A: Remove any fresh vegetables, then reheat in a skillet over medium heat for 2-3 minutes per side, or wrap in damp paper towels and microwave for 45-60 seconds.
Q: Can I make these wraps spicy?
A: Absolutely! Add diced jalapeños, use pepper jack cheese, or include a dash of hot sauce in the sour cream mixture.
Q: How do I prevent the wraps from getting soggy?
A: Pat all vegetables dry, let the chicken cool slightly before assembling, and avoid overloading with sauce. Use paper towels to absorb excess moisture.
Q: What size tortillas work best?
A: I recommend 10-inch flour tortillas as they provide enough surface area for filling without being unwieldy. Smaller tortillas work but may require less filling.
Conclusion
These Cheesy Garlic Chicken Wraps have become one of my go-to recipes when I want something delicious, satisfying, and quick to prepare. They perfectly combine convenience with flavor, making them ideal for lunch, dinner, or even meal prep.
The beauty of this recipe lies in its flexibility – you can customize the ingredients based on what you have in your pantry or your family’s preferences. Whether you’re feeding hungry teenagers, packing lunch for work, or hosting a casual get-together, these wraps never disappoint.
The combination of tender, garlicky chicken with melted cheese and fresh vegetables creates a meal that feels both comforting and exciting. Plus, the handheld nature makes them perfect for eating on the go or enjoying during movie nights.
I hope you’ll give this recipe a try and make it your own. With simple ingredients and straightforward techniques, you’ll have a delicious meal that brings smiles to faces and satisfaction to appetites. Happy cooking!