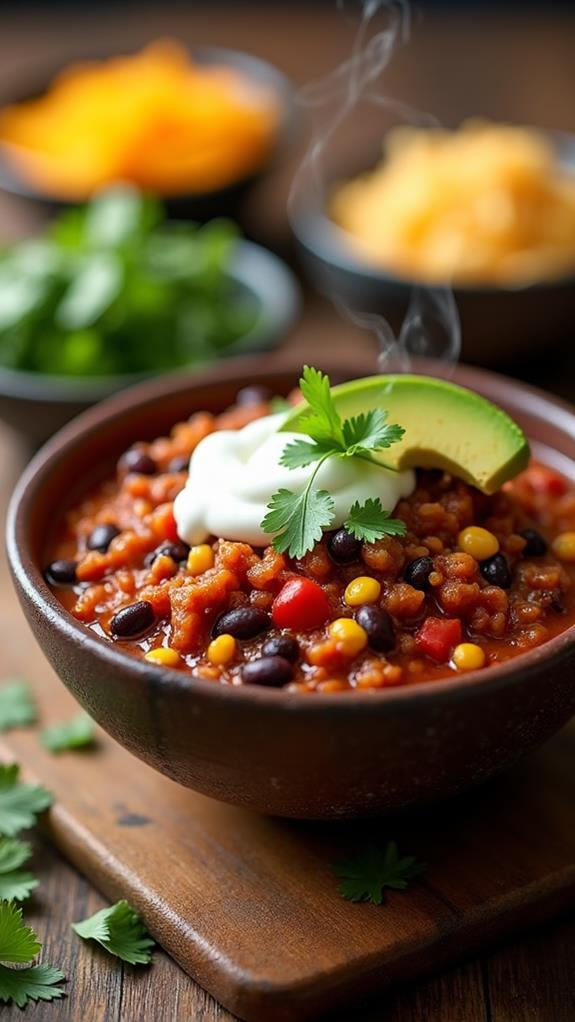
Classic White Chicken Chili Recipe

Nothing beats the comfort of a warm, hearty bowl of chili on a chilly evening, and this Classic White Chicken Chili recipe delivers exactly that cozy satisfaction you’re craving. Unlike traditional red chili, this creamy white version offers a milder, more delicate flavor profile that’s perfect for those who prefer less heat without sacrificing any of the rich, comforting taste.
This recipe combines tender chunks of chicken, creamy white beans, and a perfectly spiced broth that will have your kitchen smelling absolutely divine. Follow along as I guide you through creating this crowd-pleasing dish that’s guaranteed to become a family favorite.
What is “Classic White Chicken Chili”?
Classic White Chicken Chili is a lighter, creamier alternative to traditional red chili that features tender chicken, white beans, and a rich, flavorful broth made with chicken stock and cream. Unlike its tomato-based cousin, white chicken chili gets its distinctive appearance and taste from white ingredients like cannellini beans, sour cream, and white cheese.
This comfort food originated in the American Southwest and has become increasingly popular across the country due to its milder flavor profile and satisfying texture. The dish typically features green chiles for subtle heat, warm spices like cumin and oregano, and a creamy base that makes it incredibly satisfying without being overly heavy.
Ingredients List for Classic White Chicken Chili
- 2 pounds boneless, skinless chicken breasts or thighs
- 2 tablespoons olive oil
- 1 large white onion, diced
- 4 cloves garlic, minced
- 2 (4 oz) cans diced green chiles
- 1 jalapeño pepper, seeded and minced (optional)
- 1 teaspoon ground cumin
- 1 teaspoon dried oregano
- ½ teaspoon chili powder
- ½ teaspoon smoked paprika
- 4 cups low-sodium chicken broth
- 3 (15 oz) cans cannellini beans, drained and rinsed
- 1 cup frozen corn kernels
- ½ cup sour cream
- 4 oz cream cheese, softened
- 1 cup shredded Monterey Jack cheese
- 2 tablespoons fresh lime juice
- Salt and black pepper to taste
- ¼ cup fresh cilantro, chopped
- Green onions for garnish
How to Cook Classic White Chicken Chili: A Step-by-Step Guide
Creating the perfect White Chicken Chili requires attention to detail and proper layering of flavors. Here’s my foolproof method to ensure your chili turns out absolutely delicious every time:
1. Prepare and Season the Chicken:
- Pat the chicken dry with paper towels and season generously with salt and pepper on both sides.
- Cut the chicken into bite-sized chunks, about 1-inch pieces, which will cook evenly and be perfect for spooning.
- This preparation ensures the chicken will brown properly and absorb all the wonderful flavors.
2. Brown the Chicken:
- Heat olive oil in a large, heavy-bottomed pot or Dutch oven over medium-high heat.
- Add the chicken pieces in a single layer, being careful not to overcrowd the pot.
- Cook for 4-5 minutes without moving the pieces, allowing them to develop a golden-brown crust.
- Flip and brown the other side for another 3-4 minutes until the chicken is cooked through.
3. Sauté the Aromatics:
- Remove the chicken from the pot and set aside, leaving the flavorful drippings behind.
- Add the diced onion to the same pot and cook for 3-4 minutes until softened and translucent.
- Add the minced garlic, diced green chiles, and jalapeño (if using) and cook for another minute until fragrant.
- This step builds the flavor foundation for your entire chili.
4. Toast the Spices:
- Add the cumin, oregano, chili powder, and smoked paprika to the aromatics.
- Stir constantly for about 30 seconds until the spices become fragrant and slightly toasted.
- Toasting spices releases their essential oils and intensifies their flavors significantly.
5. Build the Base:
- Slowly pour in the chicken broth, scraping up any browned bits from the bottom of the pot.
- These browned bits add incredible depth of flavor to your chili base.
- Bring the mixture to a gentle boil, then reduce heat to maintain a steady simmer.
6. Add Beans and Corn:
- Return the browned chicken to the pot along with any accumulated juices.
- Add the drained cannellini beans and frozen corn kernels to the mixture.
- Simmer uncovered for 20-25 minutes, stirring occasionally, until the flavors meld together beautifully.
7. Create the Creamy Finish:
- In a small bowl, whisk together the sour cream and softened cream cheese until smooth.
- Gradually stir this mixture into the chili, being careful not to let it curdle.
- Add the shredded Monterey Jack cheese and stir until melted and incorporated.
- Finish with fresh lime juice and chopped cilantro for brightness and freshness.
Substitutions and Variations
One of the beautiful aspects of White Chicken Chili is its versatility. Here are some substitutions and variations I recommend to customize the recipe to your preferences:
- Chicken: Use rotisserie chicken for convenience, or substitute with turkey for a leaner option. Chicken thighs provide more flavor and moisture than breasts.
- Beans: Great Northern beans or navy beans work wonderfully if cannellini beans aren’t available. You can also use a combination of different white beans for added texture.
- Heat Level: For spicier chili, add serrano peppers or increase the jalapeño quantity. For milder versions, omit the jalapeño entirely and use mild green chiles.
- Cheese: Pepper Jack adds extra heat, while white cheddar provides a sharper flavor. You can also use a Mexican cheese blend for authentic flavor.
- Creaminess: Replace sour cream with Greek yogurt for a healthier option, or use heavy cream for an even richer texture.
- Vegetables: Add diced bell peppers, celery, or poblano peppers for extra flavor and nutrition.
Common Mistakes to Avoid
To ensure your White Chicken Chili turns out perfectly every time, avoid these common pitfalls that I’ve learned from experience:
- Overcooking the Chicken: Chicken can become tough and dry if overcooked. Remove it as soon as it’s cooked through, as it will continue cooking in the simmering chili.
- Adding Dairy Too Quickly: Always temper your sour cream and cream cheese before adding to prevent curdling. Mix them with a bit of warm broth first if needed.
- Not Draining Beans Properly: Excess liquid from canned beans can make your chili too thin. Always drain and rinse the beans thoroughly.
- Skipping the Browning Step: Browning the chicken creates depth of flavor that you simply cannot achieve any other way.
- Using Low-Quality Broth: Since broth is a major component, use good-quality, low-sodium chicken broth for the best flavor control.
How to Serve Classic White Chicken Chili
White Chicken Chili makes an excellent main course that’s perfect for casual family dinners or entertaining guests. I love serving it with warm cornbread or crusty sourdough bread for dipping. The bread helps balance the richness of the chili and provides a satisfying textural contrast.
For a complete meal, consider serving it alongside a fresh green salad with avocado and lime vinaigrette. The crisp, cool salad provides a nice contrast to the warm, creamy chili. Baked sweet potato wedges also make an excellent side dish, adding natural sweetness that complements the chili’s savory flavors.
Presentation Ideas for Classic White Chicken Chili
Presentation can elevate your White Chicken Chili from a simple weeknight dinner to an impressive meal worthy of company:
- Garnish Station: Set up a toppings bar with shredded cheese, diced avocado, chopped cilantro, sliced green onions, lime wedges, and tortilla strips for guests to customize their bowls.
- Bread Bowl Service: Hollow out round sourdough loaves and serve the chili inside for a rustic, impressive presentation.
- Colorful Contrast: Serve in colorful bowls and top with a dollop of sour cream, a sprinkle of paprika, and fresh cilantro for visual appeal.
- Layered Presentation: Start with a base of crushed tortilla chips, add the chili, then layer on toppings for a loaded chili bowl experience.
Classic White Chicken Chili Recipe Tips
Here are my tried-and-true tips for making the absolute best White Chicken Chili:
- Make It Ahead: This chili actually tastes better the next day as flavors continue to develop. Make it a day ahead and reheat gently before serving.
- Texture Matters: For a thicker chili, mash about half of the beans before adding them. For a thinner consistency, add more broth gradually.
- Fresh Ingredients: Use fresh lime juice rather than bottled for the brightest flavor, and add fresh herbs just before serving.
- Temperature Control: Keep the heat at a gentle simmer to prevent the dairy from curdling and to allow flavors to meld properly.
- Taste and Adjust: Always taste before serving and adjust seasonings. You might need more salt, lime juice, or heat depending on your preferences.
How to Store Classic White Chicken Chili
Proper storage ensures your White Chicken Chili maintains its delicious flavor and safe quality. Allow the chili to cool completely to room temperature before refrigerating, but don’t leave it out for more than 2 hours for food safety.
Transfer cooled chili to airtight containers and refrigerate for up to 4 days. The flavors actually improve during storage, making leftovers incredibly delicious. For longer storage, freeze the chili in portion-sized containers for up to 3 months, though the texture of the dairy components may change slightly upon thawing.
When reheating, do so gently over low heat, stirring frequently to prevent separation. Add a splash of broth if needed to restore the proper consistency.
Frequently Asked Questions (FAQs)
Q: Can I make White Chicken Chili in a slow cooker?
A: Absolutely! Brown the chicken and sauté the aromatics first, then transfer everything except the dairy to your slow cooker. Cook on low for 4-6 hours, then stir in the sour cream, cream cheese, and cheese during the last 30 minutes.
Q: Can I freeze White Chicken Chili?
A: Yes, though dairy-based foods may separate slightly when frozen. Freeze without the dairy additions, then stir them in when reheating. The chili will still taste delicious.
Q: What if my chili is too thin?
A: Simmer uncovered to reduce liquid, or mix 2 tablespoons of cornstarch with cold water to create a slurry and stir it in. You can also mash some of the beans to naturally thicken the chili.
Q: Can I use dried beans instead of canned?
A: Yes! Soak 1½ cups dried cannellini beans overnight, then cook until tender before adding to the chili. This adds about 2 hours to prep time but provides excellent flavor.
Q: How can I make this recipe dairy-free?
A: Substitute the sour cream with coconut cream, use dairy-free cream cheese, and replace the cheese with nutritional yeast or dairy-free cheese alternatives.
Conclusion
Classic White Chicken Chili represents comfort food at its finest – a perfect balance of creamy richness, tender protein, and warming spices that creates a truly satisfying meal. This recipe has become one of my go-to dishes for feeding family and friends because it’s both approachable for weeknight cooking and impressive enough for entertaining.
The beauty of this dish lies in its flexibility and forgiving nature. Whether you follow the recipe exactly or make it your own with various substitutions and additions, you’ll end up with a delicious, hearty meal that brings people together around the table. The leftovers are arguably even better than the first serving, making this an excellent make-ahead option for busy weeks.
I encourage you to make this recipe your own by experimenting with different toppings, heat levels, and accompaniments. Each time you make it, you’ll discover new ways to perfect this already incredible dish. Happy cooking, and enjoy every comforting spoonful of this Classic White Chicken Chili!