Decadent Dark Chocolate Peanut Butter Cake Recipe
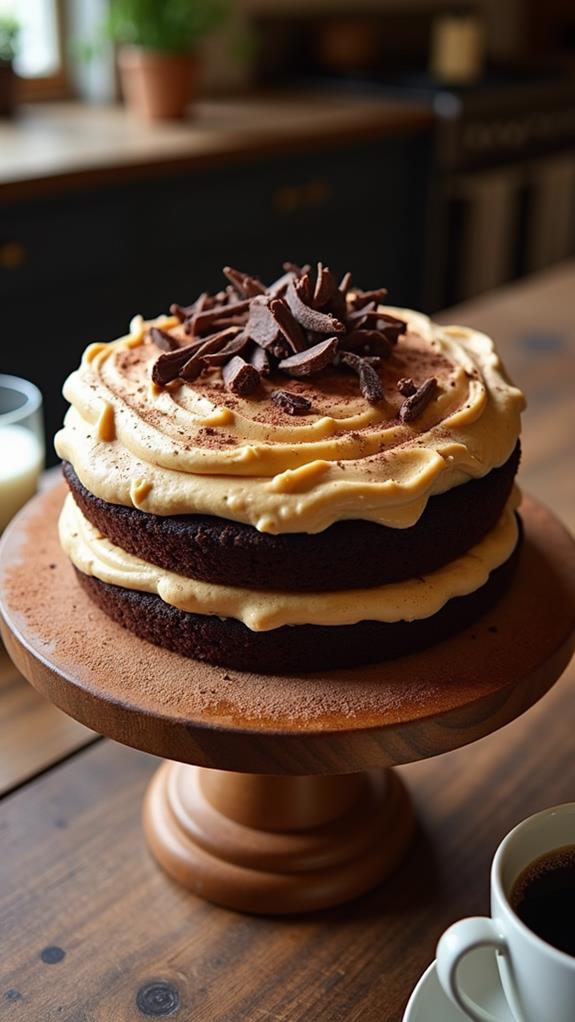
There’s something magical about the combination of rich dark chocolate and creamy peanut butter that makes my heart skip a beat every time. This Decadent Dark Chocolate Peanut Butter Cake is the ultimate indulgence for anyone who believes that life is too short for ordinary desserts.
I’ve perfected this recipe over the years, and I can confidently say it’s a showstopper that never fails to impress. The moist chocolate cake layers paired with silky peanut butter frosting create a dessert so irresistible, you’ll find yourself making excuses to bake it again and again.
What is Decadent Dark Chocolate Peanut Butter Cake?
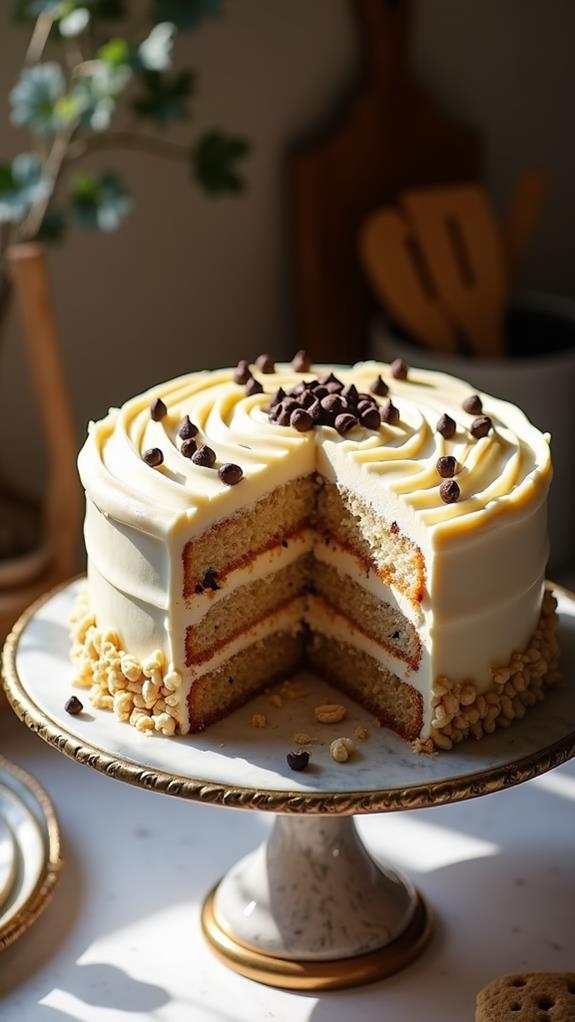
This isn’t just any chocolate cake – it’s a multi-layered masterpiece that celebrates the perfect marriage of two beloved flavors. The cake features incredibly moist dark chocolate layers that are rich without being overwhelming, complemented by a luxurious peanut butter buttercream frosting that’s smooth, creamy, and perfectly balanced.
What makes this cake truly special is the depth of chocolate flavor achieved through the use of both cocoa powder and dark chocolate, while the peanut butter elements add a creamy contrast that cuts through the richness beautifully. It’s the kind of cake that makes special occasions even more memorable.
Ingredients List for Decadent Dark Chocolate Peanut Butter Cake
For the Chocolate Cake:
- 1¾ cups all-purpose flour
- 2 cups granulated sugar
- ¾ cup unsweetened cocoa powder
- 2 teaspoons baking soda
- 1 teaspoon baking powder
- 1 teaspoon salt
- 2 large eggs, room temperature
- 1 cup buttermilk
- 1 cup strong black coffee, cooled
- ½ cup vegetable oil
- 1 teaspoon vanilla extract
- 4 oz dark chocolate, melted and cooled
For the Peanut Butter Frosting:
- 1 cup unsalted butter, room temperature
- 1 cup creamy peanut butter
- 4 cups powdered sugar, sifted
- ¼ cup heavy cream
- 2 teaspoons vanilla extract
- ¼ teaspoon salt
For Garnish (Optional):
- ½ cup chocolate chips or chopped peanuts
- Chocolate shavings
- Mini peanut butter cups, halved
How to Make Decadent Dark Chocolate Peanut Butter Cake: A Step-by-Step Guide
Creating this spectacular cake involves several steps, but each one is straightforward and contributes to the final amazing result. Here’s my detailed guide to ensure your cake turns out perfect every time:
1. Prepare Your Baking Setup:
- Preheat your oven to 350°F (175°C).
- Grease two 9-inch round cake pans with butter and dust with cocoa powder.
- Line the bottoms with parchment paper for easy removal.
- This preparation step is crucial for preventing the cake from sticking.
2. Mix the Dry Ingredients:
- In a large mixing bowl, whisk together flour, sugar, cocoa powder, baking soda, baking powder, and salt.
- Make sure there are no lumps in the cocoa powder by sifting it if necessary.
- Creating a well-combined dry mixture ensures even distribution of leavening agents.
3. Combine the Wet Ingredients:
- In a separate bowl, whisk together eggs, buttermilk, cooled coffee, vegetable oil, and vanilla extract.
- The coffee enhances the chocolate flavor without making the cake taste like coffee.
- Ensure all wet ingredients are at room temperature for better mixing.
4. Create the Cake Batter:
- Pour the wet ingredients into the dry ingredients and mix until just combined.
- Fold in the melted and cooled dark chocolate until evenly distributed.
- Don’t overmix – a few lumps are better than a tough cake.
5. Bake the Cake Layers:
- Divide the batter evenly between the prepared pans.
- Bake for 30-35 minutes, or until a toothpick inserted in the center comes out with just a few moist crumbs.
- Cool in pans for 10 minutes, then turn out onto wire racks to cool completely.
6. Prepare the Peanut Butter Frosting:
- Beat the room temperature butter until light and fluffy, about 3-4 minutes.
- Add peanut butter and beat until well combined.
- Gradually add powdered sugar, alternating with heavy cream, beating until smooth.
- Mix in vanilla extract and salt until the frosting is perfectly smooth and pipeable.
7. Assemble the Cake:
- Place one cake layer on your serving plate.
- Spread a generous layer of peanut butter frosting on top.
- Add the second cake layer and frost the top and sides completely.
- Use an offset spatula for smooth, professional-looking results.
8. Add Final Touches:
- Garnish with chocolate chips, chopped peanuts, or chocolate shavings as desired.
- Chill the assembled cake for 30 minutes to set the frosting before slicing.
Substitutions and Variations
I love how adaptable this recipe can be to accommodate different preferences and dietary needs:
- Flour: Substitute with a 1:1 gluten-free flour blend for a gluten-free version.
- Coffee: Replace with hot water if you prefer to avoid caffeine, though the coffee really enhances the chocolate flavor.
- Buttermilk: Make your own by adding 1 tablespoon lemon juice to 1 cup regular milk and letting it sit for 5 minutes.
- Peanut Butter: Use natural peanut butter for a more intense peanut flavor, or try almond butter for a different nutty taste.
- Oil: Melted butter or applesauce can be substituted, though oil creates the moistest texture.
- Dark Chocolate: Semi-sweet chocolate chips work as a substitute, though dark chocolate provides richer flavor.
Common Mistakes to Avoid
Through years of baking this cake, I’ve learned to avoid these common pitfalls:
- Overmixing the Batter: This leads to a tough, dense cake instead of the tender crumb we want.
- Using Cold Ingredients: Room temperature ingredients mix more easily and create a smoother batter.
- Overbaking: The cake should be moist, so remove it as soon as a toothpick comes out with just a few crumbs.
- Frosting a Warm Cake: Always let the cake cool completely or the frosting will melt and slide off.
- Not Sifting Powdered Sugar: Lumpy frosting is the result of not sifting the powdered sugar beforehand.
How to Serve Decadent Dark Chocolate Peanut Butter Cake
This cake is rich and indulgent, so I recommend serving smaller slices alongside a glass of cold milk or a cup of coffee. The combination of the dense chocolate cake and creamy peanut butter frosting pairs beautifully with the contrast of these beverages.
For special occasions, I like to serve it with a scoop of vanilla ice cream or fresh berries to cut through the richness. The cake is substantial enough to be the star of any dessert table.
Presentation Ideas for Decadent Dark Chocolate Peanut Butter Cake
Make your cake as beautiful as it is delicious with these presentation ideas:
- Drip Effect: Create a chocolate ganache drip around the edges for an elegant, bakery-style look.
- Textured Frosting: Use a fork or offset spatula to create swirls and patterns in the peanut butter frosting.
- Layered Garnish: Alternate chocolate shavings and crushed peanuts around the base of the cake.
- Individual Portions: Cut into squares and serve on individual plates with a dollop of whipped cream.
Decadent Dark Chocolate Peanut Butter Cake Recipe Tips
Here are my top tips for cake success:
- Room Temperature Ingredients: This cannot be overstated – it makes all the difference in texture.
- Measure Accurately: Baking is science, so use a kitchen scale if possible for the most accurate results.
- Test for Doneness: Start checking at 28 minutes, as oven temperatures can vary.
- Quality Matters: Use good quality cocoa powder and peanut butter for the best flavor.
- Patience with Frosting: If your frosting seems too thick, add cream one tablespoon at a time until you reach the perfect consistency.
How to Store Decadent Dark Chocolate Peanut Butter Cake
This cake actually improves with time as the flavors meld together. Store the finished cake covered at room temperature for up to 3 days, or in the refrigerator for up to one week.
If you need to store it longer, wrap individual slices in plastic wrap and freeze for up to 3 months. The cake layers can also be wrapped and frozen before frosting, making it perfect for advance preparation.
For best results, bring refrigerated cake to room temperature before serving, as the flavors are most pronounced when not cold.
Frequently Asked Questions (FAQs)
Q: Can I make this cake ahead of time?
A: Absolutely! The cake layers can be baked and frozen for up to 3 months, or the entire assembled cake can be made 1-2 days ahead and stored in the refrigerator.
Q: Why does the recipe call for coffee?
A: Coffee enhances the chocolate flavor without making the cake taste like coffee. You can substitute with hot water if preferred, but I highly recommend trying it with coffee at least once.
Q: Can I make this as cupcakes instead?
A: Yes! Divide the batter among 24 cupcake liners and bake for 18-22 minutes. The frosting recipe will be perfect for topping all the cupcakes.
Q: What if my frosting is too thick?
A: Add heavy cream or milk one tablespoon at a time until you reach the desired consistency. If it’s too thin, add more powdered sugar gradually.
Q: Can I use natural peanut butter?
A: Yes, but make sure it’s well-stirred and at room temperature. Natural peanut butter can make the frosting slightly less stable, so you may need to adjust with additional powdered sugar.
Conclusion
This Decadent Dark Chocolate Peanut Butter Cake has become my go-to recipe for celebrations, and I know it will become yours too. The combination of rich chocolate and creamy peanut butter creates a dessert that’s both comforting and impressive.
What I love most about this recipe is how it brings people together. Whether you’re celebrating a birthday, holiday, or just want to treat yourself to something special, this cake delivers every single time. The moist chocolate layers and silky peanut butter frosting create a perfect harmony of flavors that will have everyone asking for the recipe.
Take your time with each step, use quality ingredients, and don’t be afraid to make it your own with different garnishes or variations. Most importantly, enjoy the process of creating something truly delicious that will create lasting memories for you and everyone lucky enough to share a slice. Happy baking!

