Easy Key Lime Pie Bars Recipe
When summer calls for something bright, tangy, and refreshingly sweet, these Easy Key Lime Pie Bars answer with pure perfection. I’ve transformed the beloved Key Lime Pie into convenient, shareable bars that capture all the zesty magic of the classic dessert without the fuss of pie crusts and perfect slices.
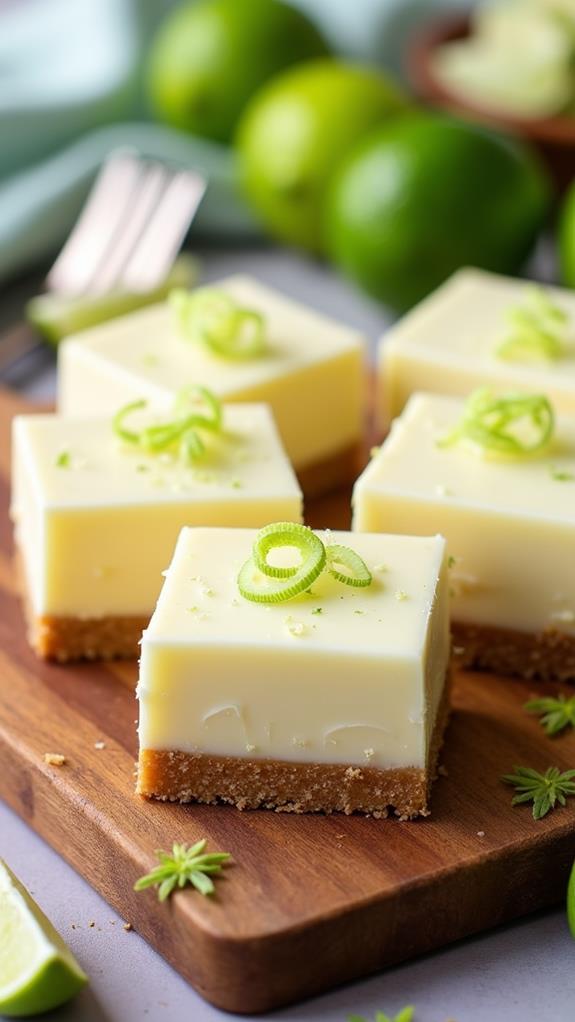
These bars feature a buttery graham cracker crust topped with a silky, tart key lime filling that strikes the perfect balance between sweet and sour. Whether you’re hosting a backyard barbecue, need a potluck contribution, or simply want to brighten someone’s day, these bars deliver sunshine in every bite.
What are Key Lime Pie Bars?
Key Lime Pie Bars are a simplified, portable version of the iconic Florida dessert. They consist of a pressed graham cracker crust base topped with a creamy, tangy key lime custard filling. The bars capture the essence of traditional key lime pie but in a format that’s easier to make, serve, and transport.
The key lime filling gets its distinctive flavor from key lime juice, which is more tart and aromatic than regular Persian limes. Combined with sweetened condensed milk and eggs, it creates a custard-like texture that sets beautifully when baked. The result is a dessert that’s both elegant and casual, perfect for any occasion.
Ingredients List for Easy Key Lime Pie Bars
For the Crust:
- 1½ cups graham cracker crumbs (about 12 whole crackers)
- ⅓ cup granulated sugar
- 6 tablespoons unsalted butter, melted
- Pinch of salt
For the Key Lime Filling:
- 4 large egg yolks
- 1 (14 oz) can sweetened condensed milk
- ½ cup fresh key lime juice (about 12-15 key limes)
- 1 tablespoon key lime zest
- ¼ teaspoon vanilla extract
- Pinch of salt
For Garnish (Optional):
- Whipped cream
- Additional lime zest
- Thin lime slices
How to Make Easy Key Lime Pie Bars: A Step-by-Step Guide
Creating these delightful bars is straightforward, but attention to detail ensures the best results. Here’s my comprehensive guide to making perfect Key Lime Pie Bars every time:
1. Prepare Your Pan and Oven:
- Preheat your oven to 350°F (175°C).
- Line an 8×8-inch square baking pan with parchment paper, leaving some overhang for easy removal.
- Lightly grease the parchment paper with butter or cooking spray.
2. Make the Graham Cracker Crust:
- In a medium bowl, combine graham cracker crumbs, sugar, and salt.
- Pour the melted butter over the mixture and stir until everything is evenly moistened.
- The mixture should hold together when pressed but not be overly wet.
- Press the mixture firmly and evenly into the bottom of your prepared pan.
- Use the bottom of a measuring cup or glass to ensure an even, compact layer.
3. Pre-bake the Crust:
- Bake the crust for 8-10 minutes until it’s lightly golden and set.
- Remove from oven and let cool slightly while you prepare the filling.
- Reduce oven temperature to 325°F (163°C).
4. Prepare the Key Lime Filling:
- In a large bowl, whisk the egg yolks until smooth.
- Add the sweetened condensed milk and whisk until well combined.
- Slowly pour in the key lime juice while whisking continuously to prevent curdling.
- Add the lime zest, vanilla extract, and salt, mixing until smooth.
- Let the mixture sit for 2-3 minutes to allow it to thicken slightly.
5. Assemble and Bake:
- Pour the key lime filling over the pre-baked crust, spreading it evenly.
- Gently tap the pan on the counter to release any air bubbles.
- Bake for 18-22 minutes, until the filling is set but still slightly jiggly in the center.
- The top should not brown; if it starts to, cover loosely with foil.
6. Cool and Chill:
- Remove from oven and cool completely at room temperature for about 1 hour.
- Refrigerate for at least 3 hours, or preferably overnight, before cutting.
- Use the parchment paper overhang to lift the bars from the pan before slicing.
Substitutions and Variations
These Key Lime Pie Bars are wonderfully adaptable to different tastes and dietary needs:
- Lime Juice: If key limes aren’t available, use fresh Persian lime juice, though the flavor will be slightly less intense.
- Crust Options: Try crushed vanilla wafers, gingersnaps, or even shortbread cookies instead of graham crackers.
- Dairy-Free Version: Use coconut cream in place of sweetened condensed milk, though you may need to add extra sweetener.
- Gluten-Free: Use gluten-free graham crackers or almond flour mixed with butter and sugar for the crust.
- Coconut Twist: Add ¼ cup shredded coconut to the crust for tropical flair.
- Chocolate Addition: Drizzle melted white chocolate over the cooled bars for extra indulgence.
Common Mistakes to Avoid
Avoid these pitfalls to ensure your Key Lime Pie Bars turn out perfectly:
- Under-pressing the Crust: A loose crust will crumble when cut. Press firmly and evenly for best results.
- Overbaking: The filling should be just set, not firm. Overbaking creates a rubbery texture.
- Skipping the Chill Time: Cutting too early results in messy, soft bars that won’t hold their shape.
- Using Bottled Lime Juice: Fresh juice makes a significant difference in flavor and quality.
- Not Zesting Before Juicing: Always zest your limes before cutting them for juice.
How to Serve Key Lime Pie Bars
These bars are delicious on their own, but a few accompaniments can elevate the experience. Serve them chilled with a small dollop of freshly whipped cream and a sprinkle of lime zest. For special occasions, add a thin lime wheel as garnish or dust lightly with powdered sugar.
I love serving these at summer gatherings alongside fresh berries or tropical fruit. They pair beautifully with iced tea, lemonade, or even a crisp white wine for adult gatherings. The portable nature makes them perfect for picnics, potlucks, and casual entertaining.
Presentation Ideas for Key Lime Pie Bars
Make your bars look as good as they taste with these simple presentation tips:
- Clean Cuts: Use a sharp knife dipped in warm water and wiped clean between cuts for neat edges.
- Garnish Artfully: Place a small lime twist or a few fresh mint leaves on each bar for color contrast.
- Dust with Powdered Sugar: A light dusting adds elegance and visual appeal.
- Serve on Colorful Plates: The pale green filling looks stunning against bright or contrasting dinnerware.
Key Lime Pie Bars Recipe Tips
Here are my tried-and-true tips for success:
- Room Temperature Ingredients: Let eggs come to room temperature for easier mixing and smoother filling.
- Strain the Filling: For ultra-smooth bars, strain the filling through a fine-mesh sieve before pouring.
- Test for Doneness: The center should be just set but still have a slight jiggle when gently shaken.
- Use Fresh Zest: Microplane graters work best for fine, aromatic zest without bitter white pith.
- Line Your Pan Well: Proper lining ensures easy removal and clean presentation.
How to Store Key Lime Pie Bars
Store your finished bars properly to maintain their texture and flavor. Cover tightly with plastic wrap or transfer to an airtight container and refrigerate for up to 4 days. The bars actually improve after a day or two as the flavors meld and the texture sets perfectly.
For longer storage, wrap individual bars in plastic wrap and freeze for up to 2 months. Thaw in the refrigerator overnight before serving. Never leave these bars at room temperature for more than 2 hours due to the dairy content.
Frequently Asked Questions (FAQs)
Q: Can I use regular limes instead of key limes?
A: Yes, though the flavor will be less intense. You may want to add an extra tablespoon of juice and increase the zest slightly.
Q: Why is my filling not setting properly?
A: Make sure you’re using fresh lime juice and not overbaking. The acid in the lime juice helps the filling set, so bottled juice may not work as well.
Q: Can I make these bars ahead of time?
A: Absolutely! These bars are perfect make-ahead desserts and actually taste better after chilling overnight.
Q: How do I know when the bars are done baking?
A: The filling should be set around the edges with just a slight jiggle in the center. It will continue to set as it cools.
Q: Can I double this recipe?
A: Yes, use a 9×13-inch pan and increase baking time by 5-8 minutes. Watch carefully for doneness.
Q: What’s the difference between key limes and regular limes?
A: Key limes are smaller, more acidic, and have a more complex, aromatic flavor than Persian limes.
Conclusion
These Easy Key Lime Pie Bars bring all the joy of the classic dessert in a convenient, shareable format. The combination of buttery graham cracker crust and tangy-sweet key lime filling creates a perfect balance that’s both refreshing and satisfying.
I’ve found that these bars never fail to impress guests and always disappear quickly at gatherings. The beauty lies in their simplicity – with just a handful of ingredients and straightforward techniques, you can create a dessert that tastes like it came from a fancy bakery.
Whether you’re a seasoned baker or just starting your culinary journey, these Key Lime Pie Bars offer a foolproof way to create something special. The make-ahead nature and excellent keeping qualities make them ideal for busy schedules and entertaining. Embrace the bright, sunny flavors and enjoy the compliments that are sure to follow. Happy baking!