Espresso Infused Mocha Poke Cake Recipe
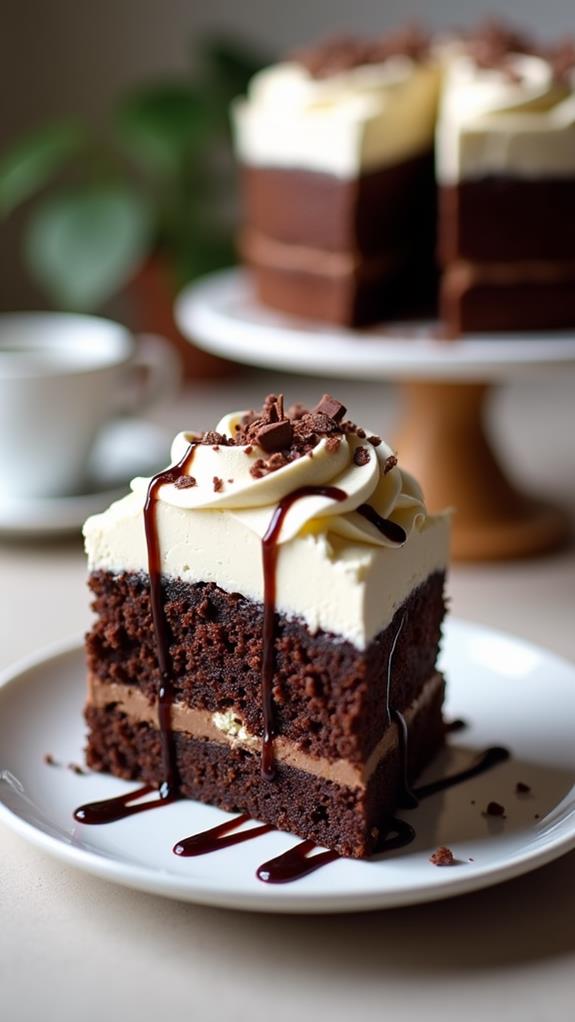
Looking for a dessert that combines the bold flavors of coffee and chocolate in one irresistible treat? This Espresso Infused Mocha Poke Cake is exactly what you need. With its moist chocolate base, rich espresso-soaked holes, and decadent mocha topping, this cake delivers an intense coffee-chocolate experience that will have everyone asking for seconds.
Perfect for coffee lovers and dessert enthusiasts alike, this poke cake is surprisingly easy to make yet impressive enough for special occasions. Let me walk you through creating this show-stopping dessert that’s guaranteed to become your new favorite.
What is “Espresso Infused Mocha Poke Cake”?
An Espresso Infused Mocha Poke Cake is a decadent dessert that starts with a moist chocolate cake base. After baking, holes are poked throughout the cake and filled with a concentrated espresso mixture, allowing the coffee flavor to penetrate deep into every bite. The cake is then topped with a rich mocha frosting that combines chocolate and coffee flavors into one heavenly finish.
This technique, known as “poking,” ensures that every forkful delivers intense coffee and chocolate flavors. The result is a dessert that’s incredibly moist, flavorful, and perfect for anyone who can’t get enough of the coffee-chocolate combination.
Ingredients List for Espresso Infused Mocha Poke Cake
For the Chocolate Cake:
- 1¾ cups all-purpose flour
- 2 cups granulated sugar
- ¾ cup unsweetened cocoa powder
- 2 teaspoons baking soda
- 1 teaspoon baking powder
- 1 teaspoon salt
- 2 large eggs
- 1 cup buttermilk
- 1 cup strong brewed coffee, cooled
- ½ cup vegetable oil
- 1 teaspoon vanilla extract
For the Espresso Poke Mixture:
- 1 cup strong espresso or very strong coffee, hot
- ¼ cup coffee liqueur (optional)
- 3 tablespoons brown sugar
- 1 tablespoon instant espresso powder
For the Mocha Frosting:
- 8 oz cream cheese, softened
- ½ cup butter, softened
- 3 cups powdered sugar
- ⅓ cup unsweetened cocoa powder
- 2 tablespoons instant espresso powder
- ¼ cup heavy cream
- 1 teaspoon vanilla extract
- Chocolate shavings for garnish
How to Cook Espresso Infused Mocha Poke Cake: A Step-by-Step Guide
Creating this incredible Espresso Infused Mocha Poke Cake involves several simple steps that layer flavors to create an unforgettable dessert. Here’s my detailed guide to ensure perfect results:
1. Prepare the Chocolate Cake:
- Preheat your oven to 350°F (175°C) and grease a 9×13-inch baking pan.
- In a large bowl, whisk together flour, sugar, cocoa powder, baking soda, baking powder, and salt.
- In another bowl, combine eggs, buttermilk, cooled coffee, vegetable oil, and vanilla extract.
- Gradually add the wet ingredients to the dry ingredients, mixing until just combined.
- Pour the batter into your prepared pan and bake for 30-35 minutes, or until a toothpick inserted in the center comes out clean.
2. Make the Espresso Poke Mixture:
- While the cake is still warm, prepare your espresso mixture.
- Combine hot espresso, coffee liqueur (if using), brown sugar, and instant espresso powder.
- Stir until the sugar and espresso powder are completely dissolved.
- Let the mixture cool slightly but use while still warm for better absorption.
3. Poke and Soak the Cake:
- Using the handle of a wooden spoon or a skewer, poke holes all over the warm cake, spacing them about 1 inch apart.
- Make sure the holes go about halfway through the cake for optimal flavor distribution.
- Slowly pour the espresso mixture over the entire cake, allowing it to soak into the holes.
- Let the cake cool completely at room temperature, then refrigerate for at least 2 hours.
4. Prepare the Mocha Frosting:
- In a large bowl, beat the softened cream cheese and butter until light and fluffy.
- In a separate bowl, sift together powdered sugar, cocoa powder, and instant espresso powder.
- Gradually add the dry ingredients to the cream cheese mixture, alternating with heavy cream.
- Beat in vanilla extract until the frosting is smooth and spreadable.
5. Assemble and Finish:
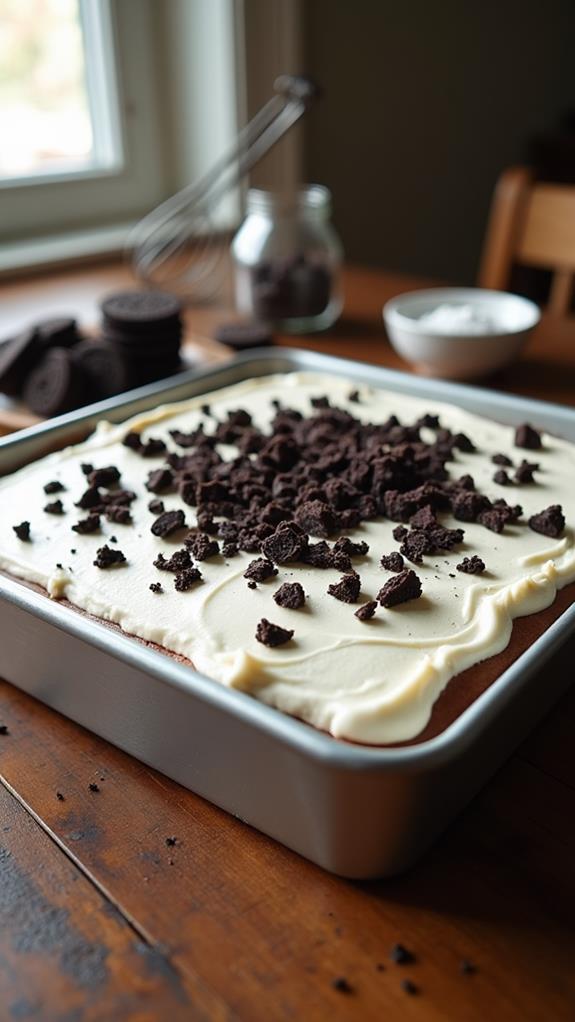
- Spread the mocha frosting evenly over the chilled cake.
- Garnish with chocolate shavings for an elegant finish.
- Refrigerate for at least 1 hour before serving to allow flavors to meld.
Substitutions and Variations
Want to customize your Espresso Infused Mocha Poke Cake? Here are some delicious substitutions and variations to try:
- Coffee Alternatives: Use decaf espresso if you want to reduce caffeine, or try chai-spiced coffee for a unique twist.
- Liqueur Options: Replace coffee liqueur with Kahlúa, Baileys, or amaretto for different flavor profiles.
- Frosting Variations: Try a whipped chocolate ganache instead of cream cheese frosting for a lighter texture.
- Flour Substitutes: Use gluten-free flour blend for those with gluten sensitivities.
- Dairy-Free Options: Substitute buttermilk with plant-based milk mixed with lemon juice, and use vegan cream cheese and butter alternatives.
- Sweetness Levels: Adjust sugar in both the cake and frosting to suit your taste preferences.
Common Mistakes to Avoid
To ensure your Espresso Infused Mocha Poke Cake turns out perfectly, avoid these common pitfalls:
- Using Cold Coffee for Poking: The espresso mixture should be warm to properly soak into the cake. Cold liquid won’t absorb as well.
- Not Poking Deep Enough: Make sure your holes go at least halfway through the cake for maximum flavor infusion.
- Rushing the Chilling Process: Allow adequate time for the cake to chill so the flavors can properly develop and meld together.
- Over-mixing the Batter: Mix just until ingredients are combined to prevent a tough, dense cake.
- Skipping the Instant Espresso: This ingredient intensifies the coffee flavor significantly and shouldn’t be omitted.
How to Serve Espresso Infused Mocha Poke Cake
This rich dessert is best served chilled, making it perfect for make-ahead entertaining. Cut generous squares and serve on dessert plates, perhaps with a dollop of whipped cream or a scoop of vanilla ice cream to balance the intense coffee flavors.
I like to serve this cake with a strong cup of coffee or espresso for the ultimate coffee lover’s experience. For those who prefer something lighter, a glass of cold milk provides a nice contrast to the rich, intense flavors.
Presentation Ideas for Espresso Infused Mocha Poke Cake
Make your cake as beautiful as it is delicious with these presentation tips:
- Dust with Cocoa: Lightly dust the top with cocoa powder using a fine-mesh sieve for an elegant finish.
- Coffee Bean Garnish: Place whole coffee beans around the edges or create patterns on top of the frosting.
- Drizzle Design: Create artistic drizzles with melted chocolate or caramel sauce across the frosting.
- Individual Portions: Cut into squares and serve on individual plates with a mint sprig for a restaurant-quality presentation.
Espresso Infused Mocha Poke Cake Recipe Tips
Here are my best tips for creating the perfect Espresso Infused Mocha Poke Cake:
- Quality Coffee Matters: Use high-quality espresso or strong coffee for the best flavor. The coffee taste is prominent, so don’t skimp here.
- Room Temperature Ingredients: Ensure eggs, buttermilk, and other dairy ingredients are at room temperature for better mixing and texture.
- Don’t Overpoke: While you want good coverage, too many holes can make the cake fall apart.
- Chill Overnight: For the most intense flavors, let the cake chill overnight before adding frosting.
- Sift Dry Ingredients: Sifting cocoa powder and powdered sugar prevents lumps in both the cake and frosting.
How to Store Espresso Infused Mocha Poke Cake
This cake actually improves with time, making it perfect for advance preparation. Cover tightly with plastic wrap or store in an airtight container in the refrigerator for up to 5 days. The flavors continue to develop and intensify during storage.
For longer storage, you can freeze the unfrosted cake for up to 3 months. Wrap individual pieces in plastic wrap and place in freezer bags. Thaw in the refrigerator overnight before frosting and serving.
Frequently Asked Questions (FAQs)
Q: Can I make this cake without coffee liqueur?
A: Absolutely! The coffee liqueur adds depth but isn’t essential. Simply replace it with additional espresso or strong coffee for the poke mixture.
Q: How strong is the coffee flavor in this cake?
A: The coffee flavor is quite prominent and intensifies after chilling. If you prefer a milder coffee taste, reduce the instant espresso powder by half.
Q: Can I use regular brewed coffee instead of espresso?
A: Yes, but use very strong coffee and add extra instant espresso powder to achieve the desired intensity of flavor.
Q: Why is my frosting too thick or too thin?
A: Adjust the consistency by adding more powdered sugar for thickness or more heavy cream for thinning. The humidity can affect frosting consistency.
Q: Can I make this as a layer cake instead?
A: Certainly! Divide the batter between two 9-inch round pans, adjust baking time to 25-30 minutes, and poke each layer before stacking with frosting between.
Q: Is there a way to make this cake less sweet?
A: Reduce the sugar in the cake by ¼ cup and use dark cocoa powder for a more intense, less sweet chocolate flavor.
Conclusion
This Espresso Infused Mocha Poke Cake represents the perfect marriage of coffee and chocolate in dessert form. The technique of poking and soaking ensures that every bite delivers intense flavor, while the mocha frosting provides a luxurious finish that coffee lovers will adore.
Whether you’re entertaining guests, celebrating a special occasion, or simply indulging your coffee cravings, this cake delivers on all fronts. The make-ahead friendly nature makes it ideal for busy schedules, and the impressive results will have everyone asking for your secret.
I encourage you to try this recipe and experience the incredible depth of flavor that develops when coffee and chocolate come together in this remarkable dessert. Don’t be surprised if this becomes your go-to cake for impressing friends and satisfying your own coffee-chocolate cravings. Happy baking!

