Glazed Soy Sauce Brown Sugar Chicken Thighs Recipe
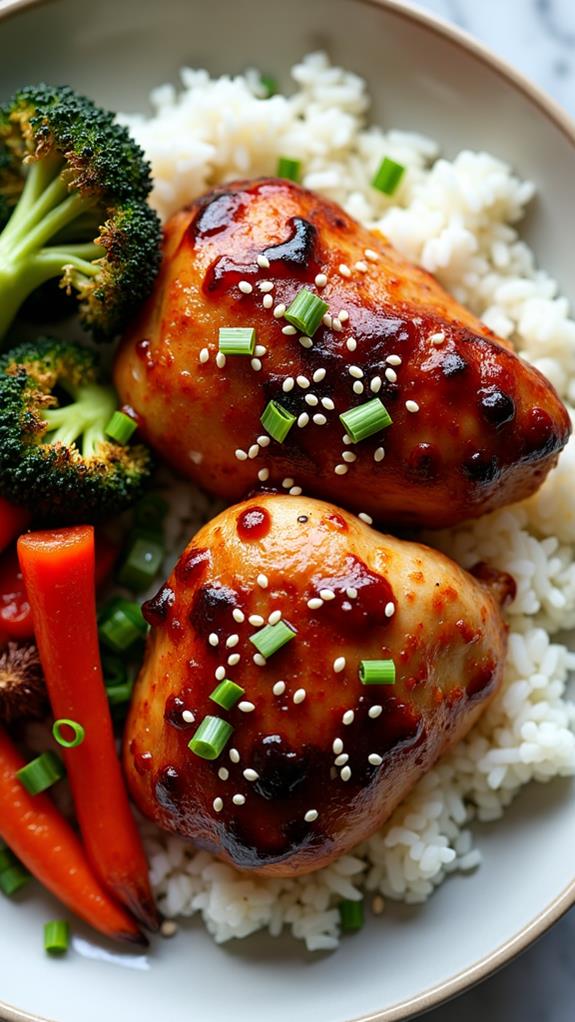
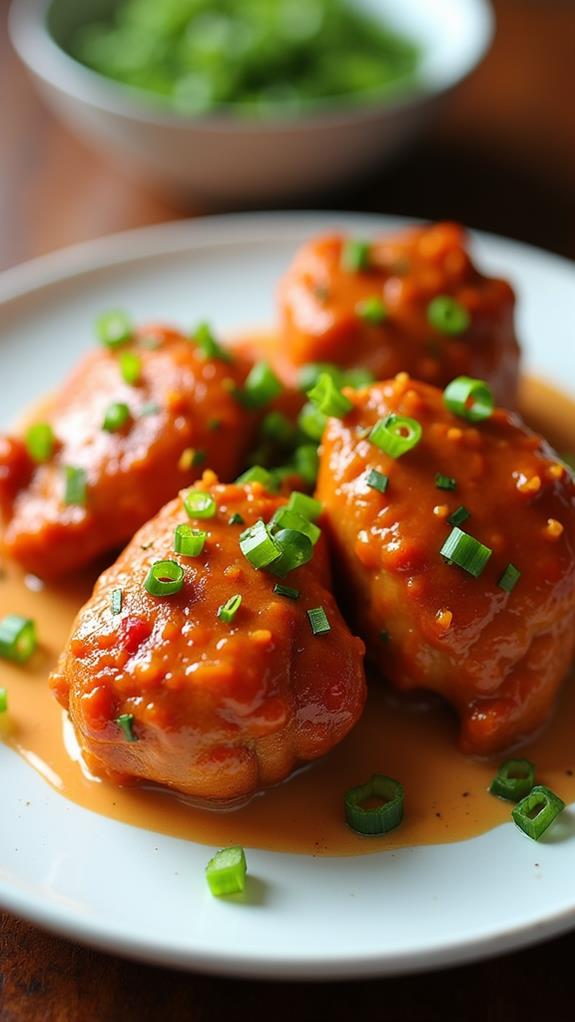
When I first discovered this Glazed Soy Sauce Brown Sugar Chicken Thighs recipe, I knew I had found something special. The perfect balance of sweet and savory flavors creates a sticky, caramelized glaze that transforms ordinary chicken thighs into an extraordinary meal.
This recipe combines the umami richness of soy sauce with the deep sweetness of brown sugar, resulting in tender, juicy chicken with a glossy finish that’s simply irresistible. Follow along as I guide you through creating this restaurant-quality dish in your own kitchen.
What is “Glazed Soy Sauce Brown Sugar Chicken Thighs”?
Glazed Soy Sauce Brown Sugar Chicken Thighs is an Asian-inspired dish that features bone-in chicken thighs cooked in a luscious glaze made from soy sauce, brown sugar, and aromatic seasonings. The chicken is first seared to develop a golden crust, then simmered in the sweet and savory sauce until it becomes beautifully caramelized and glossy.
This cooking method creates incredibly tender meat that falls off the bone while developing a rich, complex flavor profile. The glaze reduces during cooking, intensifying the flavors and creating that signature sticky coating that makes this dish so appealing.
Ingredients List for Glazed Soy Sauce Brown Sugar Chicken Thighs
- 6-8 bone-in, skin-on chicken thighs (about 2-3 pounds)
- 1/3 cup low-sodium soy sauce
- 1/4 cup packed brown sugar
- 3 tablespoons rice vinegar
- 2 tablespoons honey
- 4 cloves garlic, minced
- 1 tablespoon fresh ginger, grated
- 1 tablespoon sesame oil
- 1 teaspoon cornstarch
- 1/2 teaspoon red pepper flakes (optional)
- 2 tablespoons vegetable oil
- 3 green onions, sliced thin
- 1 tablespoon sesame seeds
- Salt and black pepper to taste
How to Cook Glazed Soy Sauce Brown Sugar Chicken Thighs: A Step-by-Step Guide
Creating these glazed chicken thighs involves several key steps that work together to build layers of flavor. Here’s my detailed process to ensure perfect results every time:
1. Prepare the Chicken:
- Pat the chicken thighs completely dry with paper towels to ensure proper browning.
- Season both sides generously with salt and black pepper.
- Let the chicken sit at room temperature for 15-20 minutes before cooking for even cooking.
2. Make the Glaze Sauce:
- In a medium bowl, whisk together soy sauce, brown sugar, rice vinegar, and honey until the sugar dissolves.
- Add minced garlic, grated ginger, sesame oil, and red pepper flakes if using.
- In a small bowl, mix cornstarch with 2 tablespoons of water to create a slurry, then stir into the sauce mixture.
3. Sear the Chicken:
- Heat vegetable oil in a large, heavy-bottomed skillet or Dutch oven over medium-high heat.
- Place chicken thighs skin-side down and cook for 4-5 minutes until the skin is golden brown and crispy.
- Flip the chicken and cook for another 3-4 minutes to brown the other side.
4. Add the Glaze:
- Reduce heat to medium and carefully pour the prepared glaze around the chicken thighs.
- The sauce will bubble vigorously at first, so be cautious of splattering.
- Bring the sauce to a gentle simmer and reduce heat to medium-low.
5. Simmer and Glaze:
- Cover the pan and cook for 20-25 minutes, turning the chicken every 5-7 minutes to ensure even coating.
- Baste the chicken frequently with the reducing sauce using a spoon.
- Continue cooking until the internal temperature reaches 165°F and the sauce has thickened to a glossy glaze.
6. Final Touches:
- Remove from heat and let rest for 5 minutes to allow the glaze to set.
- Garnish with sliced green onions and sesame seeds before serving.
- Serve immediately while the glaze is still warm and glossy.
Substitutions and Variations
This versatile recipe can be adapted to suit different dietary needs and flavor preferences. Here are some variations I’ve successfully tried:
- Chicken Cut: Substitute with boneless thighs for quicker cooking, or use drumsticks for a fun finger-food option.
- Sweetener: Replace brown sugar with maple syrup, coconut sugar, or even pineapple juice for different flavor profiles.
- Acid Component: Use apple cider vinegar or lime juice instead of rice vinegar for a different tangy note.
- Heat Level: Add sriracha, gochujang, or fresh chilies to increase the spice level.
- Gluten-Free: Use tamari or coconut aminos instead of soy sauce for a gluten-free version.
- Additional Flavors: Try adding orange zest, five-spice powder, or fresh herbs like cilantro for unique twists.
Common Mistakes to Avoid
Through my experience making this recipe, I’ve identified several pitfalls that can affect the final result:
- Not Drying the Chicken: Wet chicken won’t brown properly, resulting in less flavor development and poor glaze adherence.
- Cooking Over High Heat: Too much heat can burn the sugar in the glaze before the chicken is fully cooked.
- Skipping the Cornstarch: This helps thicken the glaze properly; without it, you’ll have a thin sauce instead of a glossy coating.
- Not Basting Regularly: Frequent basting ensures even coating and prevents the glaze from burning on the bottom of the pan.
- Overcrowding the Pan: This leads to steaming instead of proper browning; cook in batches if necessary.
How to Serve Glazed Soy Sauce Brown Sugar Chicken Thighs
These glazed chicken thighs pair beautifully with steamed jasmine rice or brown rice to soak up the delicious sauce. I love serving them alongside steamed broccoli, snap peas, or bok choy for a complete meal. Asian-style coleslaw or cucumber salad provides a refreshing contrast to the rich, sweet glaze.
For a more substantial meal, try serving over noodles or with roasted vegetables like Brussels sprouts or carrots. The versatility of this dish makes it perfect for both casual family dinners and special occasions.
Presentation Ideas for Glazed Soy Sauce Brown Sugar Chicken Thighs
To make your glazed chicken thighs look restaurant-worthy, consider these presentation techniques:
- Colorful Garnish: Sprinkle with chopped cilantro, sliced red chilies, or microgreens for vibrant color contrast.
- Sauce Drizzle: Reserve some glaze and drizzle it artfully around the plate for an elegant touch.
- Textural Elements: Add toasted sesame seeds, crushed peanuts, or crispy shallots for interesting texture.
- Fresh Elements: Serve with lime wedges or fresh herb sprigs to brighten the rich flavors.
Glazed Soy Sauce Brown Sugar Chicken Thighs Recipe Tips
Here are my top tips for achieving the best results with this recipe:
- Choose Quality Ingredients: Use good-quality soy sauce and fresh ginger for the best flavor impact.
- Don’t Rush the Browning: Proper searing creates the foundation for great flavor and texture.
- Monitor the Heat: Keep the temperature at medium-low once you add the glaze to prevent burning.
- Taste and Adjust: Add a pinch more brown sugar for sweetness or a splash of vinegar for tang to suit your preferences.
- Use a Meat Thermometer: Ensure food safety by checking that the internal temperature reaches 165°F.
- Let It Rest: Allowing the chicken to rest after cooking helps the glaze set and the juices redistribute.
How to Store Glazed Soy Sauce Brown Sugar Chicken Thighs
Allow the glazed chicken thighs to cool completely before storing (within 2 hours of cooking). Transfer to an airtight container and refrigerate for up to 4 days. The glaze may solidify when cold but will become glossy again when reheated.
For longer storage, you can freeze the cooked chicken for up to 3 months. Thaw overnight in the refrigerator before reheating. To reheat, use the oven at 350°F for 15-20 minutes or microwave in 30-second intervals until heated through.
Frequently Asked Questions (FAQs)
Q: Can I make this recipe with boneless chicken thighs?
A: Absolutely! Boneless thighs will cook faster, so reduce the simmering time to 12-15 minutes and check for doneness early.
Q: What if my glaze is too thin?
A: Mix an additional teaspoon of cornstarch with cold water and stir it into the simmering sauce. Cook for a few more minutes until it thickens.
Q: Can I prep this dish ahead of time?
A: Yes, you can marinate the chicken in the sauce for up to 24 hours before cooking. This actually enhances the flavor penetration.
Q: Is there a way to make this less sweet?
A: Reduce the brown sugar to 2-3 tablespoons and increase the rice vinegar slightly to balance the flavors.
Q: Can I use this glaze on other proteins?
A: Definitely! This glaze works wonderfully with pork chops, salmon, or even tofu for a vegetarian option.
Q: What should I do if the glaze starts to burn?
A: Lower the heat immediately and add a splash of water or broth to the pan to prevent further burning.
Conclusion
Glazed Soy Sauce Brown Sugar Chicken Thighs represents the perfect marriage of sweet and savory flavors that creates a truly memorable meal. The tender, juicy chicken combined with the glossy, caramelized glaze makes this dish a standout addition to any dinner table.
I’ve found that this recipe never fails to impress guests and has become a regular rotation in my weekly meal planning. The simple ingredients come together to create complex flavors that rival those found in your favorite Asian restaurants.
Whether you’re cooking for a special occasion or simply want to elevate your weeknight dinner routine, this glazed chicken thigh recipe delivers both on taste and visual appeal. Take your time with the process, enjoy the aromatic experience of cooking, and savor every bite of this deliciously satisfying dish. Happy cooking!

