Homemade Chocolate Peanut Butter Cake Recipe
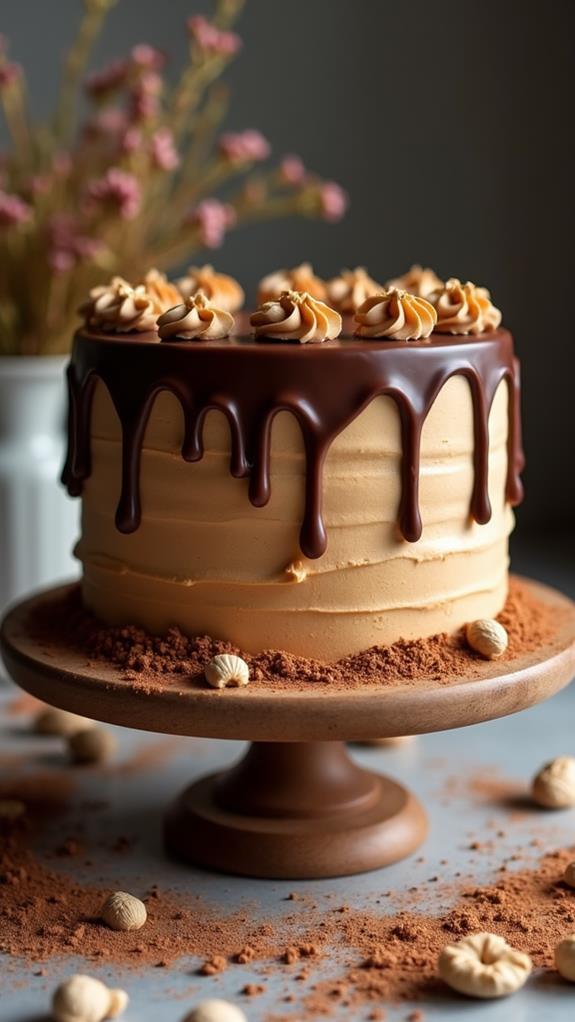
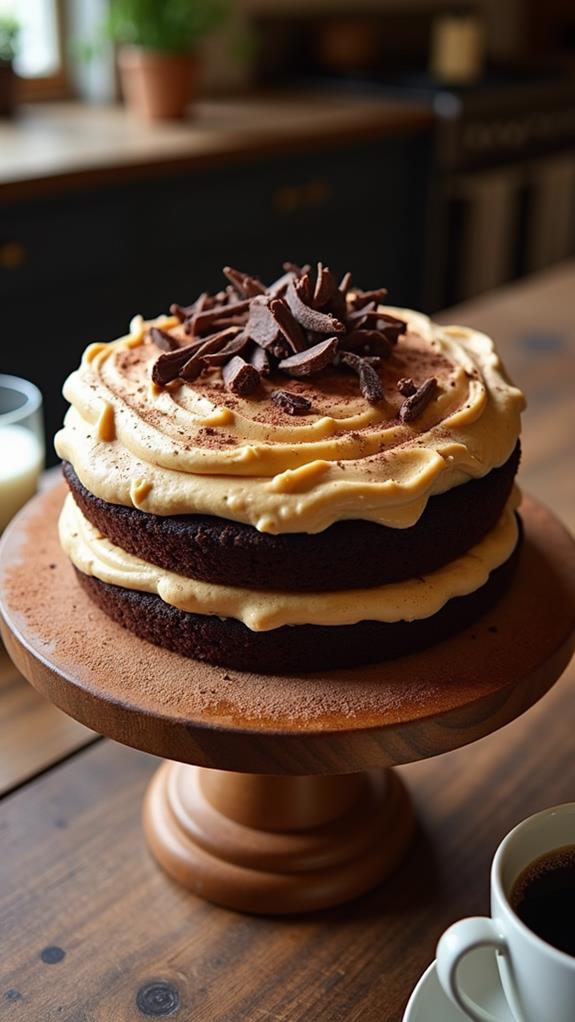
Craving the perfect combination of rich chocolate and creamy peanut butter? This Homemade Chocolate Peanut Butter Cake is your answer to dessert dreams come true. With its moist chocolate layers and silky peanut butter frosting, this cake delivers an irresistible flavor combination that will have everyone asking for the recipe.
Whether you’re celebrating a special occasion or simply want to treat yourself to something extraordinary, this cake promises to deliver bakery-quality results right from your own kitchen. Let me guide you through creating this show-stopping dessert that’s surprisingly simple to make.
What is Homemade Chocolate Peanut Butter Cake?
Homemade Chocolate Peanut Butter Cake is a decadent layered dessert that combines the best of both worlds: rich, moist chocolate cake paired with creamy peanut butter frosting. This classic American combination has been beloved for generations, and for good reason.
The cake features tender chocolate layers that are perfectly balanced with a sweet and nutty peanut butter buttercream. Unlike store-bought versions, making this cake from scratch allows you to control the quality of ingredients and achieve the perfect texture and flavor balance that makes this dessert truly special.
Ingredients List for Homemade Chocolate Peanut Butter Cake
For the Chocolate Cake:
- 1¾ cups all-purpose flour
- 2 cups granulated sugar
- ¾ cup unsweetened cocoa powder
- 2 teaspoons baking soda
- 1 teaspoon baking powder
- 1 teaspoon salt
- 2 large eggs, room temperature
- 1 cup buttermilk, room temperature
- 1 cup strong black coffee, cooled
- ½ cup vegetable oil
- 1 teaspoon vanilla extract
For the Peanut Butter Frosting:
- 1 cup unsalted butter, softened
- 1 cup creamy peanut butter
- 4 cups powdered sugar
- ¼ cup heavy cream
- 2 teaspoons vanilla extract
- ½ teaspoon salt
For Decoration (Optional):
- ½ cup chocolate chips or chopped peanuts
- 2 tablespoons cocoa powder for dusting
How to Make Homemade Chocolate Peanut Butter Cake: A Step-by-Step Guide
Creating this spectacular cake involves several steps, but each one is straightforward and rewarding. Here’s my detailed guide to ensure your cake turns out perfectly every time:
1. Prepare Your Baking Setup:
- Preheat your oven to 350°F (175°C).
- Grease two 9-inch round cake pans with butter or cooking spray.
- Line the bottom of each pan with parchment paper for easy removal.
- Lightly dust the pans with cocoa powder, tapping out any excess.
2. Mix the Dry Ingredients:
- In a large mixing bowl, whisk together flour, sugar, cocoa powder, baking soda, baking powder, and salt.
- Make sure there are no lumps and all ingredients are evenly distributed.
- This dry mixture forms the foundation of your cake’s structure and flavor.
3. Combine the Wet Ingredients:
- In a separate bowl, beat the eggs until well combined.
- Add buttermilk, cooled coffee, vegetable oil, and vanilla extract.
- Whisk everything together until the mixture is smooth and well incorporated.
4. Create the Cake Batter:
- Pour the wet ingredients into the bowl with the dry ingredients.
- Using a large spoon or electric mixer on low speed, mix until just combined.
- Don’t overmix; the batter should be smooth but may have a few small lumps.
- The coffee will make the batter quite thin, which is exactly what we want for a moist cake.
5. Bake the Cake Layers:
- Divide the batter evenly between your prepared pans.
- Bake for 28-32 minutes, or until a toothpick inserted in the center comes out with just a few moist crumbs.
- Avoid opening the oven door during the first 25 minutes of baking.
- Let the cakes cool in their pans for 10 minutes before turning them out onto wire racks.
6. Prepare the Peanut Butter Frosting:
- In a large bowl, cream the softened butter until light and fluffy (about 3-4 minutes).
- Add the peanut butter and mix until well combined.
- Gradually add the powdered sugar, one cup at a time, mixing well after each addition.
- Pour in the heavy cream, vanilla extract, and salt.
- Beat on high speed for 2-3 minutes until the frosting is smooth and spreadable.
7. Assemble Your Cake:
- Place one cake layer on your serving plate.
- Spread about one-third of the frosting evenly over the top.
- Place the second layer on top and press gently to secure.
- Use the remaining frosting to cover the top and sides of the cake.
- Create swirls or smooth finish as desired.
8. Add Final Touches:
- If using, sprinkle chocolate chips or chopped peanuts on top.
- Lightly dust with cocoa powder for an elegant finish.
- Refrigerate the cake for at least 30 minutes before serving to set the frosting.
Substitutions and Variations
I love how versatile this recipe is! Here are some substitutions and variations you can try to customize your Homemade Chocolate Peanut Butter Cake:
- Flour: Use cake flour instead of all-purpose for an even more tender crumb, or try almond flour for a gluten-free version (use 1½ cups).
- Coffee: Replace with hot water or milk if you prefer to avoid caffeine, though coffee enhances the chocolate flavor beautifully.
- Peanut Butter: Try almond butter, cashew butter, or sunflower seed butter for different flavor profiles or to accommodate allergies.
- Buttermilk: Make your own by adding 1 tablespoon of lemon juice to 1 cup of regular milk and letting it sit for 5 minutes.
- Oil: Substitute with melted butter or applesauce for different textures and flavors.
- Frosting Variations: Add cream cheese to the frosting for tang, or try a chocolate ganache instead for double chocolate indulgence.
Common Mistakes to Avoid
Through years of baking, I’ve learned to avoid these common pitfalls when making Chocolate Peanut Butter Cake:
- Overmixing the Batter: This can result in a tough, dense cake. Mix just until ingredients are combined.
- Using Cold Ingredients: Room temperature ingredients blend more easily and create a better texture.
- Overbaking: Check your cake a few minutes early; it continues cooking from residual heat even after removal from the oven.
- Frosting Warm Cake: Always let your cake layers cool completely before frosting, or the frosting will melt and slide off.
- Skipping the Parchment Paper: This simple step prevents your beautiful cake from sticking to the pan.
How to Serve Homemade Chocolate Peanut Butter Cake
This rich and indulgent cake is perfect for various occasions and serving styles. I recommend serving it at room temperature for the best flavor and texture. Cut clean slices using a sharp knife wiped between cuts.
For special occasions, pair each slice with a dollop of vanilla ice cream or a drizzle of chocolate sauce. A glass of cold milk is the classic accompaniment, though coffee or tea also complement the flavors beautifully. For adult gatherings, consider serving with a glass of red wine or bourbon.
Presentation Ideas for Homemade Chocolate Peanut Butter Cake
Make your cake as beautiful as it is delicious with these presentation ideas:
- Rustic Elegance: Leave the frosting slightly textured with visible swirls and top with a sprinkle of sea salt for a gourmet touch.
- Birthday Special: Add colorful sprinkles or pipe rosettes around the border using a star tip.
- Minimalist Chic: Create a smooth frosting finish and dust lightly with cocoa powder through a fine-mesh sieve.
- Chocolate Drip: Create a chocolate ganache drip around the edges for a modern, professional look.
Homemade Chocolate Peanut Butter Cake Recipe Tips
Here are my tried-and-true tips for cake success:
- Measure Accurately: Baking is a science, so use proper measuring cups and level your dry ingredients.
- Room Temperature Matters: Take eggs and buttermilk out 30-60 minutes before baking for best results.
- Test for Doneness: Use the toothpick test, but also gently press the center – it should spring back lightly.
- Coffee Secret: The coffee intensifies the chocolate flavor without making the cake taste like coffee.
- Frosting Consistency: If your frosting is too thick, add cream one tablespoon at a time. If too thin, add more powdered sugar.
How to Store Homemade Chocolate Peanut Butter Cake
Proper storage keeps your cake fresh and delicious for several days. Store the finished cake covered at room temperature for up to 2 days, or refrigerate for up to 5 days. The frosting actually helps keep the cake moist.
For longer storage, wrap unfrosted cake layers tightly in plastic wrap and freeze for up to 3 months. Thaw completely before frosting. If you have leftover frosted cake, cover it well and refrigerate, then let it come to room temperature before serving for the best flavor.
Frequently Asked Questions (FAQs)
Q: Can I make this cake ahead of time?
A: Absolutely! You can bake the cake layers up to 2 days ahead and store them wrapped at room temperature. The frosted cake can be made 1 day ahead and stored in the refrigerator.
Q: Why do you add coffee to chocolate cake?
A: Coffee enhances and deepens the chocolate flavor without making the cake taste like coffee. You can substitute with hot water if preferred.
Q: Can I make this as cupcakes instead?
A: Yes! This batter makes about 24 cupcakes. Bake at 350°F for 18-22 minutes and frost when completely cool.
Q: My frosting is too runny. How can I fix it?
A: Add more powdered sugar gradually until you reach the desired consistency. Make sure your butter wasn’t too soft when you started.
Q: Can I use natural peanut butter?
A: I recommend using regular creamy peanut butter for the best frosting texture. Natural peanut butter can make the frosting less stable.
Q: How do I know when my cake is done?
A: A toothpick inserted in the center should come out with just a few moist crumbs, and the cake should spring back lightly when touched.
Conclusion
This Homemade Chocolate Peanut Butter Cake represents everything I love about baking: simple ingredients transformed into something truly spectacular. The combination of rich chocolate cake and creamy peanut butter frosting creates a dessert that’s both nostalgic and impressive.
What makes this recipe special is its reliability and the way it brings people together. I’ve made this cake for birthdays, celebrations, and quiet Sunday afternoons, and it never fails to create smiles and satisfied sighs. The moist texture of the chocolate cake paired with the smooth, nutty frosting creates a perfect balance that appeals to both kids and adults.
Don’t be intimidated by making a layer cake from scratch – this recipe is forgiving and straightforward. Take your time with each step, use quality ingredients, and trust the process. The result will be a cake that not only tastes incredible but also gives you the satisfaction of creating something beautiful with your own hands. Happy baking!