Homemade Sweet Chili Sauce Recipe

Have you ever craved that perfect balance of sweet and spicy that only a good chili sauce can deliver? Making your own homemade sweet chili sauce is easier than you think and infinitely more satisfying than store-bought versions. This versatile condiment brings together the perfect harmony of sugar, heat, and tangy vinegar that will elevate everything from spring rolls to grilled chicken.
With just a handful of simple ingredients and about 15 minutes of your time, you can create a sauce that’s fresher, more flavorful, and completely customizable to your taste preferences. Let me guide you through this foolproof recipe that will become your new go-to condiment for countless dishes.
What is “Sweet Chili Sauce”?
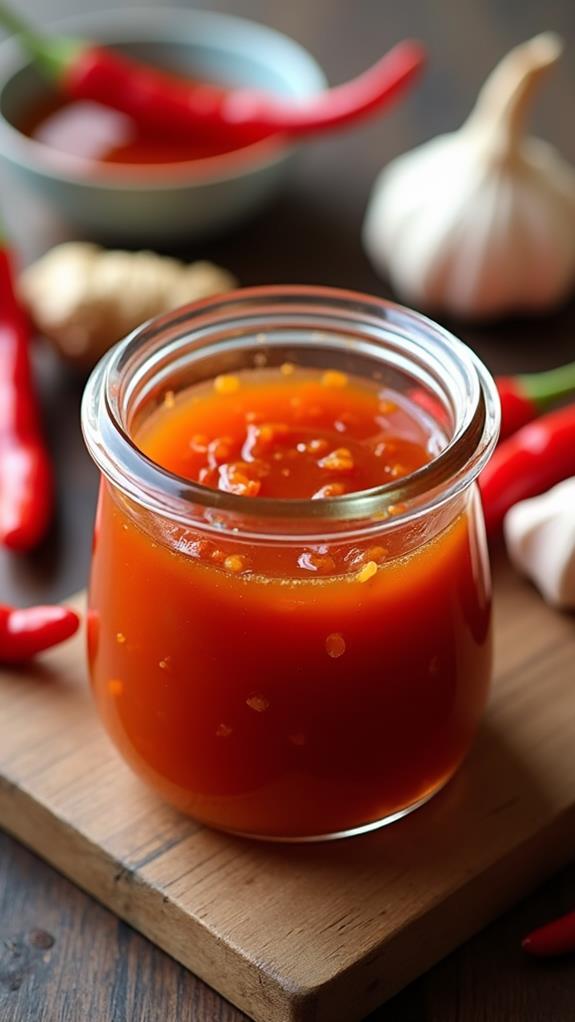
Sweet chili sauce is a popular condiment that originated in Thailand, where it’s known as “nam jim gai.” This glossy, amber-colored sauce strikes the perfect balance between sweet and spicy, with a consistency that’s thick enough to cling to food but thin enough to drizzle easily.
The sauce combines the heat of red chilies with the sweetness of sugar, balanced by the acidity of vinegar and enhanced with aromatic garlic and ginger. What makes homemade sweet chili sauce so special is its fresh, vibrant flavor that far surpasses anything you can buy in a bottle.
Unlike many commercial versions that rely on artificial preservatives and high fructose corn syrup, homemade sweet chili sauce uses natural ingredients that you can pronounce and control. The result is a sauce that’s not only tastier but also healthier and more economical than store-bought alternatives.
Ingredients List for Homemade Sweet Chili Sauce
- 1 cup granulated sugar
- ½ cup rice vinegar (or white vinegar)
- ¼ cup water
- 2 tablespoons red chili flakes (adjust to taste)
- 4 cloves garlic, minced
- 1 tablespoon fresh ginger, minced
- 1 teaspoon salt
- 2 tablespoons cornstarch
- 3 tablespoons cold water (for cornstarch slurry)
- 1 tablespoon soy sauce (optional, for depth)
- 1 fresh red chili, finely chopped (optional, for extra heat and color)
How to Make Homemade Sweet Chili Sauce: A Step-by-Step Guide
Creating the perfect sweet chili sauce is all about building layers of flavor and achieving the right consistency. Here’s my detailed guide to ensure your sauce turns out perfectly every time:
1. Prepare Your Ingredients:
- Mince the garlic and ginger finely to ensure they distribute evenly throughout the sauce.
- If using fresh chilies, remove seeds for less heat or keep them for more intensity.
- Create a cornstarch slurry by mixing cornstarch with cold water until smooth.
2. Combine the Base Ingredients:
- In a medium saucepan, combine sugar, rice vinegar, and ¼ cup water.
- Add the minced garlic, ginger, chili flakes, and salt to the mixture.
- Stir everything together until the sugar begins to dissolve.
3. Bring to a Simmer:
- Place the saucepan over medium heat and bring the mixture to a gentle simmer.
- Stir occasionally to prevent the sugar from burning on the bottom of the pan.
- Allow the mixture to simmer for 3-4 minutes until the sugar completely dissolves.
4. Add the Thickening Agent:
- Give your cornstarch slurry a quick stir to recombine it.
- Slowly pour the cornstarch mixture into the simmering sauce while stirring constantly.
- This prevents lumps from forming and ensures a smooth consistency.
5. Simmer Until Thickened:
- Continue cooking for 2-3 minutes until the sauce thickens to coat the back of a spoon.
- The sauce should have a glossy appearance and flow smoothly when drizzled.
- Add soy sauce if using, and fresh chopped chilies for extra heat and visual appeal.
6. Cool and Store:
- Remove from heat and let the sauce cool for 5 minutes before transferring to a clean jar.
- The sauce will continue to thicken slightly as it cools.
- Store in the refrigerator once completely cooled.
Substitutions and Variations
The beauty of homemade sweet chili sauce lies in its adaptability. Here are some substitutions and variations you can try to customize the sauce to your preferences:
- Sugar: Replace granulated sugar with brown sugar for a deeper, more complex sweetness, or use honey for a more natural option.
- Vinegar: Apple cider vinegar or white wine vinegar work well if you don’t have rice vinegar on hand.
- Heat Level: Adjust chili flakes from 1 tablespoon for mild to 3 tablespoons for very spicy, or use fresh Thai bird’s eye chilies for authentic heat.
- Garlic: Roasted garlic can be used instead of fresh for a mellower, sweeter garlic flavor.
- Ginger: Ground ginger can substitute fresh ginger, using about ½ teaspoon instead of 1 tablespoon fresh.
- Thickness: For a thinner sauce, reduce cornstarch to 1 tablespoon; for thicker consistency, increase to 3 tablespoons.
Common Mistakes to Avoid
When making sweet chili sauce, avoid these common pitfalls to ensure your sauce turns out perfectly:
- Burning the Sugar: Keep heat at medium and stir regularly to prevent the sugar from caramelizing too quickly or burning.
- Adding Cornstarch Directly: Always create a slurry with cold water first; adding cornstarch directly will create lumps.
- Overcooking: Once thickened, remove from heat promptly to prevent the sauce from becoming too thick or developing a burnt taste.
- Not Tasting as You Go: Adjust sweetness, heat, and acidity levels while cooking to achieve your perfect balance.
- Using Old Spices: Fresh garlic and ginger make a significant difference in flavor compared to powdered versions.
How to Serve Homemade Sweet Chili Sauce
Sweet chili sauce is incredibly versatile and can enhance a wide variety of dishes. Serve it as a dipping sauce for spring rolls, chicken nuggets, or tempura vegetables. It makes an excellent glaze for grilled or roasted meats, particularly chicken, pork, or salmon.
Use it as a condiment for Asian-inspired dishes like fried rice, noodle bowls, or lettuce wraps. The sauce also works wonderfully as a salad dressing when thinned with a little extra vinegar or as a marinade for proteins before cooking.
For appetizer platters, serve the sauce alongside cream cheese and crackers, or drizzle it over a cheese board for an unexpected sweet and spicy element that will surprise and delight your guests.
Presentation Ideas for Sweet Chili Sauce
To make your homemade sweet chili sauce look as appealing as it tastes, consider these presentation ideas:
- Elegant Serving Bowls: Transfer the sauce to small ceramic bowls for a restaurant-quality presentation when serving as a dip.
- Drizzle Patterns: Use a squeeze bottle to create artistic drizzles on plates when using as a garnish for main dishes.
- Garnish Enhancement: Top the sauce with finely chopped fresh cilantro, green onions, or sesame seeds for added color and texture.
- Glass Jars: Store in attractive glass jars for gift-giving or to showcase the beautiful amber color of your homemade sauce.
Sweet Chili Sauce Recipe Tips
Here are my essential tips for making the best homemade sweet chili sauce:
- Quality Ingredients: Use fresh garlic and ginger for the most vibrant flavor profile.
- Temperature Control: Maintain medium heat throughout cooking to prevent burning while ensuring proper dissolution and thickening.
- Consistency Check: The sauce should coat the back of a spoon when done; remember it will thicken slightly as it cools.
- Taste and Adjust: Before removing from heat, taste and adjust sweetness, heat, or acidity to your preference.
- Strain Option: For a completely smooth sauce, strain through a fine-mesh sieve to remove any garlic or ginger pieces.
- Make Ahead: The flavors actually improve after sitting for a few hours, making this perfect for meal prep.
How to Store Homemade Sweet Chili Sauce
Allow the sweet chili sauce to cool completely before storing. Transfer to a clean, airtight glass jar or container with a tight-fitting lid. The sauce will keep in the refrigerator for up to 1 month.
For longer storage, you can freeze the sauce in ice cube trays for individual portions, then transfer the frozen cubes to a freezer bag. Frozen sweet chili sauce will maintain its quality for up to 3 months.
Always use clean utensils when serving to prevent contamination and extend shelf life. If you notice any signs of spoilage such as mold, off odors, or changes in texture, discard the sauce immediately.
Frequently Asked Questions (FAQs)
Q: Can I make sweet chili sauce without cornstarch?
A: Yes, you can simmer the sauce longer to reduce and thicken naturally, though it won’t be as glossy. Alternatively, use arrowroot powder or tapioca starch as thickening agents.
Q: How spicy is this sweet chili sauce?
A: With 2 tablespoons of chili flakes, it has a mild to medium heat level. Adjust the amount of chili flakes based on your heat preference.
Q: Can I use fresh chilies instead of chili flakes?
A: Absolutely! Use 2-4 fresh red chilies, finely chopped. Remove seeds for less heat or keep them for more intensity.
Q: Why is my sauce not thickening?
A: Ensure your cornstarch slurry is well-mixed and add it while the sauce is simmering. If it’s still thin, cook a bit longer or add more cornstarch slurry.
Q: Can I double or triple this recipe?
A: Yes, this recipe scales up easily. Just maintain the same proportions and cooking times may need slight adjustment for larger batches.
Q: Is this sauce gluten-free?
A: If you omit the soy sauce or use gluten-free soy sauce, this recipe is completely gluten-free.
Conclusion
Making your own sweet chili sauce at home is not only simple and economical but also allows you to create a condiment that’s perfectly tailored to your taste preferences. This versatile sauce brings together the ideal balance of sweet, spicy, and tangy flavors that will enhance countless dishes in your cooking repertoire.
With its glossy appearance, complex flavor profile, and endless serving possibilities, homemade sweet chili sauce is sure to become a staple in your kitchen. The fresh ingredients and absence of artificial preservatives make it a healthier choice than store-bought versions, while the ability to adjust heat levels and sweetness ensures it’s perfect for your palate.
Whether you’re dipping spring rolls, glazing grilled chicken, or adding a kick to your stir-fry, this homemade sweet chili sauce will elevate your meals and impress your family and friends. Give this recipe a try, and discover why homemade always tastes better than store-bought!


