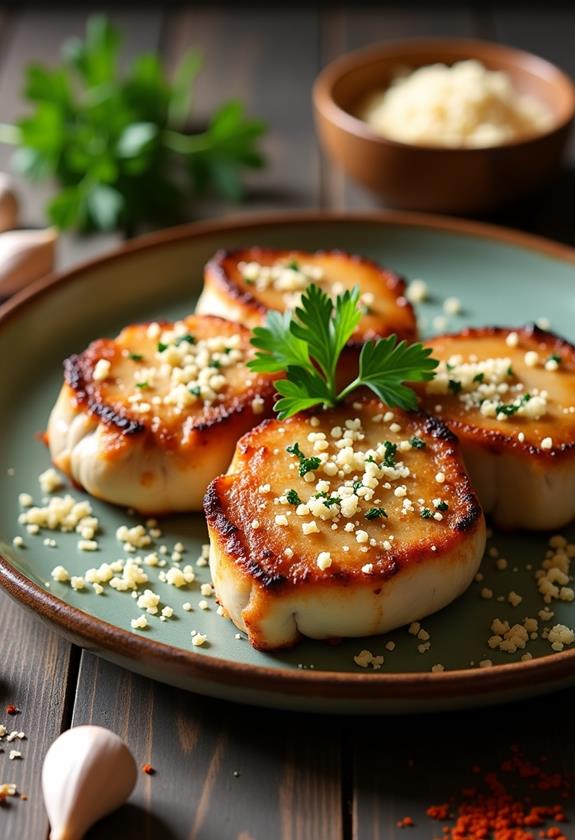
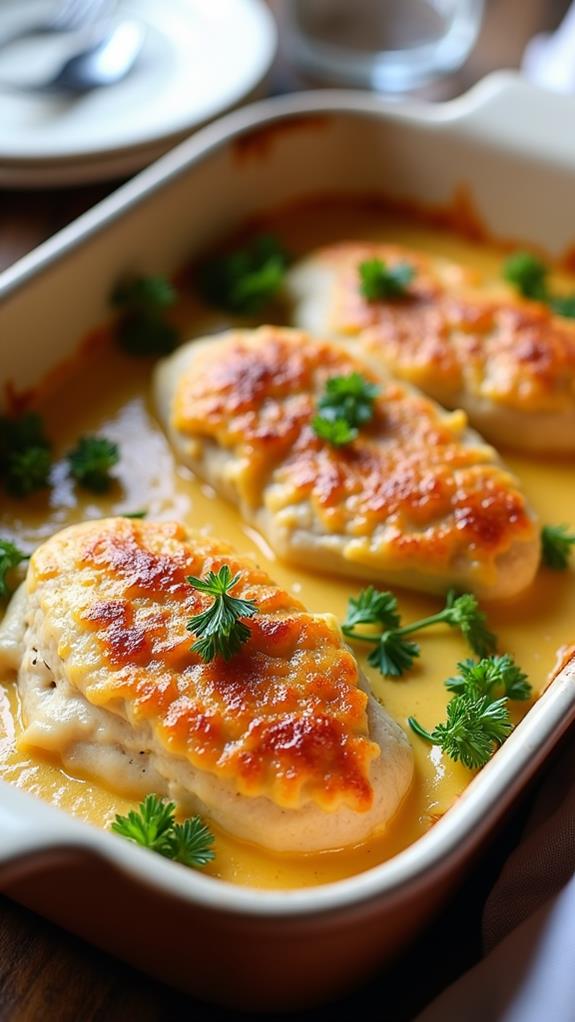
Melt In Your Mouth Chicken Bake Recipe
When you’re craving comfort food that delivers on both flavor and tenderness, there’s nothing quite like a perfectly executed chicken bake. This Melt In Your Mouth Chicken Bake recipe transforms ordinary chicken breasts into an extraordinarily tender and juicy dish that will have your family asking for seconds.
What makes this recipe special is its foolproof method for creating incredibly moist chicken paired with a rich, creamy sauce that infuses every bite with flavor. I’ve perfected this recipe over years of testing, and I can confidently say it’s become my go-to method for ensuring chicken never turns out dry or bland.
What is “Melt In Your Mouth Chicken Bake”?
Melt In Your Mouth Chicken Bake is exactly what its name suggests – a baked chicken dish where the meat becomes so tender it practically falls apart at the touch of a fork. This isn’t your average baked chicken recipe. Instead, it combines strategic seasoning, a creamy coating mixture, and precise baking techniques to create chicken that’s impossibly juicy and flavorful.
The secret lies in the preparation method, which involves coating the chicken in a mixture that not only adds flavor but also helps lock in moisture during the baking process. The result is chicken so tender and succulent that it truly melts in your mouth with each bite.
Ingredients List for Melt In Your Mouth Chicken Bake
- 4 large boneless, skinless chicken breasts (about 2 pounds)
- 1 cup mayonnaise
- ½ cup sour cream
- ¾ cup grated Parmesan cheese, divided
- 1 packet (1 oz) ranch dressing mix
- 1 teaspoon garlic powder
- 1 teaspoon onion powder
- 1 teaspoon dried Italian seasoning
- ½ teaspoon smoked paprika
- ½ teaspoon black pepper
- 1 teaspoon salt
- 1 cup panko breadcrumbs
- 2 tablespoons fresh parsley, chopped
- 2 tablespoons butter, melted
- ¼ cup mozzarella cheese, shredded (optional for extra cheesiness)
How to Cook Melt In Your Mouth Chicken Bake: A Step-by-Step Guide
Creating this incredible chicken bake requires attention to detail, but the process is surprisingly straightforward. Here’s my proven method for achieving perfectly tender results every time:
1. Prepare Your Chicken:
- Preheat your oven to 375°F (190°C) and lightly grease a 9×13-inch baking dish.
- Pat the chicken breasts completely dry with paper towels – this step is crucial for proper seasoning adherence.
- If your chicken breasts are very thick (more than 1 inch), gently pound them to an even ¾-inch thickness for uniform cooking.
- Season both sides of the chicken with salt and pepper, then let them rest for 10 minutes at room temperature.
2. Create the Creamy Coating:
- In a medium bowl, combine mayonnaise, sour cream, and ½ cup of the Parmesan cheese.
- Add the ranch dressing mix, garlic powder, onion powder, Italian seasoning, smoked paprika, and black pepper.
- Whisk everything together until you have a smooth, well-combined mixture.
- This coating is what will keep your chicken incredibly moist during baking.
3. Prepare the Topping:
- In a separate bowl, mix the panko breadcrumbs with the remaining ¼ cup Parmesan cheese.
- Add the chopped fresh parsley and melted butter, stirring until the breadcrumbs are evenly coated.
- If using mozzarella cheese, set it aside to add during the final minutes of baking.
4. Assemble the Dish:
- Place the seasoned chicken breasts in your prepared baking dish, ensuring they don’t overlap.
- Generously spread the creamy mixture over the top of each chicken breast, covering completely.
- Sprinkle the seasoned breadcrumb mixture evenly over the creamy coating.
- The coating should be thick enough to create a protective barrier during baking.
5. Bake to Perfection:
- Bake for 25-30 minutes, or until the internal temperature reaches 165°F (74°C) when measured with a meat thermometer.
- If you’re using mozzarella cheese, add it during the last 5 minutes of baking.
- The top should be golden brown and the chicken should feel firm but not hard when gently pressed.
- Let the chicken rest for 5 minutes before serving to allow the juices to redistribute.
Substitutions and Variations
One of the beautiful aspects of this recipe is its adaptability. Here are several ways you can customize it to suit different tastes and dietary needs:
- Chicken Cuts: While I prefer boneless, skinless breasts, you can use chicken thighs for even more flavor and natural tenderness. Adjust cooking time to 35-40 minutes for thighs.
- Dairy-Free Version: Replace mayonnaise with avocado-based mayo and use dairy-free sour cream and nutritional yeast instead of cheese.
- Lower Carb Option: Skip the breadcrumbs entirely and add extra Parmesan cheese and herbs to the coating for a keto-friendly version.
- Spicy Variation: Add 1 teaspoon cayenne pepper or hot sauce to the creamy mixture for a kick of heat.
- Herb Variations: Experiment with different herbs like thyme, rosemary, or oregano in place of Italian seasoning.
- Coating Alternatives: Try crushed cornflakes or crushed crackers instead of panko for different textures.
Common Mistakes to Avoid
Through my years of perfecting this recipe, I’ve identified several pitfalls that can prevent you from achieving that perfect “melt in your mouth” texture:
- Skipping the Drying Step: Failing to thoroughly dry the chicken before seasoning prevents proper adherence of the coating and can result in a watery final dish.
- Overcooking: Going beyond 165°F internal temperature will result in dry chicken, regardless of the coating. Invest in a good meat thermometer.
- Uneven Thickness: Chicken breasts of varying thickness cook unevenly. Always pound to uniform thickness for consistent results.
- Cold Chicken: Putting refrigerator-cold chicken directly into the oven can lead to uneven cooking. Let it come to room temperature first.
- Insufficient Coating: Don’t be shy with the creamy mixture – it’s what keeps the chicken moist and flavorful.
How to Serve Melt In Your Mouth Chicken Bake
This versatile chicken bake pairs beautifully with a variety of side dishes. I love serving it with roasted vegetables like asparagus, broccoli, or Brussels sprouts for a complete, balanced meal. Creamy mashed potatoes or garlic rice also complement the rich flavors perfectly.
For a lighter option, serve it alongside a crisp Caesar salad or mixed greens with a simple vinaigrette. The contrast between the rich chicken and fresh, acidic salad creates a well-rounded dining experience.
Presentation Ideas for Melt In Your Mouth Chicken Bake
To elevate this home-cooked meal to restaurant-worthy presentation, consider these simple styling tips:
- Fresh Herb Garnish: Sprinkle additional fresh parsley or chives over the finished dish for a pop of color and freshness.
- Colorful Sides: Arrange vibrant roasted vegetables alongside the chicken to create visual appeal on the plate.
- Sauce Drizzle: If any of the creamy coating remains in the baking dish, drizzle it around the plate for an elegant touch.
- Individual Portions: For dinner parties, consider cutting the chicken into medallions and fanning them on individual plates.
Melt In Your Mouth Chicken Bake Recipe Tips
Here are my insider tips for ensuring your chicken bake turns out perfectly every time:
- Quality Ingredients Matter: Use real mayonnaise and sour cream rather than low-fat versions for the best texture and flavor.
- Don’t Rush the Resting: Allowing the seasoned chicken to rest before coating helps the flavors penetrate the meat.
- Check Multiple Spots: When using a thermometer, check the thickest part of each breast to ensure even cooking.
- Make Extra Coating: I often double the coating mixture and use the extra as a delicious dip for vegetables or bread.
- Room Temperature Assembly: Let your dairy ingredients come to room temperature for easier mixing and better coating adhesion.
- Foil Tent Option: If the top browns too quickly, tent with foil for the remaining cooking time.
How to Store Melt In Your Mouth Chicken Bake
Proper storage is key to maintaining the quality of your leftovers. Allow the chicken to cool completely before refrigerating, which should happen within 2 hours of cooking. Store in an airtight container in the refrigerator for up to 4 days.
For best results when reheating, I recommend using the oven at 350°F for 10-15 minutes, covered with foil to prevent the coating from over-browning. You can also reheat individual portions in the microwave, though the coating won’t retain its original crispness.
Frequently Asked Questions (FAQs)
Q: Can I prepare this dish ahead of time?
A: Absolutely! You can assemble the entire dish up to 24 hours in advance and refrigerate it covered. Add an extra 5-10 minutes to the baking time if cooking from cold.
Q: Can I freeze Melt In Your Mouth Chicken Bake?
A: While it’s best enjoyed fresh, you can freeze the cooked chicken for up to 3 months. Thaw overnight in the refrigerator and reheat gently in the oven.
Q: What if I don’t have ranch dressing mix?
A: You can make your own by combining 1 tablespoon dried dill, 1 teaspoon garlic powder, 1 teaspoon onion powder, and ½ teaspoon each of dried parsley and salt.
Q: Can I use Greek yogurt instead of sour cream?
A: Yes, plain Greek yogurt works well as a substitute, though it may be slightly tangier in flavor.
Q: How do I know when the chicken is done without a thermometer?
A: The chicken should feel firm but springy when pressed, and any juices should run clear. However, I strongly recommend using a thermometer for food safety.
Q: Can I make this recipe gluten-free?
A: Simply substitute the panko breadcrumbs with gluten-free breadcrumbs or crushed gluten-free crackers.
Conclusion
This Melt In Your Mouth Chicken Bake has become a cornerstone recipe in my kitchen, and I’m confident it will become one in yours too. The combination of the creamy, flavorful coating and the perfectly tender chicken creates a dish that’s both comforting and impressive enough for company.
What I love most about this recipe is its reliability – follow these steps, and you’re guaranteed to have chicken that’s never dry or bland. The preparation is simple enough for a weeknight dinner, yet the results are elegant enough for special occasions.
I encourage you to make this recipe your own by experimenting with different seasonings and sides. Once you master the basic technique, you’ll find countless ways to adapt it to your family’s preferences. Most importantly, don’t be afraid to trust the process – that generous coating might seem like too much, but it’s exactly what creates the “melt in your mouth” magic.
Happy cooking, and I hope this recipe brings as much joy to your dinner table as it has to mine!