Melt In Your Mouth Pumpkin Cookies Recipe
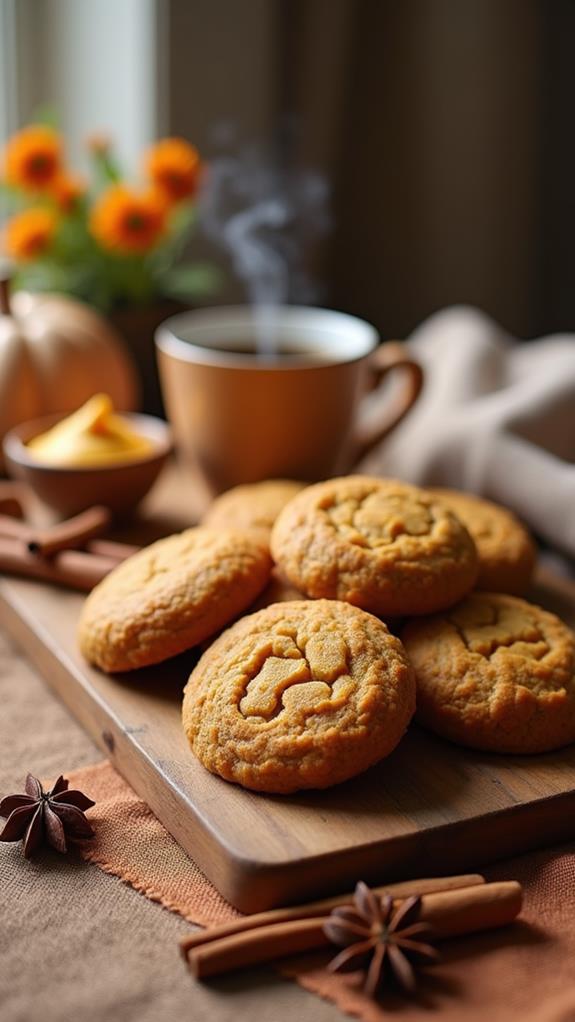
When autumn arrives and pumpkin spice fills the air, there’s nothing quite like biting into a perfectly soft, pillowy pumpkin cookie that literally melts in your mouth. These incredible Melt In Your Mouth Pumpkin Cookies are the ultimate fall treat that combines the warm, comforting flavors of pumpkin with a texture so tender and delicate, you’ll wonder how something so simple can taste so extraordinary.
I’ve perfected this recipe over years of baking, and I can confidently say these cookies will become your go-to autumn dessert. Read on to discover the secrets behind creating these heavenly pumpkin cookies that disappear as quickly as you can make them.
What are “Melt In Your Mouth Pumpkin Cookies”?
Melt In Your Mouth Pumpkin Cookies are exceptionally soft, cake-like cookies that get their incredible texture from a perfect balance of pumpkin puree, butter, and just the right amount of flour. Unlike traditional crispy cookies, these treats have an almost cloud-like consistency that dissolves gently on your tongue.
The secret lies in the high moisture content from pumpkin puree and the careful mixing technique that prevents gluten development. These cookies are flavored with warm autumn spices like cinnamon, nutmeg, and ginger, creating a flavor profile that screams fall comfort in every bite.
Ingredients List for Melt In Your Mouth Pumpkin Cookies
For the Cookies:
- 2 cups all-purpose flour
- 1 teaspoon baking soda
- ½ teaspoon salt
- 1 teaspoon ground cinnamon
- ½ teaspoon ground nutmeg
- ¼ teaspoon ground ginger
- ¼ teaspoon ground cloves
- ½ cup unsalted butter, softened
- 1¼ cups granulated sugar
- ½ cup light brown sugar, packed
- 1 large egg
- 1 teaspoon vanilla extract
- 1 cup pumpkin puree (not pumpkin pie filling)
For the Glaze (Optional):
- 1 cup powdered sugar
- 3-4 tablespoons milk
- ½ teaspoon vanilla extract
- Pinch of salt
How to Make Melt In Your Mouth Pumpkin Cookies: A Step-by-Step Guide
Creating these incredibly soft pumpkin cookies requires attention to detail and proper technique. Here’s my foolproof method for achieving that perfect melt-in-your-mouth texture:
1. Prepare Your Workspace:
- Preheat your oven to 350°F (175°C).
- Line baking sheets with parchment paper or silicone baking mats.
- Ensure all ingredients are at room temperature for optimal mixing.
2. Mix the Dry Ingredients:
- In a medium bowl, whisk together flour, baking soda, salt, cinnamon, nutmeg, ginger, and cloves.
- Set this spice mixture aside – proper spice distribution is key to even flavor throughout the cookies.
3. Cream Butter and Sugars:
- In a large mixing bowl, cream the softened butter with both granulated and brown sugars.
- Beat for 3-4 minutes until the mixture is light and fluffy – this incorporates air for a tender texture.
- The mixture should be noticeably lighter in color when properly creamed.
4. Add Wet Ingredients:
- Beat in the egg until fully incorporated, followed by vanilla extract.
- Add the pumpkin puree and mix until just combined – don’t overmix at this stage.
- The mixture may look slightly curdled, but this is normal.
5. Incorporate Dry Ingredients:
- Gradually add the flour mixture to the wet ingredients, mixing on low speed.
- Mix only until the flour disappears – overmixing develops gluten and creates tough cookies.
- The dough will be soft and slightly sticky, which is exactly what we want.
6. Shape and Bake:
- Using a cookie scoop or spoon, drop rounded tablespoons of dough onto prepared baking sheets.
- Space cookies about 2 inches apart as they will spread slightly.
- Bake for 12-15 minutes, or until the centers are just set but still soft.
- The edges should be lightly golden, but don’t overbake – they’ll continue cooking on the hot pan.
7. Cool Properly:
- Let cookies cool on the baking sheet for 5 minutes before transferring to a wire rack.
- This brief cooling period prevents the cookies from breaking apart while maintaining their soft texture.
Substitutions and Variations
I love how versatile this pumpkin cookie recipe is. Here are some substitutions and variations you can try:
- Flour: Substitute up to half the all-purpose flour with white whole wheat flour for added nutrition without sacrificing texture.
- Sugar: Replace some granulated sugar with maple syrup for deeper fall flavor, but reduce other liquids slightly.
- Spices: Create your own spice blend or use 2 teaspoons of pumpkin pie spice instead of individual spices.
- Add-ins: Fold in ½ cup of mini chocolate chips, chopped pecans, or dried cranberries for extra texture and flavor.
- Gluten-Free: Use a 1:1 gluten-free flour blend, though the texture may be slightly different.
- Dairy-Free: Substitute butter with vegan butter or coconut oil (solid, not melted).
Common Mistakes to Avoid
After years of perfecting this recipe, I’ve learned to avoid these common pitfalls:
- Overbaking: These cookies continue cooking on the hot pan, so remove them when centers still look slightly underdone.
- Using Pumpkin Pie Filling: Always use plain pumpkin puree, not the spiced pie filling which will throw off the flavor balance.
- Overmixing: Once you add flour, mix just until combined to maintain that tender, melt-in-your-mouth texture.
- Wrong Pumpkin Puree Consistency: If your puree seems watery, drain it through a fine-mesh strainer for 30 minutes.
- Skipping Room Temperature Ingredients: Cold ingredients don’t cream properly and can result in dense cookies.
How to Serve Melt In Your Mouth Pumpkin Cookies
These delicate pumpkin cookies are perfect on their own, but I love serving them in various ways depending on the occasion. For casual snacking, arrange them on a plate with a glass of cold milk or hot apple cider. The warm spices complement both beverages beautifully.
For more elegant presentations, I serve them alongside vanilla ice cream or whipped cream for a simple but impressive dessert. The soft cookie texture pairs wonderfully with the creaminess of ice cream, creating a delightful contrast in temperatures and textures.
Presentation Ideas for Melt In Your Mouth Pumpkin Cookies
To make these cookies look as amazing as they taste, consider these presentation ideas:
- Elegant Glazing: Drizzle the simple glaze in decorative patterns or dip half of each cookie for a sophisticated look.
- Autumn Styling: Arrange cookies on wooden boards with mini pumpkins, cinnamon sticks, and fall leaves for seasonal charm.
- Gift Packaging: Layer cookies between parchment paper in decorative tins or boxes – they make wonderful homemade gifts.
- Dusting Technique: Lightly dust cooled cookies with powdered sugar or cinnamon sugar for a bakery-style appearance.
Melt In Your Mouth Pumpkin Cookies Recipe Tips
Here are my insider tips for achieving the perfect batch every time:
- Measure Accurately: Use a kitchen scale for flour measurement if possible – too much flour creates dense cookies.
- Test Your Oven: Oven temperatures vary, so start checking at 10 minutes and adjust baking time accordingly.
- Don’t Flatten: Resist the urge to press down on cookie dough – let them spread naturally for optimal texture.
- Quality Pumpkin: Use high-quality pumpkin puree for the best flavor – I prefer organic brands when available.
- Storage Secret: Add a slice of bread to your storage container to keep cookies soft for days.
How to Store Melt In Your Mouth Pumpkin Cookies
Proper storage is crucial for maintaining that signature soft texture. Allow cookies to cool completely before storing to prevent condensation. Place them in an airtight container with layers separated by parchment paper.
These cookies stay fresh at room temperature for up to one week. For longer storage, freeze them in freezer-safe containers for up to three months. I often make double batches and freeze half for unexpected guests or sudden pumpkin cravings.
The cookie dough can also be frozen – scoop it onto baking sheets, freeze until solid, then transfer to freezer bags. Bake directly from frozen, adding 1-2 minutes to the baking time.
Frequently Asked Questions (FAQs)
Q: Can I make these cookies without eggs?
A: Yes! Replace the egg with 2 tablespoons of unsweetened applesauce or a commercial egg replacer. The texture will be slightly different but still delicious.
Q: Why are my cookies spreading too much?
A: This usually happens when the dough is too warm or there’s too much butter. Chill the dough for 30 minutes before baking, or add 2-3 tablespoons more flour.
Q: Can I use fresh pumpkin instead of canned?
A: Absolutely! Roast pumpkin until tender, then puree until smooth. Make sure to drain excess moisture through a fine-mesh strainer.
Q: How do I know when the cookies are done?
A: The centers should be set but still soft to the touch. They’ll look slightly underdone but will continue cooking on the hot pan.
Q: Can I make these cookies smaller or larger?
A: Yes! Adjust baking time accordingly – smaller cookies need 8-10 minutes, while larger ones may need 15-18 minutes.
Q: What’s the best way to get even-sized cookies?
A: Use a cookie scoop for uniform portions. A medium scoop (about 1.5 tablespoons) works perfectly for this recipe.
Conclusion
These Melt In Your Mouth Pumpkin Cookies truly live up to their name, delivering an incredibly tender texture that dissolves beautifully on your palate. The combination of pumpkin puree, warm spices, and proper technique creates cookies that capture the essence of autumn in every bite.
Whether you’re baking for a fall gathering, looking for the perfect homemade gift, or simply craving something special for your family, this recipe delivers consistent, impressive results. The soft, cake-like texture sets these cookies apart from ordinary treats, making them a standout addition to any dessert table.
I encourage you to try this recipe and experience the magic of truly exceptional pumpkin cookies. Once you master the technique, you’ll find yourself returning to this recipe year after year, creating new autumn memories with every batch. Happy baking, and enjoy the wonderful aroma of fall spices filling your kitchen!

