No Bake Banana Split Cheesecake
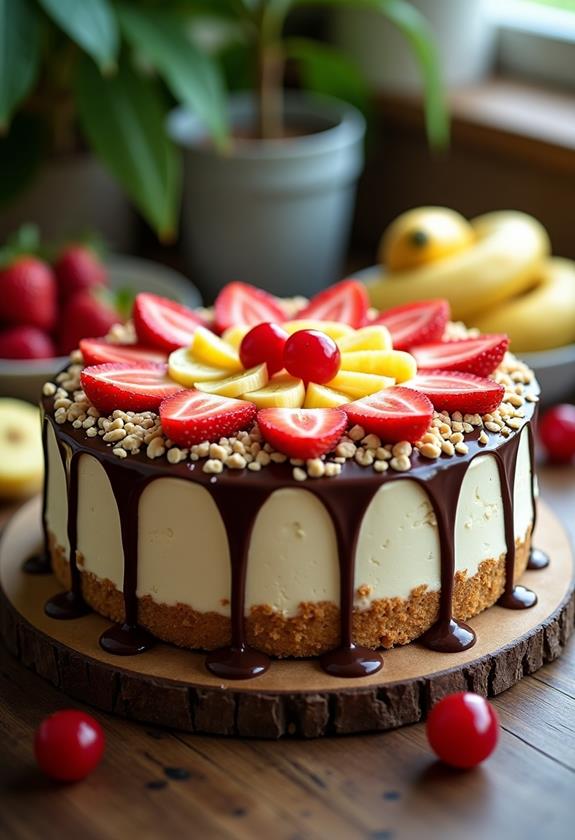
Craving the nostalgic flavors of a classic banana split but want something more elegant and shareable? This No Bake Banana Split Cheesecake transforms the beloved ice cream parlor treat into a stunning dessert that requires zero baking skills.
With layers of creamy cheesecake, fresh bananas, juicy strawberries, and all the indulgent toppings you love, this dessert captures every delicious element of a traditional banana split. Best of all, it comes together in just 30 minutes of prep time and sets beautifully in the refrigerator overnight.
What is “No Bake Banana Split Cheesecake”?
No Bake Banana Split Cheesecake is a show-stopping dessert that combines the rich, creamy texture of traditional cheesecake with all the classic flavors and toppings of a banana split. Unlike traditional cheesecakes that require baking, this version uses a simple combination of cream cheese, whipped cream, and gelatin to create a smooth, mousse-like texture that sets perfectly in the refrigerator.
The dessert features a graham cracker crust as the foundation, topped with layers of vanilla cheesecake filling, fresh sliced bananas, strawberries, chocolate sauce, and finished with whipped cream, maraschino cherries, and chopped nuts. It’s essentially a banana split in cake form – but even better!
Ingredients List for No Bake Banana Split Cheesecake
For the Crust:
- 1½ cups graham cracker crumbs
- ⅓ cup melted butter
- ¼ cup granulated sugar
- Pinch of salt
For the Cheesecake Filling:
- 16 oz cream cheese, softened to room temperature
- 1 cup powdered sugar
- 1 teaspoon vanilla extract
- 1 packet (0.25 oz) unflavored gelatin
- 3 tablespoons warm water
- 1½ cups heavy whipping cream, cold
- ⅓ cup sour cream
For the Toppings:
- 2-3 ripe bananas, sliced
- 1 cup fresh strawberries, hulled and sliced
- ½ cup chocolate sauce or hot fudge
- ½ cup caramel sauce
- 1 cup heavy whipping cream for topping
- 2 tablespoons powdered sugar
- ½ cup chopped walnuts or pecans
- 10-12 maraschino cherries
- Chocolate shavings or mini chocolate chips (optional)
How to Make No Bake Banana Split Cheesecake: A Step-by-Step Guide
Creating this impressive dessert is surprisingly simple when you follow these detailed steps. The key is allowing proper setting time and layering the components thoughtfully.
1. Prepare the Crust:
- Combine graham cracker crumbs, melted butter, sugar, and salt in a medium bowl.
- Mix until the crumbs are evenly moistened and hold together when pressed.
- Press the mixture firmly into the bottom of a 9-inch springform pan, creating an even layer.
- Refrigerate the crust while you prepare the filling to help it set.
2. Prepare the Gelatin:
- Sprinkle the unflavored gelatin over 3 tablespoons of warm water in a small bowl.
- Let it sit for 5 minutes to bloom, then microwave for 15-20 seconds until completely dissolved.
- Set aside to cool slightly while you prepare the other components.
3. Make the Cheesecake Base:
- In a large bowl, beat the softened cream cheese until smooth and fluffy, about 2-3 minutes.
- Gradually add powdered sugar, beating until well combined and no lumps remain.
- Mix in vanilla extract and sour cream until smooth.
- Slowly add the cooled gelatin mixture, beating until fully incorporated.
4. Whip the Cream:
- In a separate bowl, whip the cold heavy cream to soft peaks.
- Be careful not to overwhip, as this can make the filling grainy.
- Gently fold the whipped cream into the cream cheese mixture in three additions.
- Fold until just combined to maintain the light, airy texture.
5. Assemble the First Layer:
- Pour half of the cheesecake filling over the prepared crust.
- Smooth the top with an offset spatula for an even layer.
- Arrange half of the sliced bananas over the cheesecake layer.
- Drizzle with half of the chocolate sauce and caramel sauce.
6. Add the Final Layers:
- Spread the remaining cheesecake filling over the fruit layer.
- Smooth the top completely and tap the pan gently to remove air bubbles.
- Cover with plastic wrap and refrigerate for at least 4 hours, or preferably overnight.
7. Final Assembly and Decoration:
- Before serving, whip the remaining heavy cream with 2 tablespoons powdered sugar to medium peaks.
- Remove the cheesecake from the springform pan and place on a serving plate.
- Top with whipped cream, remaining banana slices, strawberries, nuts, and cherries.
- Drizzle with remaining sauces and add chocolate shavings if desired.
Substitutions and Variations
This versatile recipe can be adapted to accommodate different dietary needs and flavor preferences:
- Crust Alternatives: Use chocolate graham crackers, vanilla wafers, or even crushed Oreo cookies for the crust base.
- Dairy-Free Version: Substitute cream cheese with dairy-free alternatives and use coconut whipped cream in place of heavy cream.
- Fruit Variations: Replace strawberries with fresh raspberries, blueberries, or diced pineapple for different flavor profiles.
- Nut-Free Option: Omit the nuts entirely or replace with toasted coconut flakes for crunch.
- Chocolate Variation: Add 2 tablespoons of cocoa powder to the cheesecake filling for a chocolate banana split version.
- Individual Servings: Make mini cheesecakes using a muffin tin lined with paper cups for portion control.
Common Mistakes to Avoid
Ensure your No Bake Banana Split Cheesecake turns out perfectly by avoiding these common pitfalls:
- Using Cold Cream Cheese: Room temperature cream cheese is crucial for a smooth, lump-free filling. Take it out 2-3 hours before making the recipe.
- Overwhipping the Cream: Stop at soft to medium peaks to prevent the cream from becoming grainy or separating.
- Skipping the Gelatin: The gelatin is essential for helping the cheesecake set properly without baking. Don’t omit it.
- Not Dissolving Gelatin Completely: Undissolved gelatin will create lumps in your smooth filling.
- Adding Bananas Too Early: Only add banana slices just before serving to prevent browning and excess moisture.
- Insufficient Chilling Time: Rush the setting process and your cheesecake may be too soft to slice cleanly.
How to Serve No Bake Banana Split Cheesecake
This impressive dessert works beautifully for various occasions and serving styles. For formal dinners, slice the cheesecake into neat wedges using a sharp knife dipped in warm water between cuts.
Serve each slice on individual dessert plates with a small dollop of additional whipped cream and a drizzle of chocolate sauce. For casual gatherings, you can serve it family-style, allowing guests to help themselves to generous portions.
The cheesecake pairs wonderfully with a cup of coffee, hot chocolate, or even a glass of cold milk. For adult gatherings, consider serving it alongside dessert wines or coffee liqueurs that complement the rich, creamy flavors.
Presentation Ideas for No Bake Banana Split Cheesecake
Elevate your dessert presentation with these creative ideas:
- Glass Serving Dish: Use a clear glass springform pan to showcase the beautiful layers when serving.
- Individual Glass Cups: Layer the components in clear glasses or mason jars for elegant single-serving presentations.
- Garnish Artfully: Arrange the fruit toppings in colorful patterns and use a piping bag for neat whipped cream dollops.
- Sauce Drizzles: Create decorative patterns with chocolate and caramel sauces using squeeze bottles.
- Fresh Mint: Add sprigs of fresh mint for a pop of color and refreshing aroma.
No Bake Banana Split Cheesecake Recipe Tips
Follow these professional tips to ensure your cheesecake turns out restaurant-quality every time:
- Temperature Matters: All dairy ingredients should be at room temperature for the smoothest mixing.
- Quality Ingredients: Use full-fat cream cheese and real vanilla extract for the best flavor and texture.
- Gentle Folding: When incorporating whipped cream, use a gentle folding motion to maintain airiness.
- Plan Ahead: This dessert actually improves with time, so making it a day ahead is ideal.
- Sharp Knife: Use a sharp knife for clean slices, and wipe it clean between cuts.
- Prevent Browning: Brush banana slices with lemon juice if you need to prepare them in advance.
How to Store No Bake Banana Split Cheesecake
Proper storage is essential for maintaining the quality and safety of your no-bake cheesecake. Cover the entire cheesecake tightly with plastic wrap or store individual slices in airtight containers in the refrigerator.
The cheesecake will keep well for up to 4-5 days when properly stored. However, for the best texture and appearance, it’s recommended to add fresh fruit toppings just before serving rather than storing the fully assembled dessert.
If you need to freeze portions, wrap individual slices in plastic wrap and then aluminum foil. Frozen slices will keep for up to 2 months, though the texture may be slightly different after thawing.
Frequently Asked Questions (FAQs)
Q: Can I make this cheesecake without gelatin?
A: While gelatin helps the cheesecake set properly, you can try using an extra ½ cup of whipped cream and ensure it’s very well chilled. The texture may be softer but still delicious.
Q: How far in advance can I make this dessert?
A: The cheesecake base can be made up to 2 days ahead. Add fresh fruit toppings and final decorations just before serving for the best appearance.
Q: What if my cheesecake doesn’t set properly?
A: Ensure you used the correct amount of gelatin and that it was properly dissolved. If it’s still soft after overnight chilling, it may need a few more hours in the refrigerator.
Q: Can I use frozen strawberries?
A: Fresh strawberries work best for topping, but you can use thawed and drained frozen strawberries if fresh aren’t available. Pat them dry to prevent excess moisture.
Q: Is there a way to make this sugar-free?
A: Yes, you can substitute powdered erythritol or your preferred sugar substitute in equal amounts. The texture may vary slightly.
Q: Can I make mini versions?
A: Absolutely! Use a muffin tin lined with paper cups or small individual springform pans for portion-controlled servings.
Conclusion
No Bake Banana Split Cheesecake brings together the best of both worlds – the elegant sophistication of cheesecake and the playful, nostalgic flavors of a classic banana split. This impressive dessert proves that you don’t need an oven to create something truly spectacular for your family and friends.
The beauty of this recipe lies not only in its delicious taste but also in its make-ahead convenience and stunning presentation. Whether you’re hosting a dinner party, celebrating a special occasion, or simply wanting to treat yourself to something extraordinary, this cheesecake delivers on all fronts.
Take your time with each step, use quality ingredients, and don’t rush the chilling process. The result will be a dessert that looks as amazing as it tastes, guaranteed to become a favorite in your recipe collection. Enjoy creating this delightful twist on two beloved classics!

