No Bake Mini Banana Cream Pies Recipe
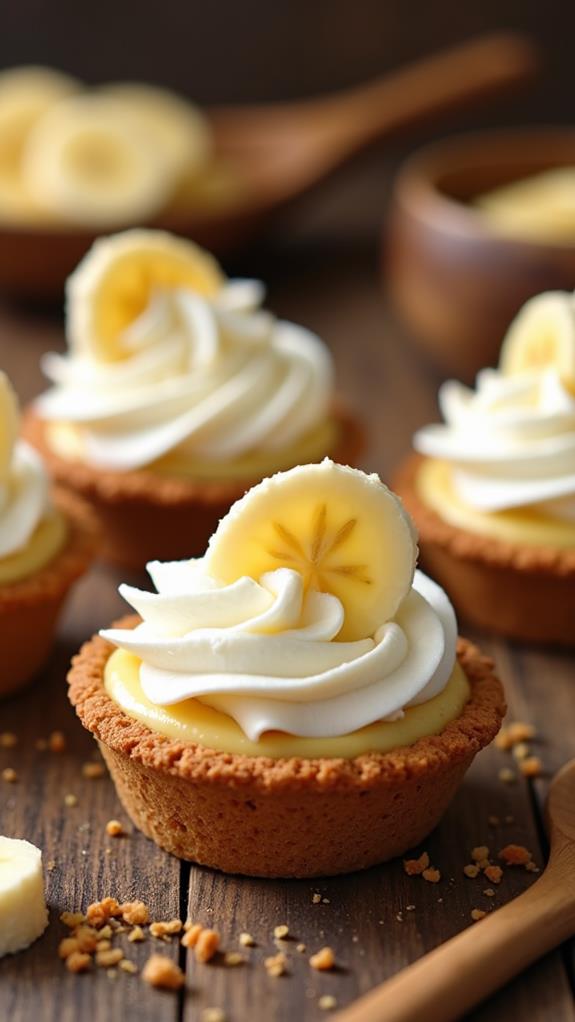
When summer heat makes you crave something cool and creamy, these No Bake Mini Banana Cream Pies are the perfect solution. These individual-sized treats combine the classic flavors of banana cream pie with the convenience of no-bake preparation, making them ideal for entertaining or satisfying those sweet tooth cravings.
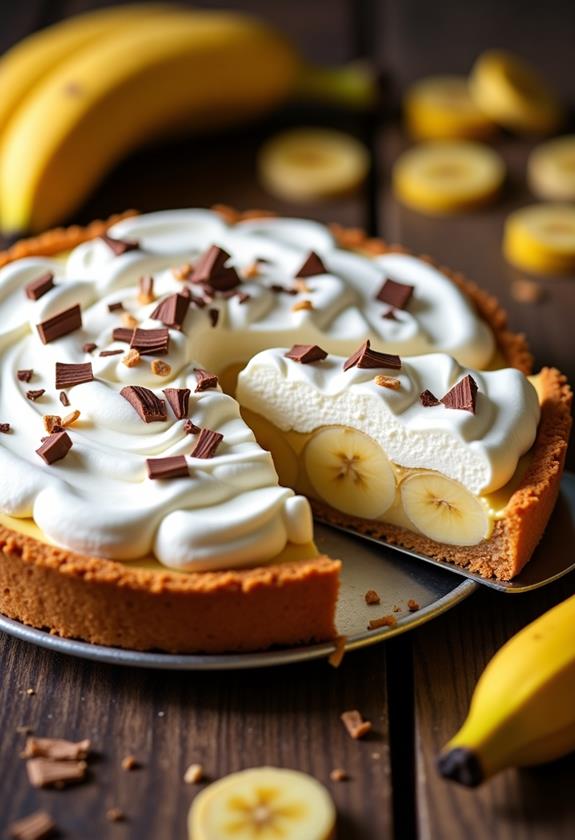
I love how these mini pies deliver all the indulgence of traditional banana cream pie without turning on the oven. Each bite offers layers of graham cracker crust, silky vanilla pudding, fresh banana slices, and fluffy whipped cream. Follow this recipe to create elegant desserts that will have your guests asking for seconds!
What are “No Bake Mini Banana Cream Pies”?
No Bake Mini Banana Cream Pies are individual-sized versions of the classic American dessert that requires no baking whatsoever. These delightful treats feature a pressed graham cracker crust filled with homemade vanilla pudding, fresh banana slices, and topped with whipped cream.
The beauty of these mini pies lies in their simplicity and convenience. Unlike traditional banana cream pie that requires baking a pastry crust and lengthy cooling times, these no-bake versions come together quickly and set in the refrigerator. They’re perfect for summer gatherings, potluck dinners, or anytime you want an impressive dessert without the hassle of baking.
Each mini pie serves one person, making them ideal for portion control and elegant presentation. The individual serving size also means no messy slicing and serving – guests can simply grab their own personal pie and enjoy every perfect bite.
Ingredients List for No Bake Mini Banana Cream Pies
For the Crust:
- 1½ cups graham cracker crumbs (about 12 whole crackers)
- ⅓ cup melted butter
- 3 tablespoons granulated sugar
- Pinch of salt
For the Vanilla Pudding:
- 2 cups whole milk
- ½ cup granulated sugar
- ⅓ cup cornstarch
- 3 large egg yolks
- 3 tablespoons butter
- 2 teaspoons vanilla extract
- Pinch of salt
For Assembly:
- 3-4 ripe bananas, sliced
- 1 cup heavy whipping cream
- 2 tablespoons powdered sugar
- ½ teaspoon vanilla extract
- Graham cracker crumbs for garnish (optional)
- Mini chocolate chips for garnish (optional)
How to Make No Bake Mini Banana Cream Pies: A Step-by-Step Guide
Creating these delicious mini pies involves several steps that build upon each other to create the perfect dessert. Here’s my detailed guide to ensure your pies turn out beautifully:
1. Prepare the Graham Cracker Crust:
- Combine graham cracker crumbs, melted butter, sugar, and salt in a medium bowl.
- Mix thoroughly until the mixture resembles wet sand and holds together when pressed.
- Divide the mixture evenly among 6-8 mini tart pans or muffin cups lined with plastic wrap.
- Press firmly into the bottom and up the sides to create a compact crust.
- Refrigerate for at least 30 minutes while preparing the pudding.
2. Make the Vanilla Pudding:
- In a medium saucepan, whisk together sugar, cornstarch, and salt.
- Gradually whisk in milk until smooth, ensuring no lumps remain.
- Cook over medium heat, whisking constantly, until the mixture thickens and comes to a boil.
- In a small bowl, whisk the egg yolks until smooth.
- Slowly add about ½ cup of the hot milk mixture to the yolks, whisking constantly to temper them.
3. Finish the Pudding:
- Pour the tempered egg mixture back into the saucepan, whisking continuously.
- Cook for an additional 2-3 minutes, whisking constantly, until thick and creamy.
- Remove from heat and whisk in butter and vanilla extract until smooth.
- Press plastic wrap directly onto the surface of the pudding to prevent a skin from forming.
- Refrigerate until completely cool, about 2 hours.
4. Prepare the Whipped Cream:
- In a large bowl, whip heavy cream with powdered sugar and vanilla extract.
- Beat until soft peaks form, being careful not to over-whip.
- Cover and refrigerate until ready to use.
5. Assemble the Mini Pies:
- Remove the chilled crusts from the refrigerator.
- Slice bananas into ¼-inch thick rounds just before assembling to prevent browning.
- Spoon a layer of pudding into each crust, filling about halfway.
- Arrange banana slices over the pudding in an overlapping pattern.
- Add another layer of pudding, smoothing the top.
- Top each pie with a generous dollop of whipped cream.
6. Final Touches and Chilling:
- Garnish with additional graham cracker crumbs or mini chocolate chips if desired.
- Refrigerate the completed pies for at least 2 hours or overnight before serving.
- This final chilling allows all the flavors to meld and the pudding to set completely.
Substitutions and Variations
These mini banana cream pies are wonderfully adaptable to different tastes and dietary needs. Here are some substitutions and variations I recommend:
- Crust Alternatives: Try vanilla wafer crumbs, chocolate cookie crumbs, or crushed gingersnaps for different flavor profiles.
- Pudding Variations: Make chocolate pudding instead of vanilla, or try banana pudding for an extra banana flavor boost.
- Dairy-Free Options: Use coconut milk for the pudding and coconut whipped cream for the topping to make these pies dairy-free.
- Fruit Substitutions: Replace bananas with sliced strawberries, peaches, or mixed berries for seasonal variations.
- Flavor Enhancements: Add a tablespoon of rum or bourbon to the pudding for an adult version, or fold in some peanut butter for a tropical twist.
- Chocolate Lovers: Drizzle melted chocolate over the whipped cream or add chocolate shavings as a garnish.
Common Mistakes to Avoid
When making No Bake Mini Banana Cream Pies, I’ve learned to avoid these common pitfalls that can affect the final result:
- Lumpy Pudding: Always whisk the cornstarch mixture thoroughly and cook while whisking constantly to prevent lumps from forming.
- Scrambled Eggs: Temper the egg yolks properly by adding hot milk slowly while whisking to prevent the eggs from cooking too quickly.
- Soggy Crust: Ensure the crust is pressed firmly and chilled adequately before adding the pudding filling.
- Brown Bananas: Slice bananas just before assembly and consider brushing them lightly with lemon juice to prevent browning.
- Over-Whipped Cream: Stop whipping as soon as soft peaks form to avoid butter formation.
- Rushing the Process: Allow adequate chilling time for each component to ensure proper setting and flavor development.
How to Serve No Bake Mini Banana Cream Pies
These mini pies are perfect as individual desserts and require minimal serving preparation. I like to serve them directly in their mini tart pans for an elegant presentation, or carefully remove them and place on dessert plates.
The ideal serving temperature is well-chilled, straight from the refrigerator. The contrast between the cool, creamy filling and the crisp crust is what makes these pies so delightful. Serve alongside fresh coffee, tea, or even a glass of cold milk for a comforting dessert experience.
For special occasions, consider serving these mini pies on a tiered dessert stand or wooden serving board for a beautiful display. They pair wonderfully with other no-bake desserts or fresh fruit for a varied dessert table.
Presentation Ideas for No Bake Mini Banana Cream Pies
To make your mini banana cream pies look as impressive as they taste, consider these presentation ideas:
- Elegant Garnish: Dust the tops lightly with cinnamon or cocoa powder for a sophisticated finish.
- Fruit Decoration: Arrange thin banana slices in a fan pattern on top of the whipped cream for visual appeal.
- Chocolate Drizzle: Create decorative patterns with melted chocolate drizzled over the whipped cream topping.
- Mint Accent: Add a small sprig of fresh mint to each pie for a pop of color and fresh aroma.
- Textural Elements: Sprinkle chopped toasted nuts or coconut flakes for added texture and visual interest.
No Bake Mini Banana Cream Pie Recipe Tips
Here are my essential tips for ensuring your mini banana cream pies turn out perfectly every time:
- Quality Ingredients: Use the ripest bananas you can find for the best flavor, and always use real vanilla extract rather than imitation.
- Temperature Control: Keep all components well-chilled throughout the process to maintain the best texture and food safety.
- Make-Ahead Friendly: These pies actually improve with time, so don’t hesitate to make them a day ahead of serving.
- Portion Control: Use an ice cream scoop to ensure even distribution of pudding and whipped cream among all the pies.
- Professional Touch: Use a piping bag to create beautiful swirls of whipped cream on top for a bakery-quality appearance.
- Storage Consideration: Keep the pies covered in the refrigerator to prevent the whipped cream from absorbing other flavors.
How to Store No Bake Mini Banana Cream Pies
Proper storage is crucial for maintaining the quality and safety of these cream-based desserts. Store the completed pies in the refrigerator, covered with plastic wrap or in an airtight container, for up to 3 days.
The pudding components can be made up to 2 days ahead and stored separately in the refrigerator. However, I recommend assembling the complete pies no more than 24 hours before serving to ensure the bananas stay fresh and the crust maintains its texture.
These pies are not suitable for freezing due to the fresh bananas and dairy-based pudding, which can separate and lose their smooth texture when thawed.
Frequently Asked Questions (FAQs)
Q: Can I make these pies without eggs?
A: Yes! You can use instant pudding mix instead of homemade pudding to create an egg-free version. Just follow the package instructions and fold in some extra vanilla for flavor.
Q: How far in advance can I make these pies?
A: The pudding can be made 2 days ahead, but I recommend assembling the complete pies no more than 24 hours before serving for the best texture and appearance.
Q: Can I use frozen bananas?
A: Fresh bananas work best for this recipe. Frozen bananas become too soft and watery when thawed, which can make the pies soggy.
Q: What if I don’t have mini tart pans?
A: You can use a muffin tin lined with plastic wrap, or make one large pie in a 9-inch pie pan and cut into slices.
Q: Can I make these pies vegan?
A: Absolutely! Use coconut milk for the pudding, vegan butter for the crust, and coconut whipped cream for the topping. Replace egg yolks with additional cornstarch for thickening.
Q: Why is my pudding not thickening?
A: Make sure you’re cooking the pudding long enough and whisking constantly. The mixture needs to reach a full boil to properly activate the cornstarch.
Conclusion
No Bake Mini Banana Cream Pies represent the perfect marriage of convenience and elegance in dessert making. These individual treats offer all the beloved flavors of traditional banana cream pie without any of the fuss of baking or complicated preparation techniques.
I’ve found that these mini pies are incredibly versatile and always receive rave reviews from guests. Whether you’re hosting a summer barbecue, planning a potluck contribution, or simply craving a cool and creamy dessert, this recipe delivers consistently delicious results.
The beauty of this recipe lies not only in its simplicity but also in its make-ahead convenience and impressive presentation. Each component can be prepared separately and assembled when ready, making it perfect for entertaining. The individual serving size ensures everyone gets their own perfect portion, complete with the ideal ratio of crust, pudding, bananas, and whipped cream in every bite.
Take your time with each step, use quality ingredients, and don’t rush the chilling process. Your patience will be rewarded with desserts that look professionally made and taste absolutely divine. Happy cooking, and enjoy watching faces light up when you serve these delightful mini banana cream pies!

