No Bake Orange Creamsicle Cheesecake Recipe
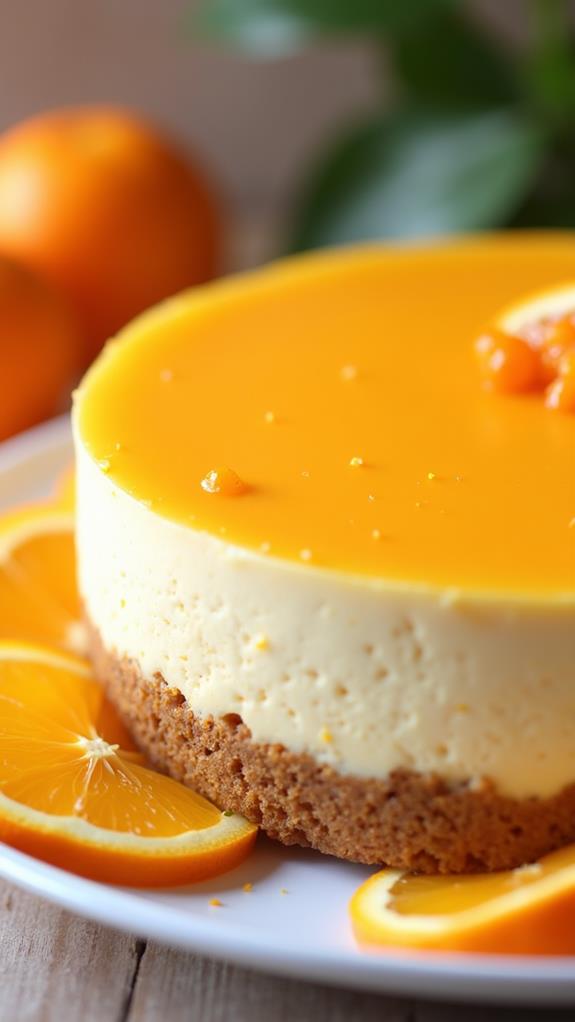
There’s something magical about the combination of creamy vanilla and bright citrus orange that instantly transports you back to childhood summers. This No Bake Orange Creamsicle Cheesecake captures that beloved frozen treat flavor in an elegant, crowd-pleasing dessert that requires no oven time whatsoever.
Perfect for hot summer days when you want to avoid heating up the kitchen, this recipe delivers all the satisfaction of traditional cheesecake with a fraction of the effort. The result is a silky smooth, refreshingly citrusy dessert that will have everyone asking for seconds.
What is No Bake Orange Creamsicle Cheesecake?
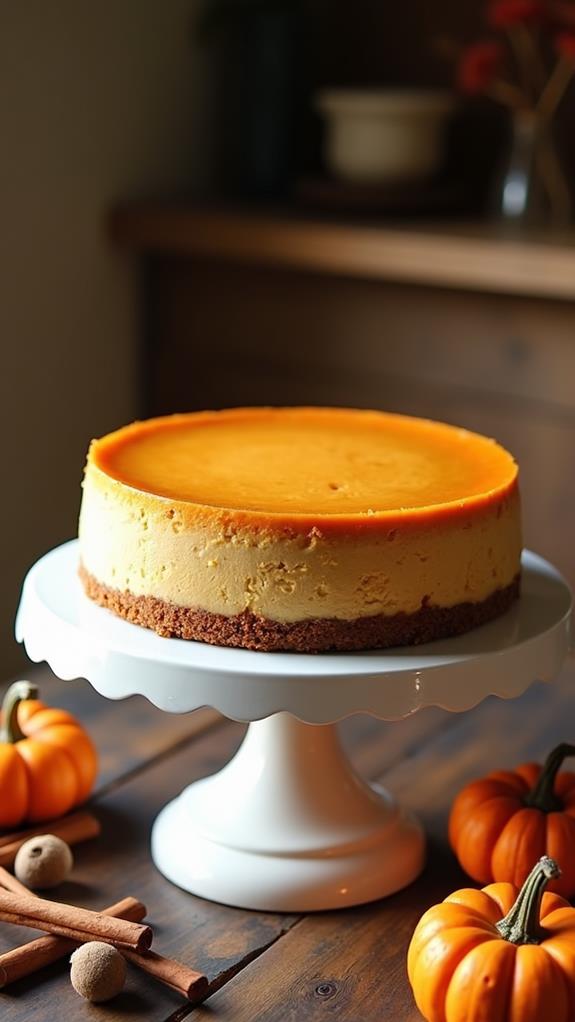
No Bake Orange Creamsicle Cheesecake is a chilled dessert that mimics the iconic orange and vanilla ice cream treat in cheesecake form. Unlike traditional baked cheesecakes, this version sets in the refrigerator using gelatin or the natural firmness of cream cheese and whipped cream.
The dessert features a classic graham cracker crust topped with a two-toned filling that combines vanilla cream cheese with bright orange flavoring. The orange layer can be created using fresh orange juice, orange zest, and sometimes orange extract to achieve that distinctive creamsicle taste.
This no-bake method makes it incredibly beginner-friendly while still delivering professional-looking results. The dessert requires minimal prep time and uses simple ingredients that are readily available in most grocery stores.
Ingredients List for No Bake Orange Creamsicle Cheesecake
For the Crust:
- 1½ cups graham cracker crumbs
- ⅓ cup granulated sugar
- 6 tablespoons melted butter
- ¼ teaspoon salt
For the Cheesecake Filling:
- 24 oz cream cheese, softened to room temperature
- 1 cup powdered sugar
- 1 cup heavy whipping cream
- 1 packet (2¼ teaspoons) unflavored gelatin
- 3 tablespoons cold water
- ½ cup fresh orange juice
- 2 tablespoons orange zest (from about 2 large oranges)
- 1 teaspoon vanilla extract
- ½ teaspoon orange extract
- Orange food coloring (optional, for vibrant color)
For Garnish:
- Additional whipped cream
- Orange zest
- Orange slices
- Fresh mint leaves (optional)
How to Make No Bake Orange Creamsicle Cheesecake: A Step-by-Step Guide
Creating this stunning no-bake cheesecake is easier than you might think. Follow these detailed steps to ensure perfect results every time:
1. Prepare the Crust:
- Line a 9-inch springform pan with parchment paper for easy removal.
- In a medium bowl, combine graham cracker crumbs, granulated sugar, and salt.
- Pour in the melted butter and mix until the mixture resembles wet sand and holds together when squeezed.
- Press the mixture firmly into the bottom of your prepared pan, using the bottom of a measuring cup to create an even layer.
- Refrigerate the crust while you prepare the filling.
2. Bloom the Gelatin:
- In a small bowl, sprinkle the unflavored gelatin over cold water.
- Let it sit for 5 minutes until it becomes spongy and absorbs all the water.
- After blooming, microwave for 15-20 seconds or place the bowl in a small saucepan with simmering water until completely dissolved.
- Set aside to cool slightly.
3. Prepare the Base Filling:
- In a large mixing bowl, beat the softened cream cheese until smooth and fluffy, about 3-4 minutes.
- Gradually add powdered sugar and continue beating until well combined and no lumps remain.
- Add vanilla extract and mix until incorporated.
4. Whip the Cream:
- In a separate clean bowl, whip the heavy cream to stiff peaks using an electric mixer.
- Be careful not to over-whip, as this can cause the cream to become grainy.
5. Create the Orange Layer:
- Take half of the cream cheese mixture and transfer it to another bowl.
- Add the dissolved gelatin, fresh orange juice, orange zest, and orange extract to this portion.
- Mix until well combined and add a few drops of orange food coloring if desired for a more vibrant color.
6. Fold in Whipped Cream:
- Gently fold half of the whipped cream into the vanilla cream cheese mixture.
- Fold the remaining whipped cream into the orange cream cheese mixture.
- Use a folding motion rather than stirring to maintain the light, airy texture.
7. Layer the Cheesecake:
- Remove the crust from the refrigerator.
- Spread the vanilla layer evenly over the crust using an offset spatula.
- Carefully spoon the orange layer on top of the vanilla layer.
- For a marbled effect, use a knife to gently swirl the two layers together.
8. Chill and Set:
- Cover the cheesecake with plastic wrap, ensuring it doesn’t touch the surface.
- Refrigerate for at least 4 hours, but preferably overnight for best results.
- The cheesecake should be firm and set before serving.
Substitutions and Variations
This versatile recipe can be adapted to suit different tastes and dietary needs:
- Crust Options: Replace graham crackers with vanilla wafers, gingersnaps, or even crushed orange-flavored cookies for extra citrus flavor.
- Dairy-Free Version: Use vegan cream cheese and coconut whipping cream. Make sure to chill the coconut cream overnight before whipping.
- Sugar Alternatives: Substitute powdered sugar with powdered erythritol or your preferred sugar substitute, adjusting to taste.
- Citrus Variations: Try lemon-lime for a different citrus profile, or use lime juice and zest for a key lime creamsicle version.
- Gelatin-Free Option: For a softer set, omit the gelatin entirely. The cheesecake will still firm up from chilling but will have a more mousse-like texture.
- Individual Servings: Make mini cheesecakes using a muffin tin lined with cupcake papers for portion-controlled treats.
Common Mistakes to Avoid
Prevent these common pitfalls to ensure your cheesecake turns out perfectly:
- Using Cold Cream Cheese: Room temperature cream cheese is crucial for a smooth, lump-free filling. Take it out of the refrigerator 2-3 hours before making the recipe.
- Over-whipping the Cream: Stop whipping as soon as stiff peaks form to avoid a grainy texture that can’t be fixed.
- Not Properly Dissolving Gelatin: Ensure the gelatin is completely dissolved and cooled slightly before adding to prevent lumps.
- Rushing the Chilling Process: Allow adequate time for the cheesecake to set properly. Cutting too early will result in a messy, runny dessert.
- Forgetting to Line the Pan: Always line your springform pan with parchment paper for easy removal and clean presentation.
How to Serve No Bake Orange Creamsicle Cheesecake
This refreshing cheesecake is perfect for various occasions and can be served in multiple ways:
Serve chilled slices on dessert plates with a dollop of fresh whipped cream and a sprinkle of orange zest. The contrast between the cool, creamy cheesecake and the bright citrus garnish creates a beautiful presentation.
For special occasions, consider serving with fresh berry compote or a drizzle of orange glaze made from powdered sugar and fresh orange juice. The additional flavors complement the creamsicle taste without overwhelming it.
This dessert pairs wonderfully with light summer meals, barbecues, or as a refreshing end to a heavy dinner. It’s also an excellent choice for potluck gatherings since it travels well and doesn’t require reheating.
Presentation Ideas for No Bake Orange Creamsicle Cheesecake
Elevate your cheesecake presentation with these creative ideas:
- Ombré Effect: Create gradient layers by dividing the orange mixture into portions and adding varying amounts of food coloring to each.
- Citrus Wheel Garnish: Arrange thin orange slices around the edge of the cheesecake for a professional bakery look.
- Piped Borders: Use a piping bag to create decorative whipped cream borders around the edge of the cheesecake.
- Candied Orange Peel: Top with homemade or store-bought candied orange peel for added texture and intense orange flavor.
No Bake Orange Creamsicle Cheesecake Tips
Follow these expert tips for the best results:
- Temperature Matters: All dairy ingredients should be at room temperature for smooth mixing and proper incorporation.
- Quality Ingredients: Use real vanilla extract and fresh orange juice rather than artificial flavors for the most authentic taste.
- Proper Zesting: When zesting oranges, only remove the colored outer layer and avoid the bitter white pith underneath.
- Storage Considerations: Keep the cheesecake covered in the refrigerator to prevent it from absorbing other flavors.
- Make-Ahead Friendly: This dessert actually improves after a day in the refrigerator as the flavors meld together.
How to Store No Bake Orange Creamsicle Cheesecake
Proper storage ensures your cheesecake maintains its quality and safety:
Cover the cheesecake tightly with plastic wrap or store in an airtight container in the refrigerator. The dessert will keep fresh for up to 5 days when properly stored.
For longer storage, individual slices can be wrapped in plastic wrap and frozen for up to 3 months. Thaw overnight in the refrigerator before serving.
Always keep the cheesecake refrigerated except when serving, as dairy-based desserts can spoil quickly at room temperature.
Frequently Asked Questions (FAQs)
Q: Can I make this cheesecake without gelatin?
A: Yes, you can omit the gelatin for a softer, mousse-like texture. The cheesecake will still set from chilling but will be less firm.
Q: How long does the cheesecake need to set?
A: Minimum 4 hours, but overnight is preferred for the best texture and flavor development.
Q: Can I use bottled orange juice instead of fresh?
A: Fresh orange juice provides the best flavor, but high-quality bottled juice can be substituted if necessary.
Q: What if my cream cheese has lumps?
A: Strain the mixture through a fine-mesh sieve or use an immersion blender to smooth out any remaining lumps.
Q: Can I double the recipe for a larger crowd?
A: Yes, but use a larger pan or make two separate cheesecakes to maintain proper proportions and setting.
Q: How do I know when the cheesecake is properly set?
A: The surface should feel firm to gentle touch and not jiggle when the pan is moved slightly.
Conclusion
This No Bake Orange Creamsicle Cheesecake brings together the best of both worlds: the nostalgic flavors of a beloved childhood treat and the sophisticated appeal of a homemade cheesecake. The beauty of this recipe lies in its simplicity and the stunning results it produces without any baking required.
The combination of creamy vanilla and bright orange creates a dessert that’s both refreshing and indulgent, perfect for any season but especially delightful during warmer months. Whether you’re hosting a dinner party, attending a potluck, or simply treating your family to something special, this cheesecake is guaranteed to impress.
Remember that the key to success lies in using quality ingredients, allowing proper setting time, and following the steps carefully. With practice, you’ll find this recipe becomes a go-to dessert that never fails to bring smiles and requests for the recipe. Enjoy creating this delightful treat and watching as it becomes a new favorite in your dessert repertoire!

