Paula Deens 5 Minute Fudge Recipe
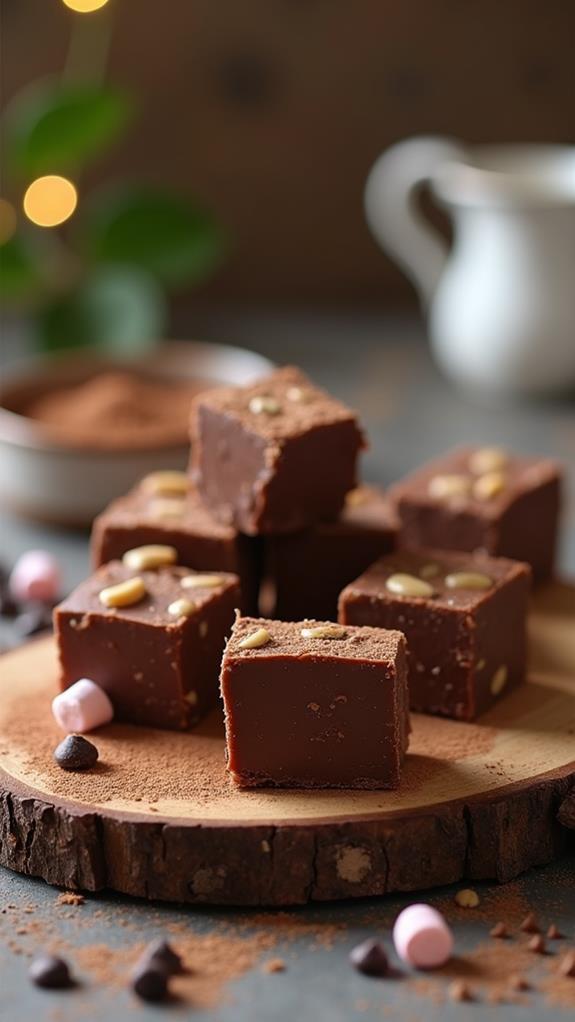
When you’re craving rich, chocolatey goodness but don’t have hours to spend in the kitchen, Paula Deen’s 5 Minute Fudge is the answer to your sweet tooth prayers. This legendary recipe delivers all the indulgent flavor of traditional fudge in just minutes, making it perfect for unexpected guests, last-minute gift giving, or those moments when only homemade fudge will do.
I’ve made this recipe countless times, and it never fails to impress. The best part? You probably already have most of these ingredients in your pantry right now!
What is Paula Deen’s 5 Minute Fudge?
Paula Deen’s 5 Minute Fudge is a simplified version of traditional fudge that eliminates the need for candy thermometers and complicated temperature testing. This Southern-inspired recipe combines simple pantry staples to create a rich, creamy confection that rivals any store-bought variety.
The genius of this recipe lies in its foolproof method – by boiling a sugar mixture for exactly 5 minutes, you achieve the perfect consistency without guesswork. The addition of mini marshmallows creates an incredibly smooth texture, while the pecans add that signature Southern touch that Paula Deen is famous for.
Unlike traditional fudge recipes that require precise temperatures and can easily go wrong, this version is nearly impossible to mess up, making it perfect for beginners and experienced cooks alike.
Ingredients List for Paula Deen’s 5 Minute Fudge
- 1⅔ cups granulated sugar
- ⅔ cup evaporated milk
- 4 tablespoons butter
- ½ teaspoon salt
- 1 (6-oz) bag semi-sweet chocolate chips
- 2 cups mini marshmallows
- 1 teaspoon pure vanilla extract
- ½ cup chopped pecans
How to Make Paula Deen’s 5 Minute Fudge: A Step-by-Step Guide
Creating this delicious fudge involves just a few simple steps that come together to produce consistently perfect results. Here’s my detailed guide to ensure your fudge turns out beautifully every time:
1. Prepare Your Pan:
- Line an 8-inch square pan with parchment paper, leaving some overhang for easy removal.
- Lightly grease the parchment paper with butter or cooking spray.
- This preparation step is crucial – don’t skip it, or you’ll struggle to remove the fudge later.
2. Combine the Base Ingredients:
- In a heavy-bottomed saucepan, combine the sugar, evaporated milk, butter, and salt.
- Use a wooden spoon to mix everything together until the sugar is mostly dissolved.
- The heavy-bottomed pan is important to prevent burning and ensure even heat distribution.
3. The Critical 5-Minute Boil:
- Place the saucepan over medium heat and bring the mixture to a rolling boil.
- Once boiling, set a timer for exactly 5 minutes and stir constantly.
- This constant stirring prevents the mixture from sticking or burning.
- The mixture will bubble vigorously – this is exactly what you want.
4. Add the Chocolate:
- Remove the pan from heat immediately after 5 minutes.
- Quickly add all the chocolate chips and stir until completely melted and smooth.
- The hot mixture will melt the chocolate almost instantly.
5. Incorporate the Final Ingredients:
- Stir in the vanilla extract, mini marshmallows, and chopped pecans.
- Continue stirring until the marshmallows are completely melted and the mixture is smooth.
- Work quickly during this step, as the fudge will begin to set as it cools.
6. Set the Fudge:
- Pour the mixture into your prepared pan and spread evenly with a spatula.
- Refrigerate for at least 2 hours, or until completely firm.
- Cut into squares using a sharp knife for clean, professional-looking pieces.
Substitutions and Variations
This versatile recipe can be customized to suit different tastes and dietary needs:
- Nuts: Replace pecans with walnuts, almonds, or peanuts for different flavor profiles. You can also omit nuts entirely for a smooth fudge.
- Chocolate: Try milk chocolate chips for a sweeter fudge, or dark chocolate chips for a more intense chocolate flavor.
- Add-ins: Consider adding 1 tablespoon of peanut butter, ½ cup of coconut flakes, or dried fruit like cranberries.
- Dairy-Free Option: Use dairy-free chocolate chips and replace butter with vegan butter alternative.
- Flavor Extracts: Substitute vanilla with almond, mint, or orange extract for unique flavor variations.
Common Mistakes to Avoid
I’ve learned these lessons through experience, so save yourself the frustration by avoiding these common pitfalls:
- Not Timing the Boil: The 5-minute boil is crucial. Too short and the fudge won’t set; too long and it becomes grainy.
- Using the Wrong Pan: A thin-bottomed pan can cause hot spots and burning. Always use heavy-bottomed cookware.
- Stale Marshmallows: Fresh mini marshmallows melt smoothly. Stale ones can create lumps and make stirring difficult.
- Skipping the Parchment: Greasing alone isn’t enough. Always use parchment paper for easy removal.
- Rushing the Cooling: Don’t try to speed up the process. Proper chilling is essential for the right texture.
How to Serve Paula Deen’s 5 Minute Fudge
This fudge is incredibly versatile and perfect for numerous occasions. I love serving it at holiday gatherings, where it disappears faster than any other dessert on the table. Cut into small squares and arrange on a decorative platter for an elegant presentation.
For gift-giving, place pieces in small paper cups and arrange in a decorative tin or box. The fudge also makes an excellent addition to dessert tables, cookie exchanges, or potluck dinners. Pair it with coffee, hot chocolate, or a glass of cold milk for the ultimate indulgence.
Presentation Ideas for Paula Deen’s 5 Minute Fudge
To make your fudge look as good as it tastes, consider these presentation suggestions:
- Elegant Squares: Cut into perfect 1-inch squares and dust lightly with powdered sugar for a professional bakery look.
- Gift Boxes: Wrap individual pieces in small squares of parchment paper and place in decorative boxes.
- Layered Display: Create visual interest by stacking different variations on a tiered serving stand.
- Holiday Theme: During Christmas, sprinkle with crushed peppermint candies or drizzle with white chocolate.
Paula Deen’s 5 Minute Fudge Recipe Tips
Here are my tried-and-true tips for perfect fudge every time:
- Quality Ingredients: Use high-quality chocolate chips and real vanilla extract for the best flavor.
- Weather Matters: Humid days can affect fudge setting. If it’s very humid, you may need extra chilling time.
- Clean Cuts: For the cleanest cuts, use a sharp knife wiped with a warm, damp cloth between cuts.
- Temperature Check: The mixture should reach about 234°F (soft ball stage) during the 5-minute boil.
- Storage Prep: Cut into pieces before storing to prevent breaking when the fudge is fully set.
How to Store Paula Deen’s 5 Minute Fudge
Proper storage ensures your fudge maintains its perfect texture and flavor. Allow the fudge to cool completely before cutting and storing. Place pieces in an airtight container with parchment paper between layers to prevent sticking.
Store at room temperature for up to one week, or refrigerate for up to two weeks. For longer storage, wrap individual pieces in plastic wrap and freeze for up to three months. When ready to serve frozen fudge, let it thaw at room temperature for about 30 minutes.
Frequently Asked Questions (FAQs)
Q: Why is my fudge not setting properly?
A: This usually means the mixture wasn’t boiled long enough. Make sure you boil for the full 5 minutes at a rolling boil, stirring constantly.
Q: Can I make this fudge without nuts?
A: Absolutely! Simply omit the pecans for a smooth, nut-free version. You can add extra chocolate chips or other mix-ins instead.
Q: What if I don’t have evaporated milk?
A: Heavy cream can be substituted, but use slightly less (about ½ cup) as it’s richer than evaporated milk. Regular milk won’t work as well.
Q: How do I know when the mixture has boiled long enough?
A: Set a timer for exactly 5 minutes from when the mixture reaches a full, rolling boil. The mixture should look glossy and thick.
Q: Can I double this recipe?
A: Yes, but use a larger, heavy-bottomed pan and increase the boiling time to 6-7 minutes. Watch carefully to prevent overflow.
Q: Why did my fudge turn out grainy?
A: This usually happens from overcooking or not stirring constantly during the boiling phase. The mixture may have gotten too hot.
Q: Can I use different types of chocolate?
A: Semi-sweet chocolate chips work best, but you can experiment with milk chocolate for sweeter fudge or dark chocolate for more intense flavor.
Conclusion
Paula Deen’s 5 Minute Fudge truly lives up to its name, delivering rich, creamy, restaurant-quality fudge in just minutes. This foolproof recipe has become my go-to for last-minute desserts, holiday treats, and satisfying those inevitable chocolate cravings.
The beauty of this recipe lies in its simplicity and reliability. Whether you’re a novice cook or an experienced baker, you’ll find this fudge incredibly rewarding to make. The combination of simple ingredients creates something truly special that rivals any expensive chocolate shop confection.
I encourage you to make this recipe your own by experimenting with different nuts, extracts, or add-ins. Once you master the basic technique, the possibilities are endless. Remember to follow the timing precisely, use quality ingredients, and don’t rush the cooling process.
This fudge makes an excellent gift, brings joy to any gathering, and creates sweet memories in your kitchen. Give it a try, and I guarantee it will become a treasured recipe in your collection. Happy cooking, and enjoy every rich, chocolatey bite!

