Perfect No Bake Cheesecake Recipe
When summer heat makes turning on the oven unbearable, or when you’re craving that rich, creamy cheesecake flavor without the fuss of baking, this Perfect No Bake Cheesecake recipe is your answer. This incredibly smooth and decadent dessert requires no special equipment, no water baths, and absolutely no oven time.
I’ve perfected this recipe over the years, and it never fails to impress guests with its silky texture and perfectly balanced sweetness. Best of all, you can have this stunning dessert ready in just 20 minutes of prep time, then let the refrigerator do the rest of the work!
What is “No Bake Cheesecake”?
No bake cheesecake is a chilled dessert that achieves the same rich, creamy texture as traditional baked cheesecake without requiring any oven time. Instead of relying on eggs and heat to set the filling, this version uses whipped cream and sometimes gelatin to create structure and stability.
The result is a lighter, more mousse-like texture that’s incredibly refreshing and perfect for warm weather entertaining. Unlike baked cheesecake, which can crack or require precise temperature control, no bake cheesecake is virtually foolproof and always turns out beautifully.
Ingredients List for Perfect No Bake Cheesecake
For the Crust:
- 2 cups graham cracker crumbs (about 16 crackers)
- ⅓ cup granulated sugar
- 6 tablespoons butter, melted
- Pinch of salt
For the Filling:
- 24 oz cream cheese, softened to room temperature
- 1 cup powdered sugar, sifted
- 1 teaspoon vanilla extract
- 2 tablespoons fresh lemon juice
- 1½ cups heavy whipping cream, cold
- 1 packet (2¼ teaspoons) unflavored gelatin
- 3 tablespoons warm water
For Topping (Optional):
- Fresh berries
- Fruit compote
- Chocolate shavings
- Caramel or chocolate sauce
How to Make Perfect No Bake Cheesecake: A Step-by-Step Guide
Creating the perfect no bake cheesecake is all about proper technique and timing. Here’s my foolproof method that ensures silky-smooth results every time:
1. Prepare the Crust:
- In a medium bowl, combine graham cracker crumbs, granulated sugar, and a pinch of salt.
- Pour in the melted butter and mix until the mixture resembles wet sand and holds together when pressed.
- Press the mixture firmly into the bottom of a 9-inch springform pan, using the bottom of a measuring cup to create an even layer.
- Refrigerate the crust while you prepare the filling to help it set properly.
2. Bloom the Gelatin:
- Sprinkle the unflavored gelatin over 3 tablespoons of warm water in a small bowl.
- Let it sit for 5 minutes until the gelatin becomes spongy and absorbs all the water.
- Microwave for 15-20 seconds until the gelatin completely dissolves into a clear liquid.
- Set aside to cool slightly while preparing the rest of the filling.
3. Prepare the Cream Cheese Base:
- In a large mixing bowl, beat the softened cream cheese with an electric mixer until completely smooth and fluffy, about 2-3 minutes.
- Gradually add the sifted powdered sugar, beating until well combined and no lumps remain.
- Mix in the vanilla extract and fresh lemon juice until the mixture is smooth and creamy.
4. Incorporate the Gelatin:
- Make sure the dissolved gelatin has cooled but is still liquid (not beginning to set).
- While beating the cream cheese mixture on low speed, slowly drizzle in the gelatin mixture.
- Beat until completely incorporated, ensuring no streaks of gelatin remain.
5. Whip the Cream:
- In a separate clean bowl, whip the cold heavy cream using clean beaters until soft peaks form.
- Be careful not to overwhip, as this can cause the cream to become grainy.
- The peaks should hold their shape but still look smooth and glossy.
6. Fold Everything Together:
- Add one-third of the whipped cream to the cream cheese mixture and gently fold in with a rubber spatula.
- This lightens the mixture and makes it easier to fold in the remaining cream.
- Add the remaining whipped cream in two additions, folding gently until just combined and no white streaks remain.
7. Assemble and Chill:
- Pour the filling over the prepared crust, spreading it evenly with an offset spatula.
- Gently tap the pan on the counter a few times to release air bubbles.
- Cover with plastic wrap and refrigerate for at least 4 hours, or preferably overnight, until completely set.
Substitutions and Variations
This no bake cheesecake recipe is incredibly versatile and can be customized to suit different tastes and dietary needs:
- Crust Options: Try crushed vanilla wafers, chocolate cookies, or even crushed pretzels for a unique twist.
- Cream Cheese: Full-fat cream cheese works best, but you can use reduced-fat versions with slightly different texture results.
- Flavor Variations: Add 2 tablespoons of cocoa powder for chocolate cheesecake, or ½ cup of fruit puree for berry flavors.
- Dairy-Free Version: Use dairy-free cream cheese and coconut whipping cream for a lactose-free option.
- Sugar Alternatives: Replace powdered sugar with the same amount of powdered erythritol for a lower-carb version.
- Gelatin-Free: Skip the gelatin for a softer, more mousse-like texture that’s still delicious but less firm.
Common Mistakes to Avoid
Avoid these pitfalls to ensure your no bake cheesecake turns out perfectly every time:
- Using Cold Cream Cheese: Room temperature cream cheese is crucial for a smooth filling without lumps.
- Overwhipping the Cream: Stop at soft peaks to prevent a grainy texture in your final cheesecake.
- Hot Gelatin: Allow the dissolved gelatin to cool before adding it, or it might curdle the cream cheese.
- Rushing the Chilling: Don’t skip the minimum 4-hour chill time, or your cheesecake won’t be properly set.
- Overmixing After Adding Cream: Gentle folding is key to maintaining the light, airy texture.
How to Serve Perfect No Bake Cheesecake
This no bake cheesecake is best served chilled and pairs beautifully with a variety of accompaniments. I recommend removing it from the refrigerator about 10 minutes before serving to make slicing easier.
For clean slices, use a sharp knife dipped in warm water and wiped clean between each cut. The cheesecake pairs wonderfully with fresh berries, a drizzle of fruit compote, or even a simple dusting of powdered sugar.
Consider serving smaller portions, as this dessert is quite rich. A simple dollop of whipped cream and a mint sprig make for an elegant presentation that’s perfect for dinner parties or special occasions.
Presentation Ideas for No Bake Cheesecake
Transform your no bake cheesecake into a showstopping dessert with these presentation ideas:
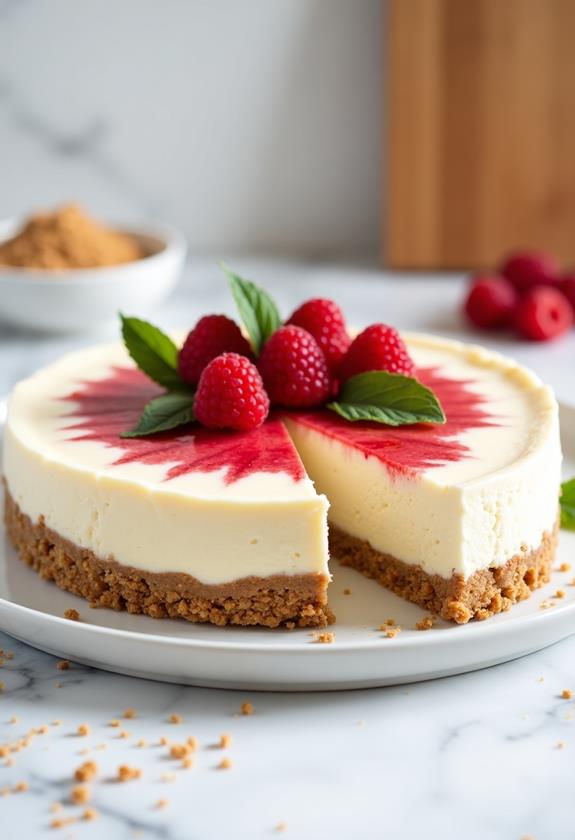
- Berry Crown: Arrange fresh strawberries, blueberries, and raspberries in concentric circles on top for a vibrant, colorful finish.
- Chocolate Elegance: Drizzle melted chocolate in artistic patterns and top with chocolate curls or shavings.
- Seasonal Themes: Use seasonal fruits like sliced peaches in summer or sugared cranberries during the holidays.
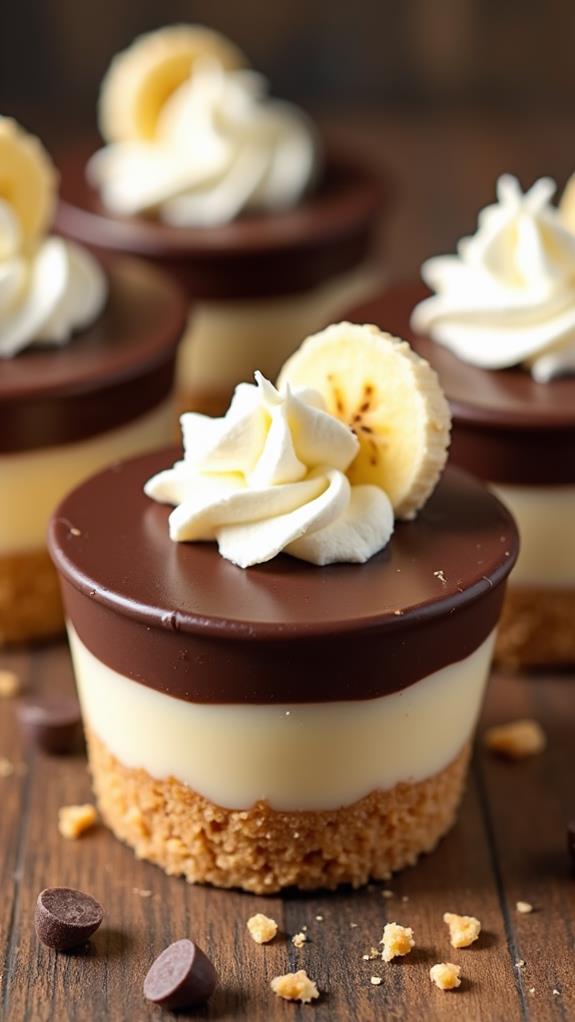
- Individual Portions: Make mini cheesecakes in muffin tins lined with paper cups for perfect single servings.
Perfect No Bake Cheesecake Recipe Tips
Here are my professional tips for achieving cheesecake perfection:
- Quality Ingredients: Use full-fat, high-quality cream cheese for the richest flavor and smoothest texture.
- Temperature Control: All dairy ingredients should be at room temperature for easy mixing and smooth results.
- Gentle Folding: Use a rubber spatula and fold from bottom to top to maintain the airy texture of the whipped cream.
- Make Ahead: This dessert actually improves after a full day in the refrigerator, making it perfect for entertaining.
- Storage: Keep covered to prevent the surface from drying out or absorbing refrigerator odors.
How to Store Perfect No Bake Cheesecake
Proper storage is essential for maintaining the quality and safety of your no bake cheesecake. Cover the entire pan tightly with plastic wrap or store individual slices in airtight containers in the refrigerator.
The cheesecake will maintain its best quality for up to 5 days when properly stored. For longer storage, you can freeze individual slices wrapped in plastic wrap and foil for up to 2 months. Thaw frozen slices in the refrigerator overnight before serving.
Always keep the cheesecake refrigerated when not serving, as the dairy content requires cold storage for food safety.
Frequently Asked Questions (FAQs)
Q: Can I make this cheesecake without gelatin?
A: Yes, you can skip the gelatin, but the texture will be softer and more mousse-like. The cheesecake will still be delicious but less firm when slicing.
Q: How long does the cheesecake need to set?
A: Minimum 4 hours, but overnight is ideal for the best texture and easiest slicing. The gelatin needs time to fully set the filling.
Q: Can I use a different pan size?
A: Yes, but adjust accordingly. A smaller pan will create a thicker cheesecake that may need extra setting time, while a larger pan will create a thinner dessert.
Q: Why is my cheesecake grainy?
A: This usually happens from cold cream cheese or overwhipped cream. Make sure your cream cheese is fully softened and stop whipping cream at soft peaks.
Q: Can I add fresh fruit to the filling?
A: Fresh fruit releases moisture that can affect the texture. It’s better to use fruit as a topping or make a fruit compote to layer on top.
Q: How do I prevent cracks in the surface?
A: Unlike baked cheesecake, no bake versions rarely crack. If you see any surface issues, they’re likely from air bubbles that can be prevented by gentle folding and tapping the pan.
Conclusion
This Perfect No Bake Cheesecake recipe has become my go-to dessert for everything from casual family dinners to elegant entertaining. The combination of simplicity and sophistication makes it a winner every time, and the fact that it requires no baking means I can make it even on the hottest summer days.
The key to success lies in using quality ingredients, proper technique, and patience during the chilling process. Once you master this basic recipe, you’ll find endless opportunities to customize it with different flavors, toppings, and presentations.
Whether you’re a beginner baker or an experienced cook looking for a reliable no-fuss dessert, this cheesecake delivers professional results with minimal effort. I hope this recipe brings as much joy to your kitchen as it has to mine. Happy dessert making!