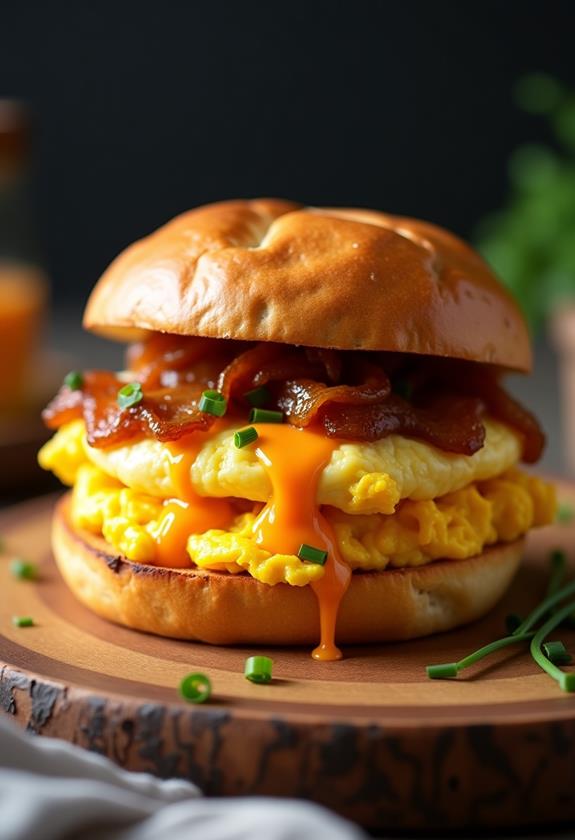
Sausage Egg And Cheese Breakfast Sliders With Syrup Glaze Recipe
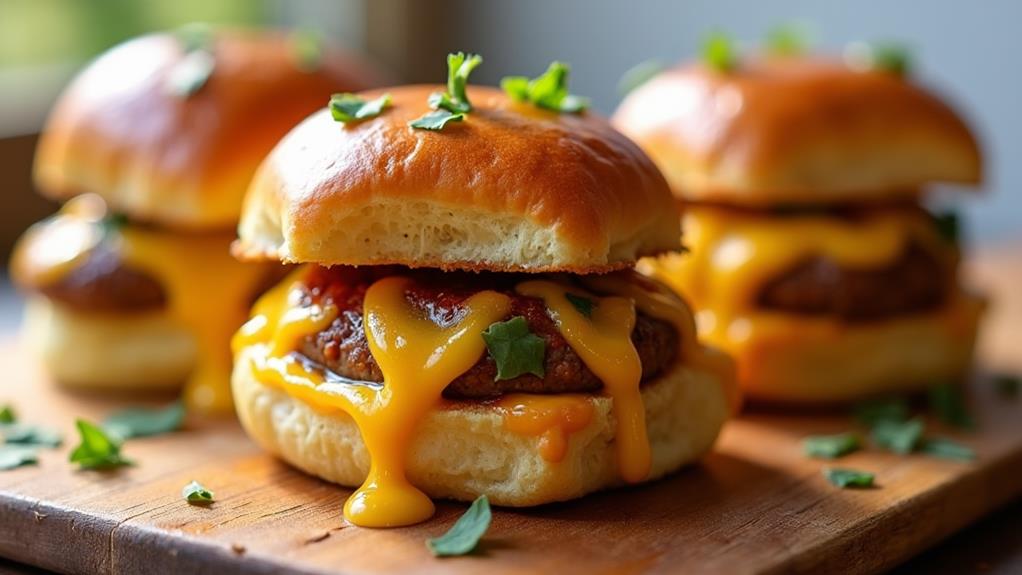
There’s nothing quite like starting your morning with a breakfast that combines all your favorite flavors in one perfect bite. These Sausage Egg and Cheese Breakfast Sliders with Syrup Glaze deliver exactly that – a harmonious blend of savory sausage, creamy scrambled eggs, melted cheese, and a touch of sweet maple syrup glaze that ties everything together beautifully.
Whether you’re hosting a weekend brunch, feeding a hungry family, or meal-prepping for busy mornings, these sliders are your answer to breakfast perfection. They’re easy to make, incredibly satisfying, and guaranteed to become a household favorite.
What are Sausage Egg and Cheese Breakfast Sliders?
Sausage Egg and Cheese Breakfast Sliders are mini breakfast sandwiches that pack all the classic breakfast flavors into perfectly portioned slider buns. The magic happens when you add a sweet maple syrup glaze that caramelizes slightly during baking, creating an irresistible sweet-and-savory combination.
These sliders take the beloved breakfast sandwich concept and elevate it with the convenience of batch cooking and the indulgent touch of a syrup glaze. They’re perfect for feeding a crowd or preparing several servings at once.
Ingredients List for Sausage Egg and Cheese Breakfast Sliders
For the Sliders:
- 12 slider buns (Hawaiian rolls work perfectly)
- 1 pound breakfast sausage
- 8 large eggs
- 2 tablespoons butter
- 1/4 cup milk
- 8 slices American cheese (or cheddar)
- Salt and pepper to taste
- 1/4 teaspoon garlic powder
- 2 tablespoons chives, chopped (optional)
For the Syrup Glaze:
- 1/4 cup maple syrup
- 3 tablespoons butter, melted
- 1 tablespoon Dijon mustard
- 1/2 teaspoon onion powder
- 1/4 teaspoon black pepper
How to Cook Sausage Egg and Cheese Breakfast Sliders: A Step-by-Step Guide
Creating these delicious breakfast sliders is easier than you might think. Here’s my detailed guide to ensure perfect results every time:
1. Prepare Your Workspace:
- Preheat your oven to 350°F (175°C).
- Line a 9×13 inch baking dish with parchment paper or lightly grease it.
- Gather all your ingredients and have them ready to go.
2. Cook the Sausage:
- Heat a large skillet over medium heat.
- Add the breakfast sausage, breaking it up with a spoon as it cooks.
- Cook for 6-8 minutes until the sausage is browned and fully cooked through.
- Remove from heat and drain any excess grease. Set aside to cool slightly.
3. Scramble the Eggs:
- In a large bowl, whisk together eggs, milk, salt, pepper, and garlic powder.
- Heat butter in the same skillet over medium-low heat.
- Pour in the egg mixture and gently scramble, stirring frequently.
- Cook until the eggs are just set but still slightly creamy (they’ll finish cooking in the oven).
- Remove from heat and fold in chopped chives if using.
4. Prepare the Slider Buns:
- Slice the slider buns in half horizontally, keeping the tops and bottoms together as one unit.
- Place the bottom halves in your prepared baking dish.
5. Assemble the Sliders:
- Spread the cooked sausage evenly over the bottom buns.
- Layer the scrambled eggs on top of the sausage.
- Place the cheese slices over the eggs, tearing them if needed to fit.
- Top with the upper halves of the buns.
6. Make the Syrup Glaze:
- In a small bowl, whisk together maple syrup, melted butter, Dijon mustard, onion powder, and black pepper.
- The mixture should be smooth and well combined.
7. Apply the Glaze and Bake:
- Brush the syrup glaze generously over the tops of the sliders.
- Cover the baking dish with aluminum foil.
- Bake for 15 minutes, then remove the foil and bake for an additional 5-7 minutes until the tops are golden brown.
8. Serve and Enjoy:
- Let the sliders cool for 2-3 minutes before serving.
- Use a sharp knife to cut between the individual sliders if needed.
- Serve warm for the best experience.
Substitutions and Variations
These breakfast sliders are wonderfully adaptable to different tastes and dietary needs. Here are some variations I love to try:
- Meat Options: Replace breakfast sausage with bacon, ham, or turkey sausage for different flavor profiles.
- Cheese Varieties: Try sharp cheddar, Swiss, pepper jack, or even cream cheese for unique tastes.
- Bread Alternatives: Use English muffins, croissants, or regular dinner rolls instead of slider buns.
- Vegetarian Version: Skip the meat and add sautéed mushrooms, spinach, or bell peppers for a veggie-packed option.
- Spicy Kick: Add jalapeños to the eggs or use spicy breakfast sausage for heat lovers.
- Herb Enhancement: Fresh herbs like thyme, oregano, or parsley can elevate the flavor profile.
Common Mistakes to Avoid
After making these sliders countless times, I’ve learned to avoid these common pitfalls:
- Overcooking the Eggs: Remember, the eggs will continue cooking in the oven, so slightly undercook them during scrambling.
- Skipping the Glaze: The syrup glaze is what makes these sliders special – don’t skip this crucial step.
- Using Cold Ingredients: Let your eggs come to room temperature for easier scrambling and better texture.
- Overcrowding the Pan: If doubling the recipe, use two baking dishes rather than cramming everything into one.
- Not Draining the Sausage: Excess grease will make your sliders soggy, so always drain the cooked sausage.
How to Serve Sausage Egg and Cheese Breakfast Sliders
These sliders are perfect as a complete breakfast on their own, but they pair beautifully with several sides. I love serving them with crispy hash browns, fresh fruit salad, or roasted breakfast potatoes.
For beverages, coffee, orange juice, or even a breakfast cocktail like a mimosa complement these rich, satisfying sliders perfectly. The sweet-savory combination makes them suitable for both casual family breakfasts and more elegant brunch gatherings.
Presentation Ideas for Breakfast Sliders
To make your breakfast sliders look as amazing as they taste, consider these presentation tips:
- Rustic Serving: Serve directly from the baking dish for a cozy, family-style presentation.
- Individual Plating: Place 2-3 sliders on each plate with a small side of fresh berries or hash browns.
- Garnish Touch: Sprinkle additional chopped chives or a light dusting of paprika on top before serving.
- Buffet Style: Arrange the sliders on a large platter with small plates and napkins for easy self-service.
Breakfast Sliders Recipe Tips
Here are my top tips for slider success:
- Make-Ahead Option: Assemble the sliders the night before (without the glaze), cover, and refrigerate. Add the glaze and bake in the morning.
- Batch Cooking: Double the recipe and freeze half for quick future breakfasts.
- Temperature Control: Use a meat thermometer to ensure the sausage reaches 160°F for food safety.
- Even Distribution: Spread ingredients evenly to ensure each slider has the perfect ratio of flavors.
- Quality Ingredients: Use real maple syrup rather than pancake syrup for the best glaze flavor.
How to Store Sausage Egg and Cheese Breakfast Sliders
Store leftover sliders in an airtight container in the refrigerator for up to 3 days. For best results, let them cool completely before storing to prevent condensation and sogginess.
To reheat, place sliders on a baking sheet and warm in a 300°F oven for 8-10 minutes, or microwave individual sliders for 30-45 seconds. The oven method will help maintain the texture of the buns better than microwaving.
Frequently Asked Questions (FAQs)
Q: Can I freeze these breakfast sliders?
A: Yes! Wrap individual sliders in plastic wrap and freeze for up to 1 month. Thaw overnight in the refrigerator and reheat in the oven.
Q: Can I make these without the syrup glaze?
A: While the glaze adds a special touch, you can make them without it. The sliders will still be delicious, just less sweet.
Q: What’s the best way to reheat leftover sliders?
A: For best texture, reheat in a 300°F oven for 8-10 minutes rather than using the microwave.
Q: Can I use different types of cheese?
A: Absolutely! Any melting cheese works well. Cheddar, Swiss, or pepper jack are all excellent choices.
Q: How far in advance can I prepare these?
A: You can assemble them the night before and bake in the morning, or fully prepare and reheat when needed.
Q: Can I make these dairy-free?
A: Yes, use dairy-free cheese and substitute the butter with a plant-based alternative.
Conclusion
Sausage Egg and Cheese Breakfast Sliders with Syrup Glaze represent everything I love about breakfast – they’re comforting, satisfying, and bring people together around the table. The combination of savory breakfast ingredients with that touch of sweet maple glaze creates a flavor experience that’s both familiar and special.
These sliders have become my go-to recipe for weekend brunches, holiday mornings, and any time I want to make breakfast feel like a celebration. They’re simple enough for beginners but impressive enough to serve to guests. The make-ahead option makes them perfect for busy families, while the customizable nature means everyone can enjoy them their way.
I encourage you to try this recipe and make it your own. Whether you stick to the classic version or experiment with different ingredients, these breakfast sliders are sure to become a beloved addition to your morning routine. Happy cooking, and enjoy every delicious bite!

