Soft Thick Peanut Butter Cookies Recipe
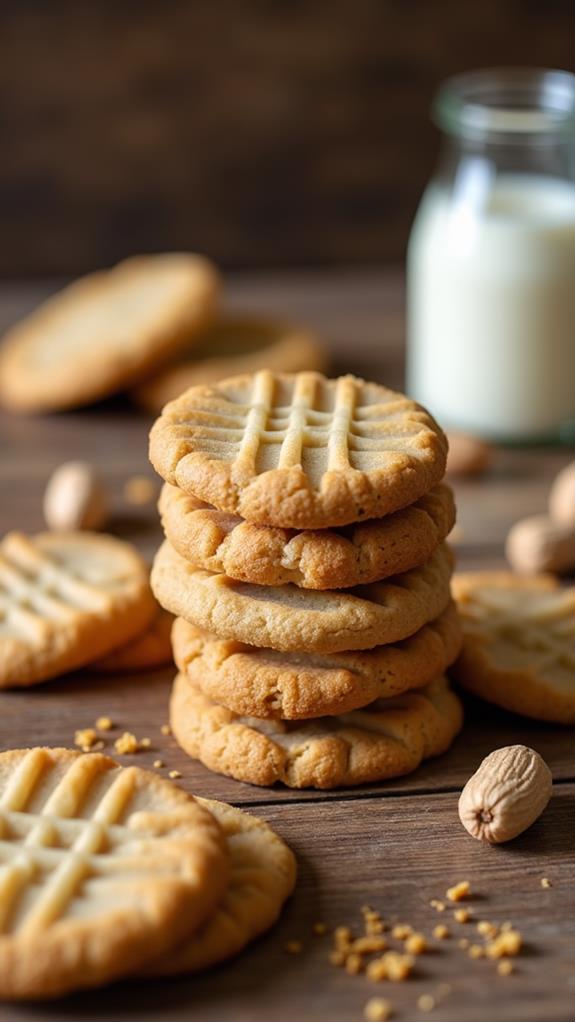
There’s nothing quite like the irresistible aroma of freshly baked peanut butter cookies wafting through your kitchen. These soft thick peanut butter cookies are the ultimate comfort treat that will transport you back to childhood memories with every bite.
What makes these cookies truly special is their perfectly soft, chewy texture combined with that rich, nutty flavor that peanut butter lovers crave. Follow this foolproof recipe to create bakery-quality cookies that stay soft for days and will have everyone asking for your secret!
What are Soft Thick Peanut Butter Cookies?
Soft thick peanut butter cookies are a beloved American classic that strikes the perfect balance between tender and substantial. Unlike their crispy counterparts, these cookies maintain a pillowy soft texture with a slightly dense, cake-like interior that melts in your mouth.
The key to achieving that coveted thick, soft texture lies in the perfect ratio of ingredients and proper mixing technique. These cookies are characterized by their golden-brown edges, soft centers, and the classic crisscross pattern pressed on top with a fork.
Ingredients List for Soft Thick Peanut Butter Cookies
- 1 cup creamy peanut butter (natural or regular)
- ½ cup unsalted butter, softened
- ¾ cup brown sugar, packed
- ¼ cup granulated sugar
- 1 large egg
- 1 teaspoon vanilla extract
- 1¼ cups all-purpose flour
- ½ teaspoon baking soda
- ½ teaspoon salt
- 2-3 tablespoons milk (if needed)
- Extra granulated sugar for rolling
How to Make Soft Thick Peanut Butter Cookies: A Step-by-Step Guide
Creating these perfectly soft and thick peanut butter cookies requires attention to detail and proper technique. Here’s my comprehensive guide to ensure your cookies turn out amazing every time:
1. Prepare Your Kitchen:
- Preheat your oven to 350°F (175°C) and line two baking sheets with parchment paper.
- Make sure all ingredients are at room temperature for the best mixing results.
- This temperature control is crucial for achieving the right texture in your cookies.
2. Cream the Fats and Sugars:
- In a large mixing bowl, cream together the softened butter and peanut butter until smooth and well combined.
- Add both brown and granulated sugars, beating for 2-3 minutes until the mixture becomes light and fluffy.
- This creaming process incorporates air, which contributes to the soft texture of your cookies.
3. Add Wet Ingredients:
- Beat in the egg and vanilla extract until fully incorporated.
- Make sure to scrape down the sides of the bowl to ensure even mixing.
- The egg adds moisture and helps bind the ingredients together.
4. Combine Dry Ingredients:
- In a separate bowl, whisk together flour, baking soda, and salt.
- Gradually add the dry ingredients to the wet mixture, mixing just until combined.
- Avoid overmixing, as this can lead to tough cookies rather than soft ones.
5. Adjust Consistency:
- If the dough seems too stiff or dry, add 1-2 tablespoons of milk to achieve a soft, workable consistency.
- The dough should hold together well but not be sticky.
- This step ensures your cookies will bake up soft and tender.
6. Shape and Prepare for Baking:
- Roll the dough into balls about 1½ inches in diameter (roughly 2 tablespoons of dough each).
- Roll each ball in granulated sugar for a slightly crispy exterior.
- Place the balls on your prepared baking sheets, spacing them about 2 inches apart.
7. Create the Classic Pattern:
- Using a fork, gently press a crisscross pattern on top of each cookie.
- Press down just enough to flatten slightly and create the traditional peanut butter cookie look.
- This also helps the cookies bake more evenly.
8. Bake to Perfection:
- Bake for 10-12 minutes, until the edges are just set but centers still look slightly soft.
- The cookies will continue cooking on the hot pan after removal from the oven.
- Let them cool on the baking sheet for 5 minutes before transferring to a wire rack.
Substitutions and Variations
I love experimenting with different variations of this classic recipe. Here are some substitutions and creative twists you can try:
- Peanut Butter Types: Natural peanut butter works beautifully, but you may need to add an extra tablespoon of flour if it’s very oily. Crunchy peanut butter adds delightful texture.
- Sugar Alternatives: You can substitute the granulated sugar with coconut sugar for a slightly different flavor profile.
- Flour Options: For gluten-free cookies, use a 1:1 gluten-free flour blend. Whole wheat flour can be substituted for half the all-purpose flour for added nutrition.
- Add-ins: Fold in chocolate chips, chopped peanuts, or mini marshmallows for extra excitement.
- Butter Substitute: For dairy-free cookies, use vegan butter or coconut oil (solid, not melted).
Common Mistakes to Avoid
Through years of baking these cookies, I’ve learned to avoid these common pitfalls that can ruin your batch:
- Overbaking: This is the biggest mistake! Remove cookies when centers still look slightly underdone.
- Using Cold Ingredients: Room temperature ingredients mix better and create a more consistent texture.
- Overmixing the Dough: Mix just until ingredients are combined to maintain tenderness.
- Skipping the Sugar Roll: Rolling in sugar creates a delicate, sweet crust that contrasts beautifully with the soft interior.
- Incorrect Measurements: Always measure flour by spooning it into the cup and leveling off for accuracy.
How to Serve Soft Thick Peanut Butter Cookies
These versatile cookies are perfect for numerous occasions and serving styles. I love serving them warm from the oven with a cold glass of milk for the ultimate comfort experience.
For special occasions, you can create ice cream sandwiches using vanilla or chocolate ice cream between two cookies. They also pair wonderfully with hot coffee or tea for an afternoon treat.
During holidays, I like to package them in decorative tins as gifts. Their soft texture and rich flavor make them a crowd-pleaser that both kids and adults adore.
Presentation Ideas for Soft Thick Peanut Butter Cookies
Making your cookies look as good as they taste can elevate any occasion:
- Drizzle Decoration: Melt some dark or white chocolate and drizzle over cooled cookies for an elegant touch.
- Sandwich Style: Create cookie sandwiches with peanut butter frosting or jam between two cookies.
- Gift Presentation: Stack cookies in clear cellophane bags tied with ribbon for beautiful homemade gifts.
- Platter Arrangement: Arrange on a rustic wooden board with other baked goods for a charming display.
Soft Thick Peanut Butter Cookies Recipe Tips
Here are my tried-and-true tips for consistently perfect cookies:
- Use Quality Peanut Butter: The flavor of your peanut butter directly impacts your cookies, so choose one you love eating straight from the jar.
- Don’t Skip the Chill: If your dough seems too soft to handle, chill it for 30 minutes before shaping.
- Test Your Oven: Every oven bakes differently, so start checking your cookies at the 9-minute mark.
- Store Properly: Keep cookies soft by storing them in an airtight container with a slice of bread.
- Freeze the Dough: Shape cookies and freeze them on baking sheets, then transfer to freezer bags for baking fresh cookies anytime.
How to Store Soft Thick Peanut Butter Cookies
Proper storage is essential for maintaining that perfect soft texture I know you’ll love. Allow cookies to cool completely before storing to prevent condensation that could make them soggy.
Store your cookies in an airtight container at room temperature for up to one week. To keep them extra soft, place a slice of fresh bread in the container – the cookies will absorb moisture from the bread.
For longer storage, you can freeze baked cookies for up to three months. Wrap them individually in plastic wrap and place in a freezer-safe container. Thaw at room temperature when ready to enjoy.
Frequently Asked Questions (FAQs)
Q: Why are my peanut butter cookies hard instead of soft?
A: This usually happens from overbaking or using too much flour. Make sure to remove cookies when centers still look slightly underdone and measure flour accurately.
Q: Can I make these cookies without eggs?
A: Yes! You can substitute the egg with a flax egg (1 tablespoon ground flaxseed mixed with 3 tablespoons water) or use a commercial egg replacer.
Q: How do I prevent my cookies from spreading too much?
A: Chill the dough for 30 minutes before baking, and make sure your baking sheets aren’t warm when you place the dough on them.
Q: Can I double this recipe?
A: Absolutely! This recipe doubles beautifully. Just make sure you have enough baking sheets and oven space to accommodate the larger batch.
Q: What’s the best way to measure peanut butter?
A: I recommend weighing it if you have a kitchen scale, but otherwise, pack it firmly into your measuring cup and level off the top.
Q: Why do my cookies crack on top?
A: Some cracking is normal and adds to the rustic charm. Excessive cracking usually means the oven temperature is too high or the dough is too dry.
Conclusion
These soft thick peanut butter cookies represent everything I love about homemade baking – they’re simple enough for beginners yet delicious enough to impress the most discerning cookie connoisseur. The combination of creamy peanut butter, perfectly balanced sweetness, and that incredible soft texture creates a cookie that’s truly irresistible.
I’ve shared this recipe with countless friends and family members over the years, and it never fails to deliver smiles and requests for seconds. Whether you’re baking for a special occasion, looking for the perfect after-school snack, or simply craving something sweet and comforting, these cookies will exceed your expectations.
Remember that baking is both an art and a science, so don’t be discouraged if your first batch isn’t perfect. With practice and attention to the details I’ve shared, you’ll soon be turning out bakery-quality peanut butter cookies that will become a treasured recipe in your collection. Happy baking, and enjoy every soft, delicious bite!